Trusted by:
Updated: January 16, 2026
16 min read
How to Generate Certificates With Typeform Surveys in 2026?
Did somebody fill out the Typeform survey? Easily generate certificates based on the answers. Check out how to do that in 2026 via Certifier integration.
Want to give out certificates at your event or course? Here's a simple way to do it. Use Typeform to collect attendee details and automatically create certificates for them.
You now have two options:
Set up the workflow with Zapier (the traditional way)
Or skip Zapier entirely and use Certifier’s new native integrations with Google Sheets or Microsoft Excel
This guide will show you both. First, we’ll cover the Certifier Zapier integration path step by step, then we’ll show you the alternative method for a simpler, no-code setup.
TL;DR
You can automatically generate and send certificates from Typeform responses using Certifier.
Set it up either with Zapier (Typeform → Zapier → Certifier) or skip Zapier by connecting Typeform → Google Sheets / Excel → Certifier directly.
Dynamic attributes pull names, emails, dates, and other data from survey responses, so each certificate is personalized automatically.
Once the workflow is active, every new Typeform submission triggers automated certificate issuance.
Typeform + Certifier – autogenerate certificates from surveys
Typeform and Certifier have joined forces via Zapier and created a seamless way to handle certificates. With Typeform's surveys, you can collect all the necessary participant info.

Then, Certifier steps in to automatically whip up certificates from those survey responses. What does it mean? No more manual slog through certificate creation.
The list of the tools you’ll need to auto-generate certificates based on the survey certificate answers:
Typeform
Certifier
Zapier
Pst! It is possible to integrate these tools with free versions!
You don’t always need Zapier. If your Typeform sends responses into Google Sheets (or Microsoft Excel), you can connect Certifier directly with those sheets. That way, every new response instantly issues a certificate.
Jump ahead to the section Alternative method: Typeform + Google Sheets + Certifier (no Zapier) if you want to see how that works.
So, let’s get to work and set up the workflow between Typeform and Certifier (it’s not difficult at all!). We’ll show you every detail, step by step.
01 Set up your Typeform survey
If you don’t already have a survey, go to Typeform and create one. If you have an existing survey that fits the bill, feel free to use that.
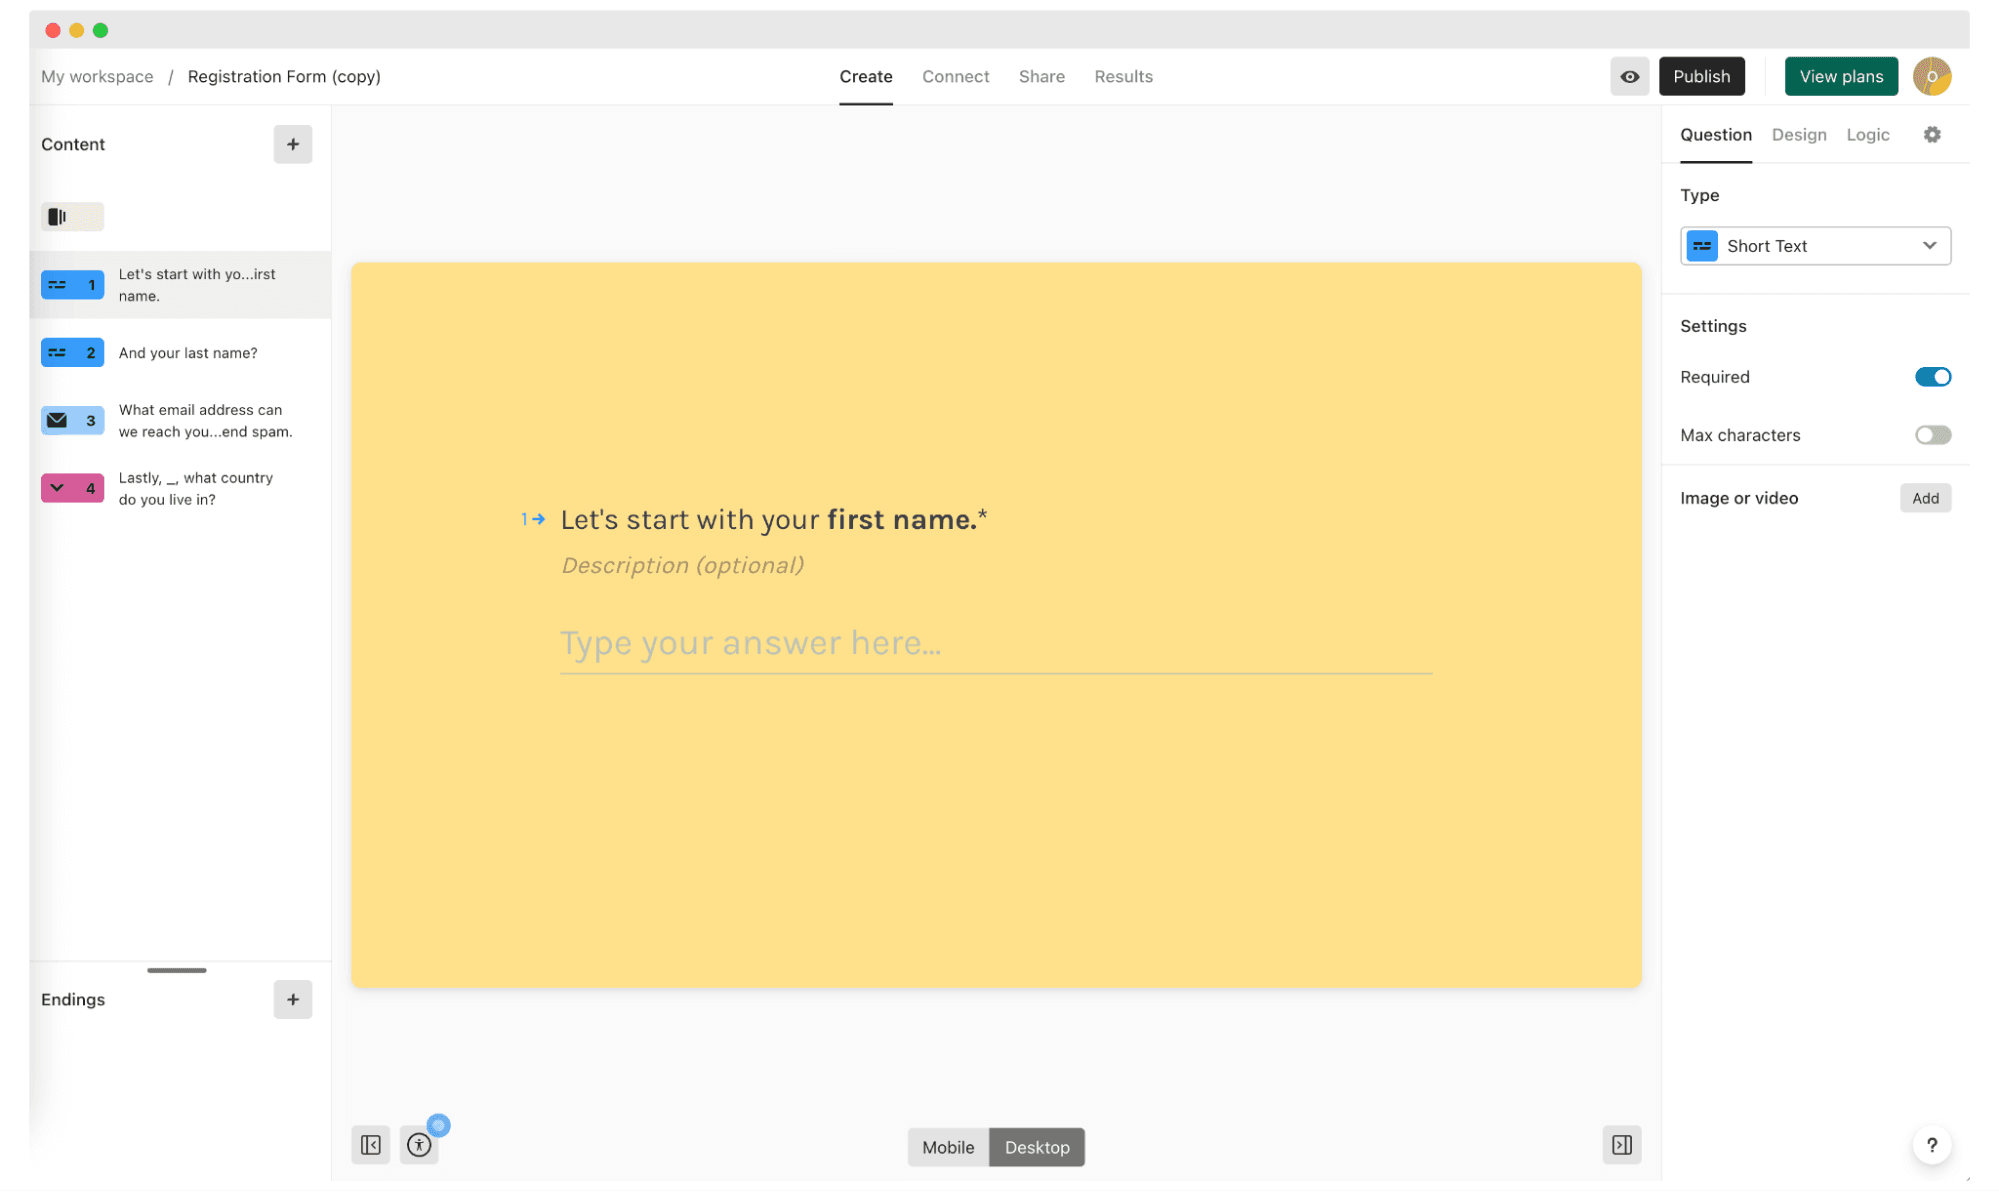
For example, if you're issuing certificates for a course, you might ask respondents to select the course they attended from a dropdown menu.
Don’t forget to publish the survey.
Your survey certificate should ask for key details that will appear on the credential. It typically includes the respondent's name and email address. Remember, how you phrase your questions in Typeform will directly impact the data you collect.
02 Sign up for Zapier
If you're new to Zapier, the first step is to sign up for an account. Visit the Zapier website and click on the “Sign Up” button. You can sign up using your email address or simply use your Google, Facebook, or Microsoft account for quick registration.
This service will be the bridge between Typeform and Certifier. And allows the tools to communicate automatically with each other.
If you need more guidance, this video shows step-by-step instructions on connecting tools with Zapier and explains all the magic behind it. See yourself!
03 Create a New Zap in Zapier
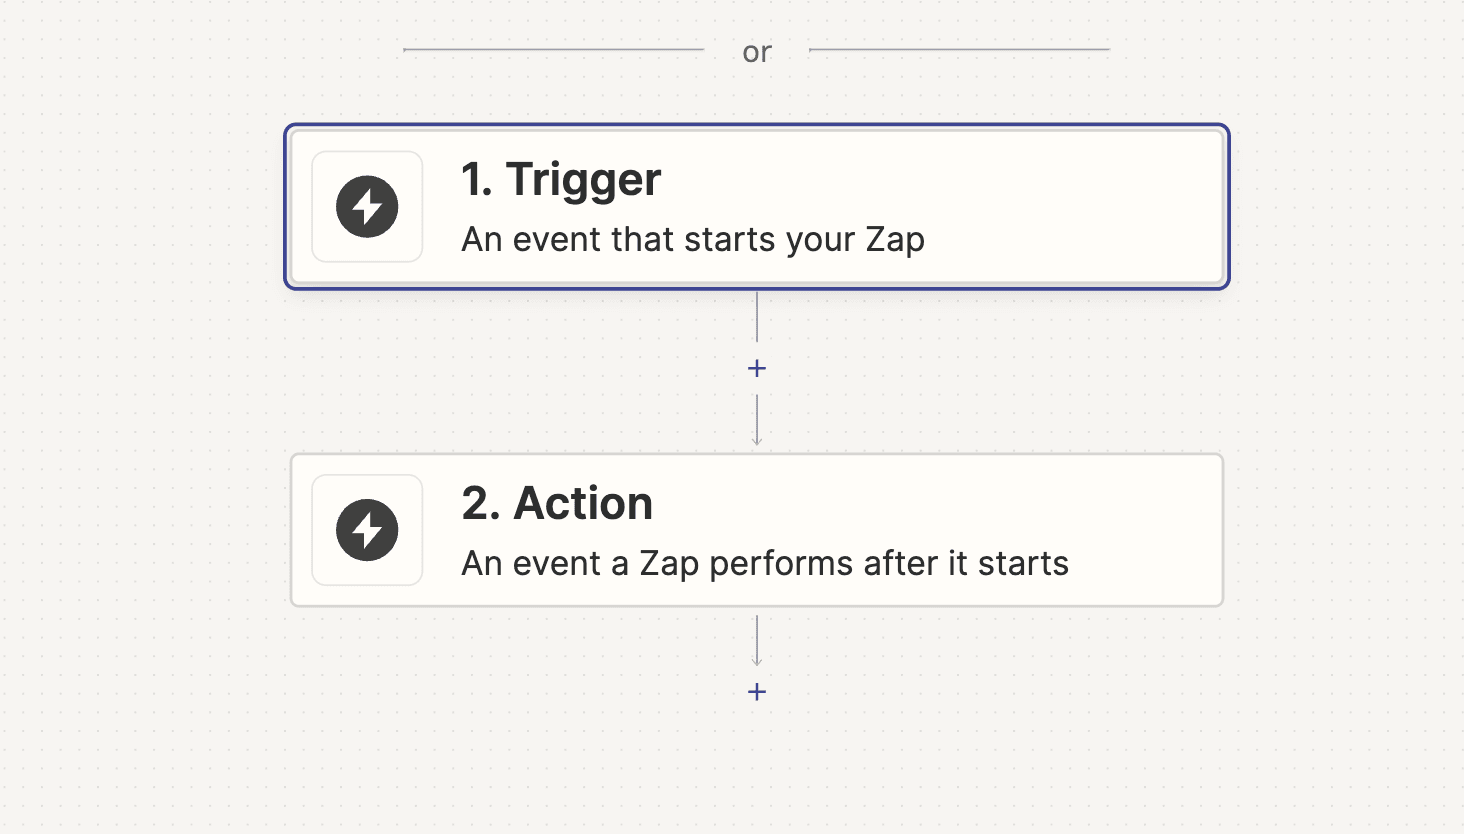
Once you're logged into your Zapier account, locate the “Create Zap” button. You'll usually find it on the dashboard or in the top left menu.

This button starts a new automated workflow called a Zap.
04 Choose Typeform as the Trigger
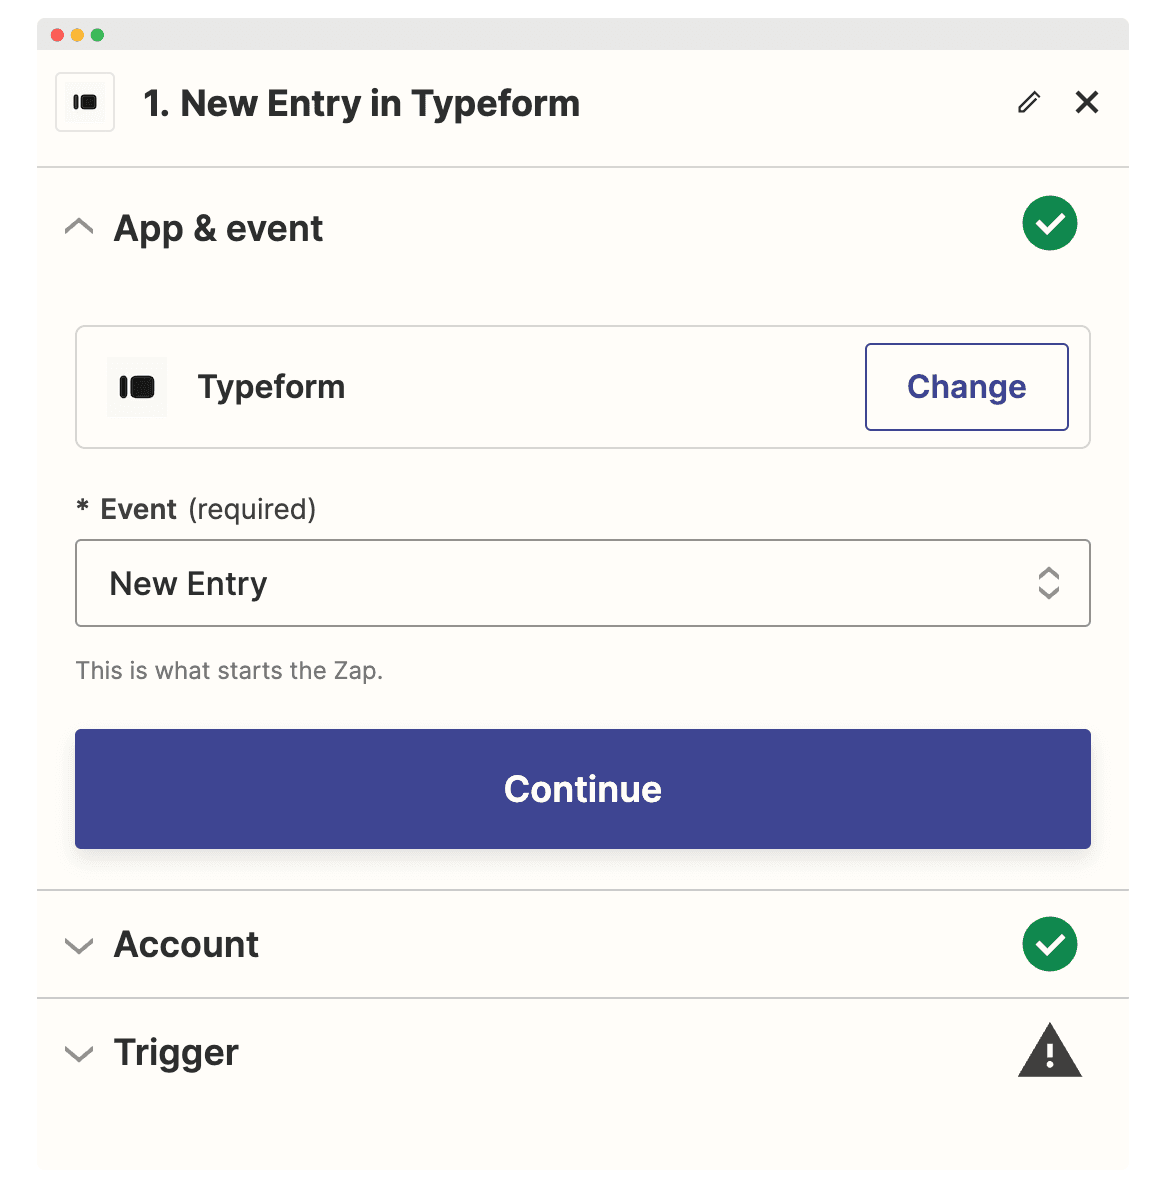
Choose the Trigger app – the app where the process begins. In this case, select “Typeform” as your trigger. This means the Zap will start its process whenever the specified event in Typeform occurs.
Select the specific trigger event, like "New Entry,” which triggers the Zap each time a new survey response is submitted.
05 Connect your Typeform account to Zapier
If you haven’t already connected your Typeform account to Zapier, you’ll be prompted to do so.
You’ll find this option under the Account tab. Click on it and log in.
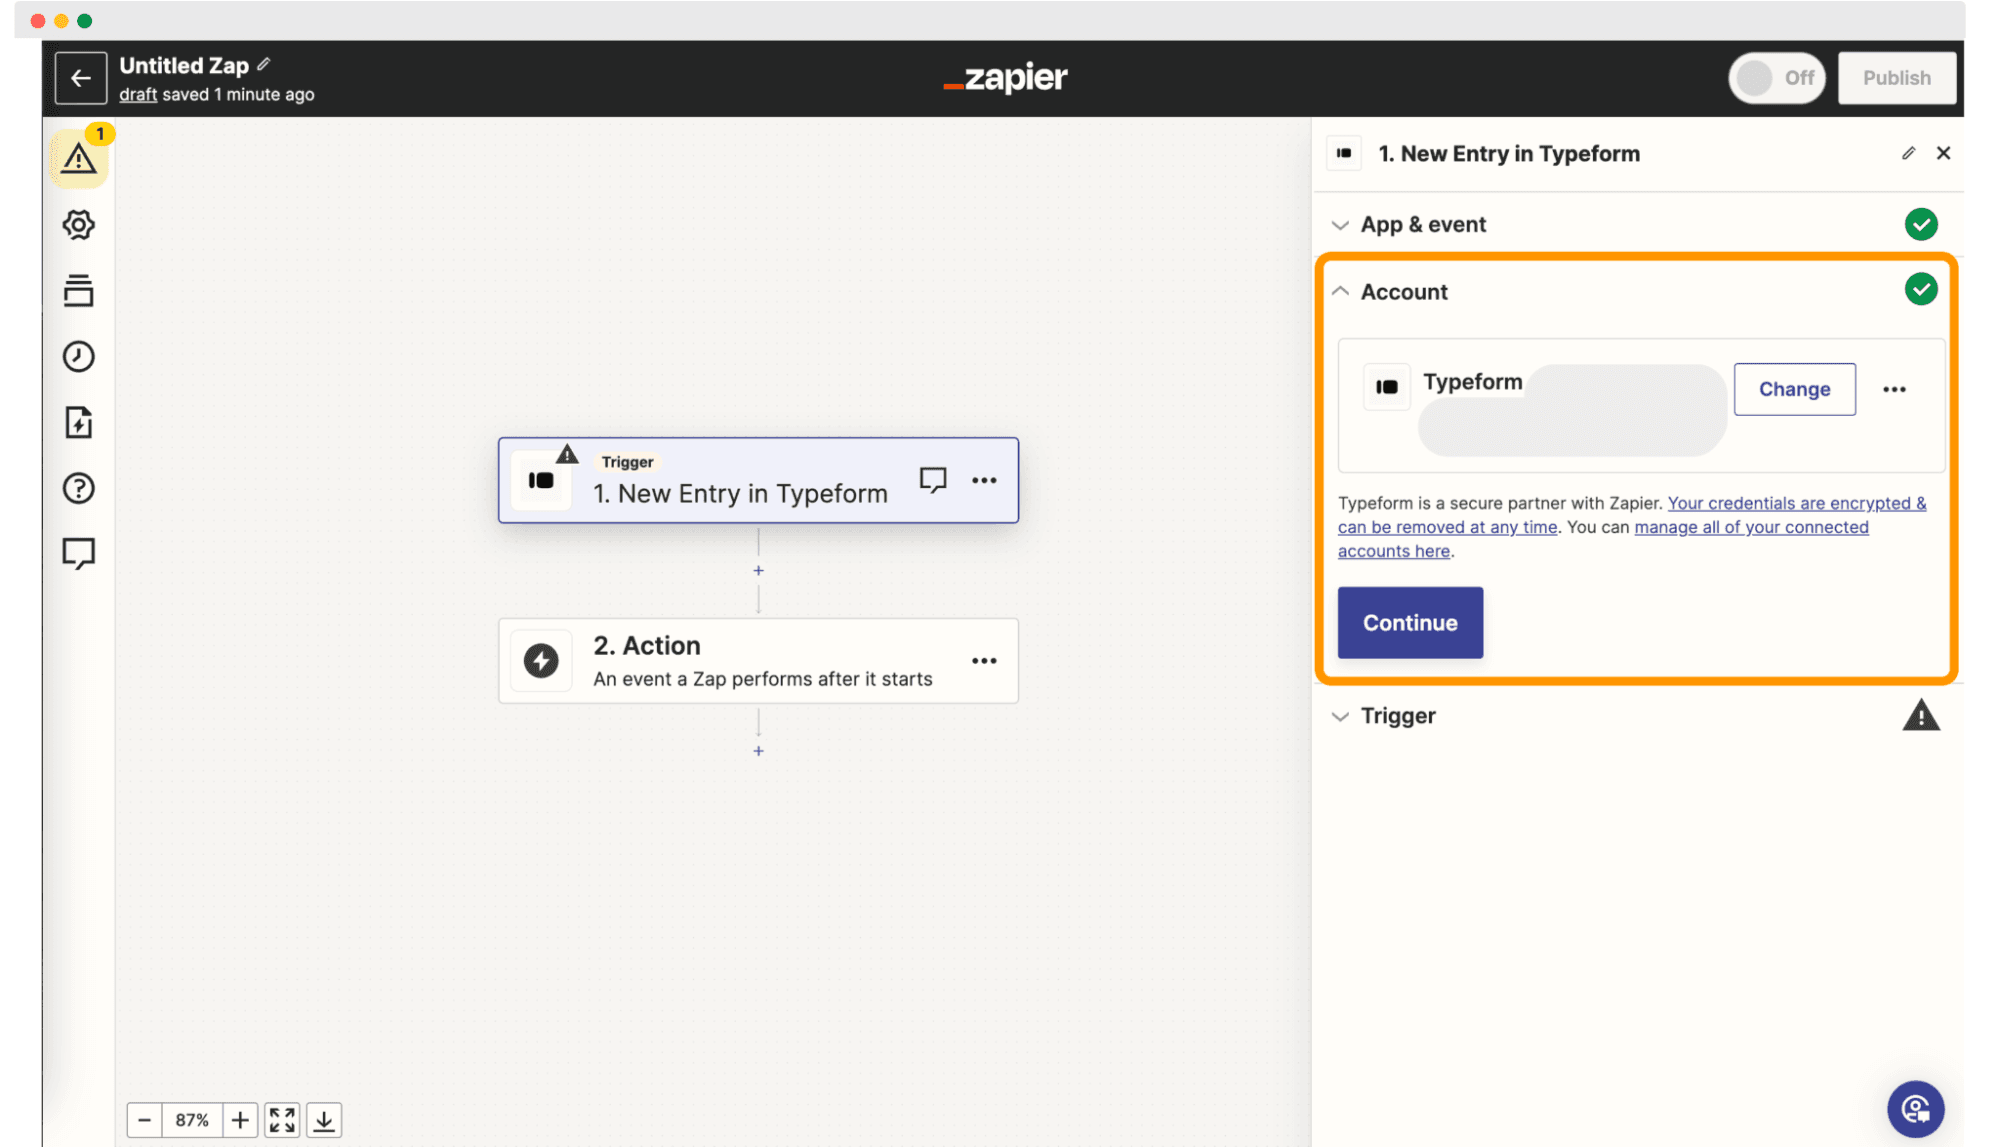
06 Set up Trigger details in Zapier
Now, you'll need to specify which particular survey in Typeform should trigger the Zap.
Select the survey you've set up for your event or course from the dropdown list provided.
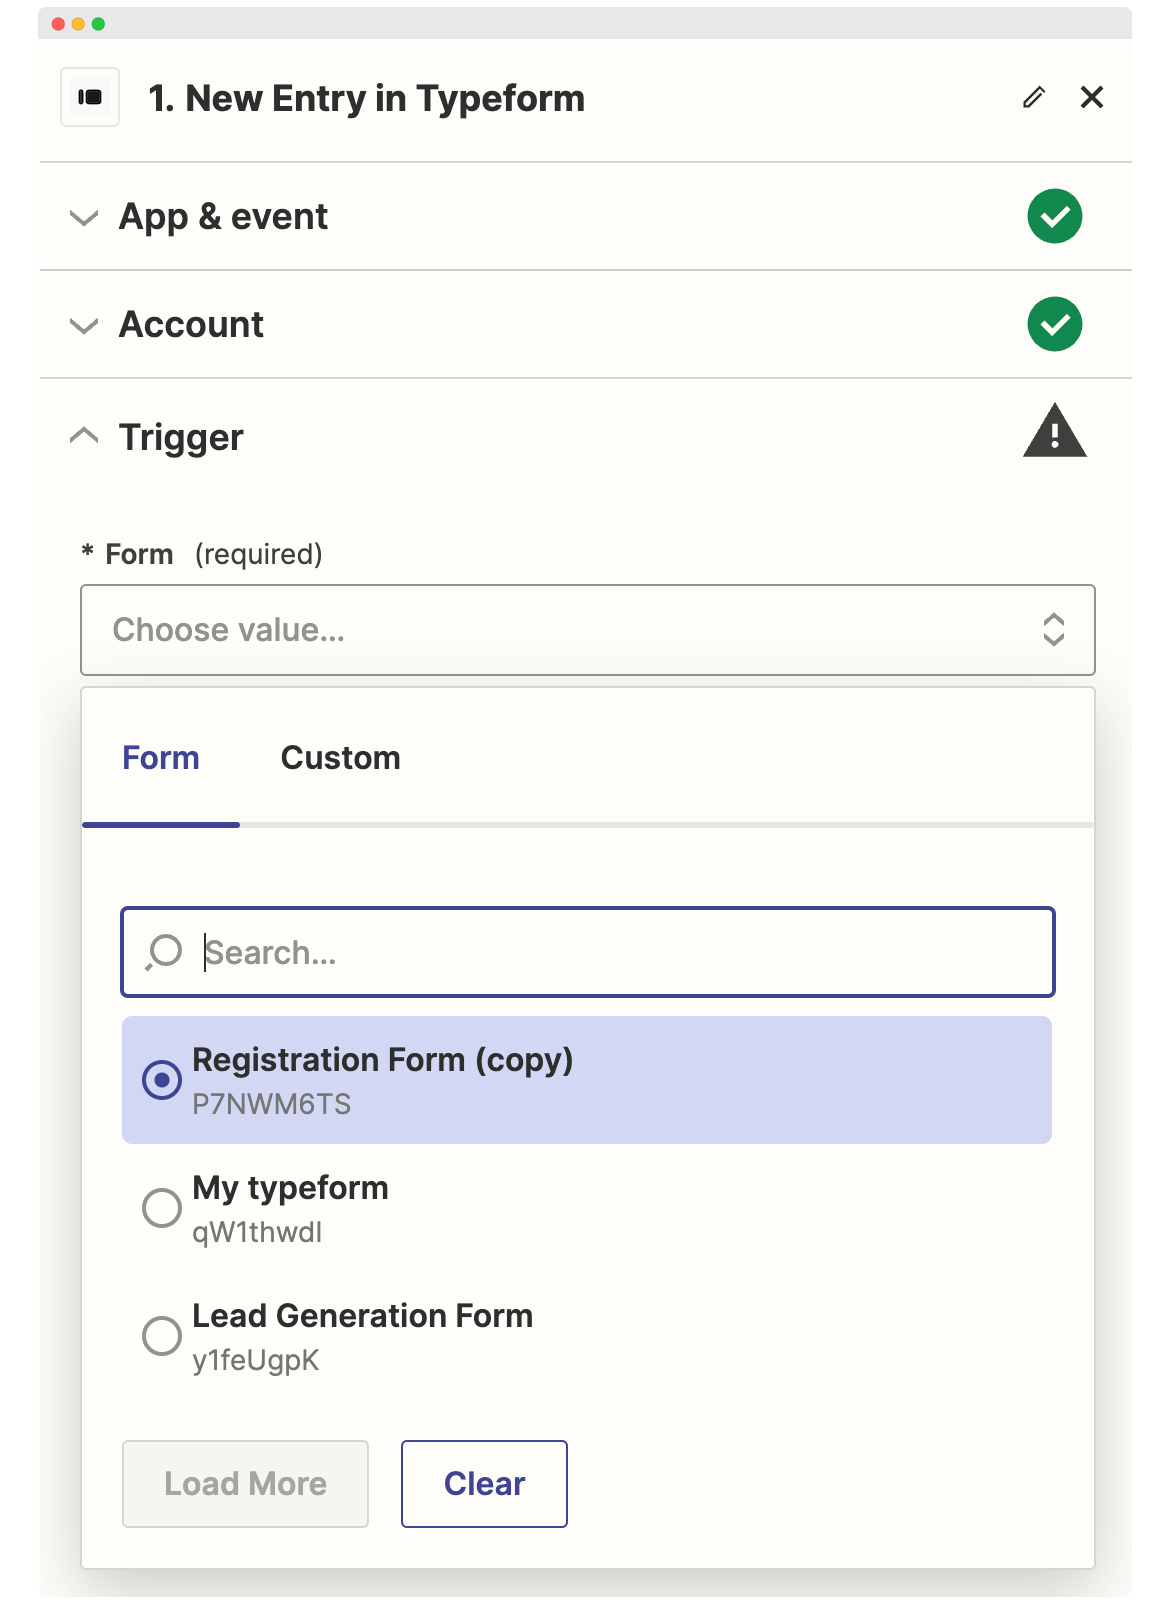
Configure any additional trigger options if needed.
Test your trigger to detect any errors.
07 Log into Certifier
To integrate Certifier with your Typeform responses via Zapier, you first need to access your Certifier account.
Creating an account takes less than a minute, just enter your email and set a password. You can also do it via a Google account.
Once you’re in, navigate to the Designs tab.
08 Create a new certificate template in Certifier (takes 2 minutes!)
Click on the option to “Create Design.”
We don’t have time to create a certificate from scratch, so we’ll choose one of the 500+ certificate templates available.
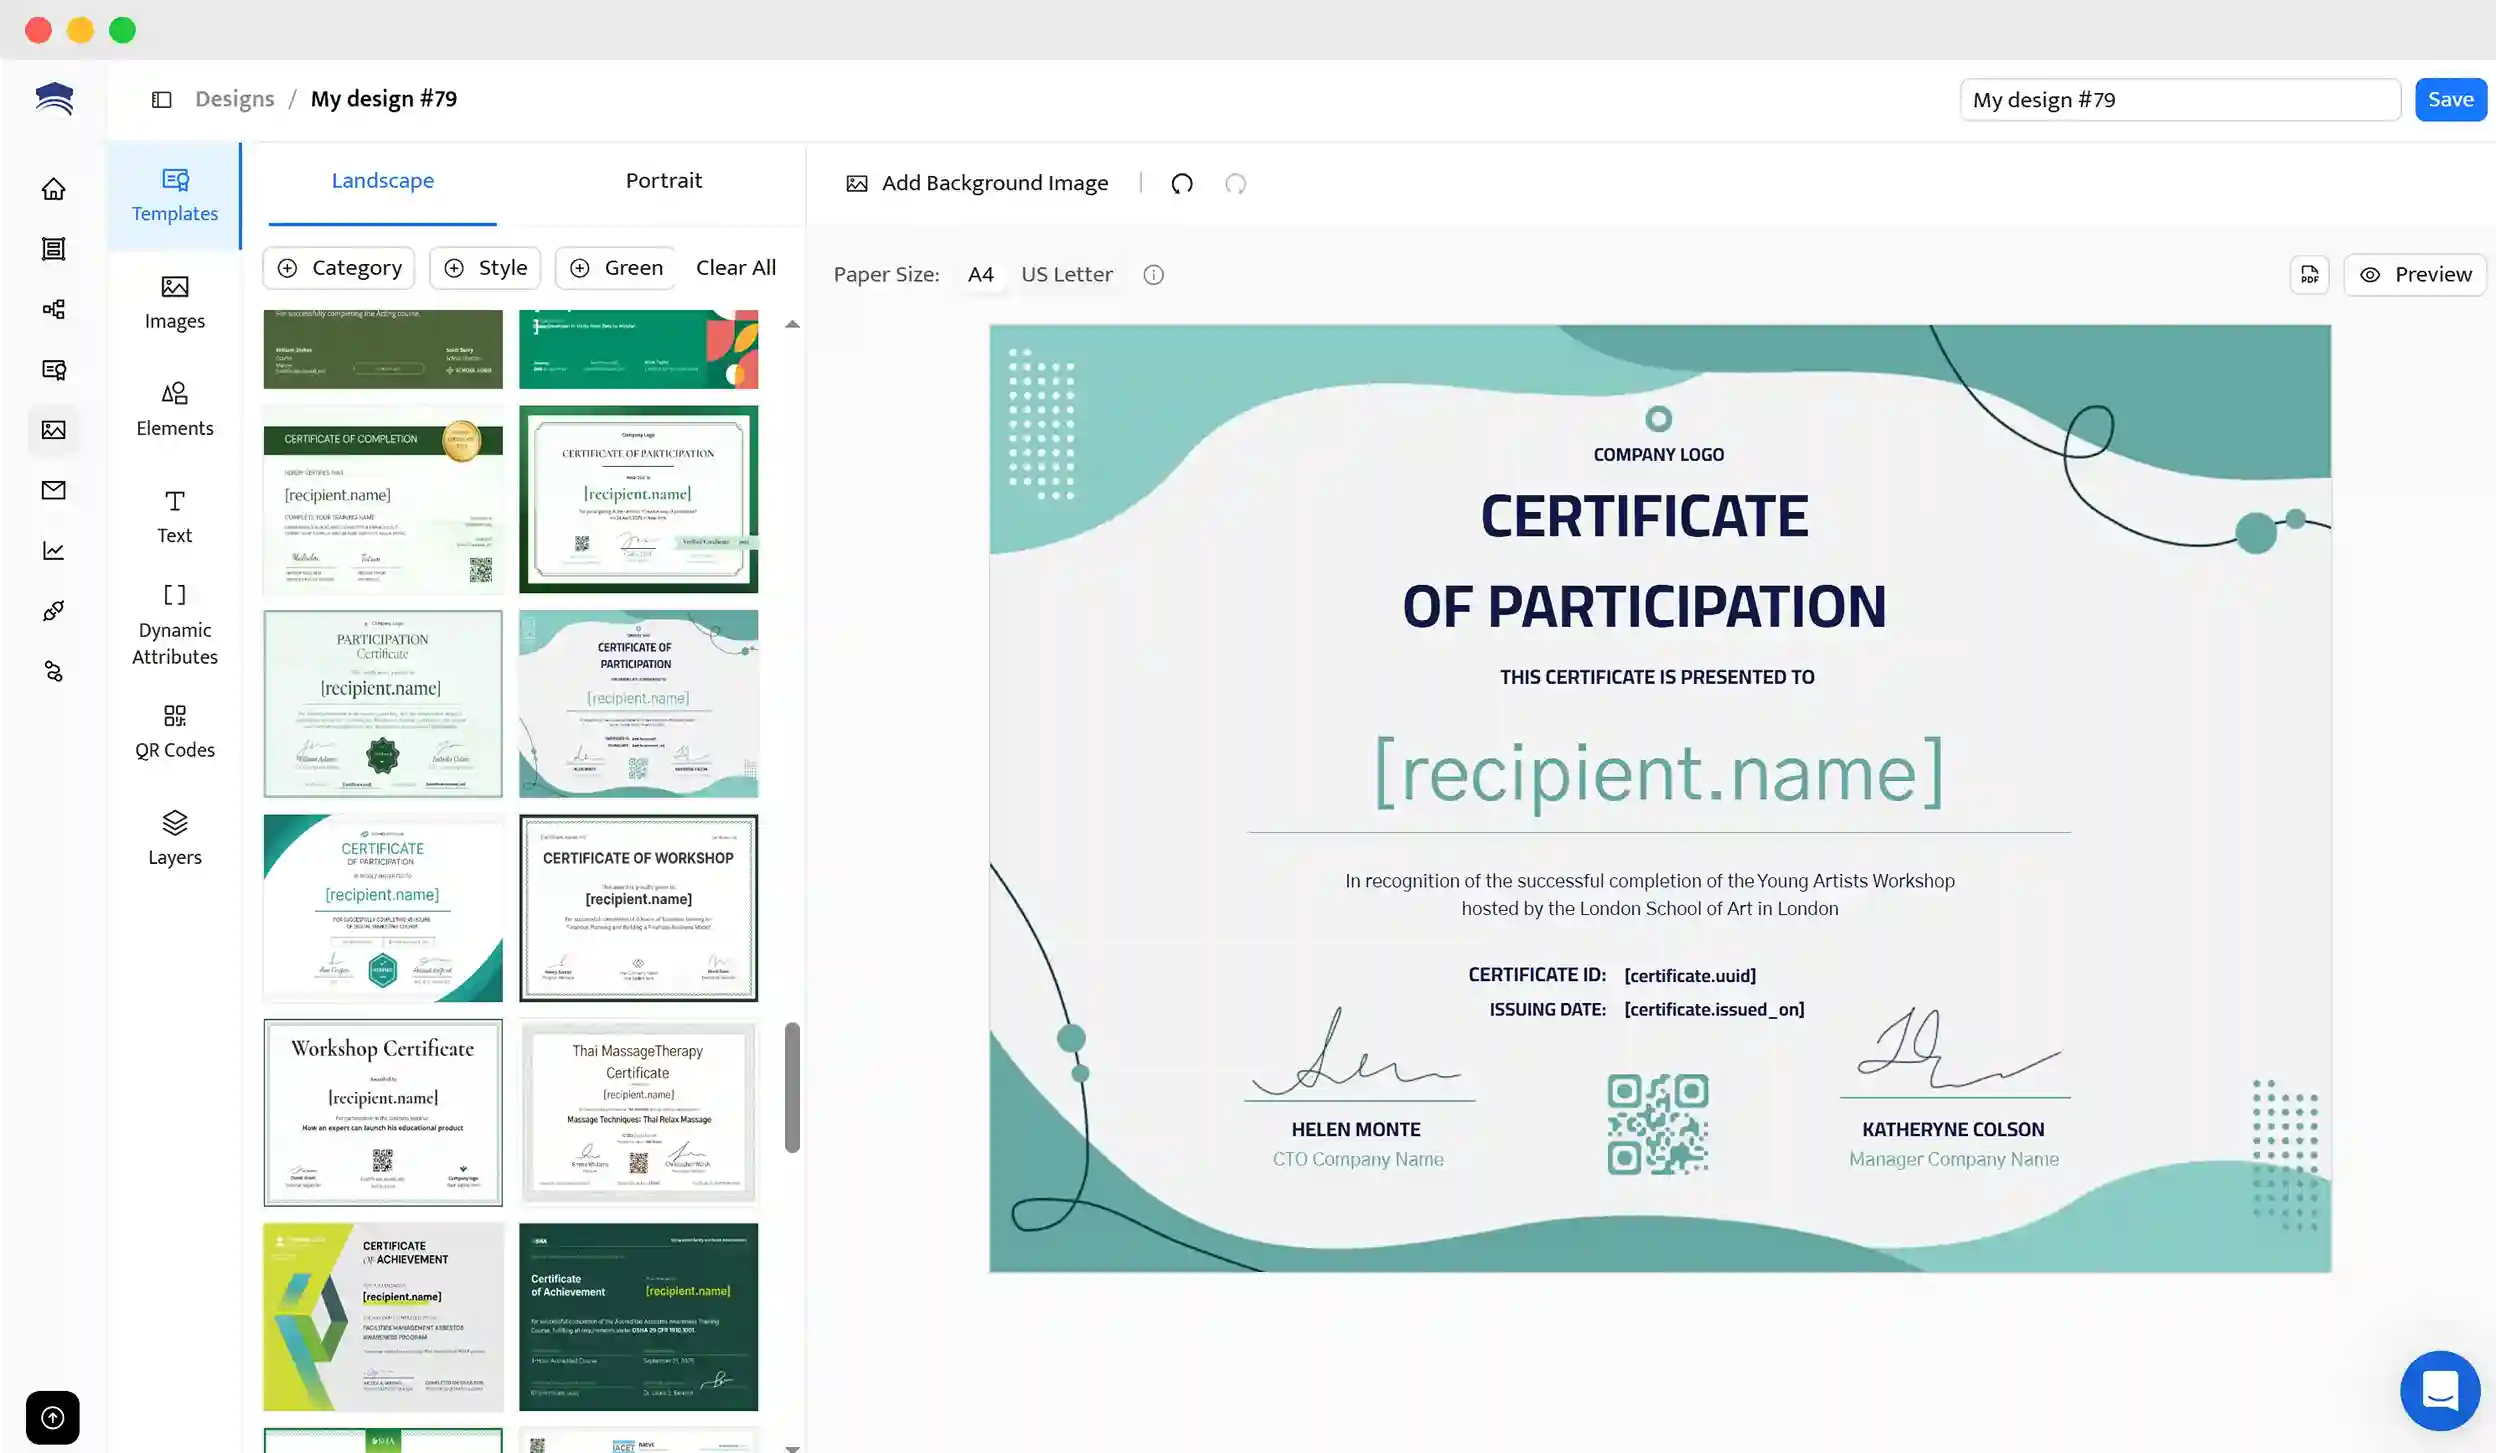
Here’s our choice.
The only elements we need to add are texts, signatures, and dynamic attributes that will insert data from the survey automatically.
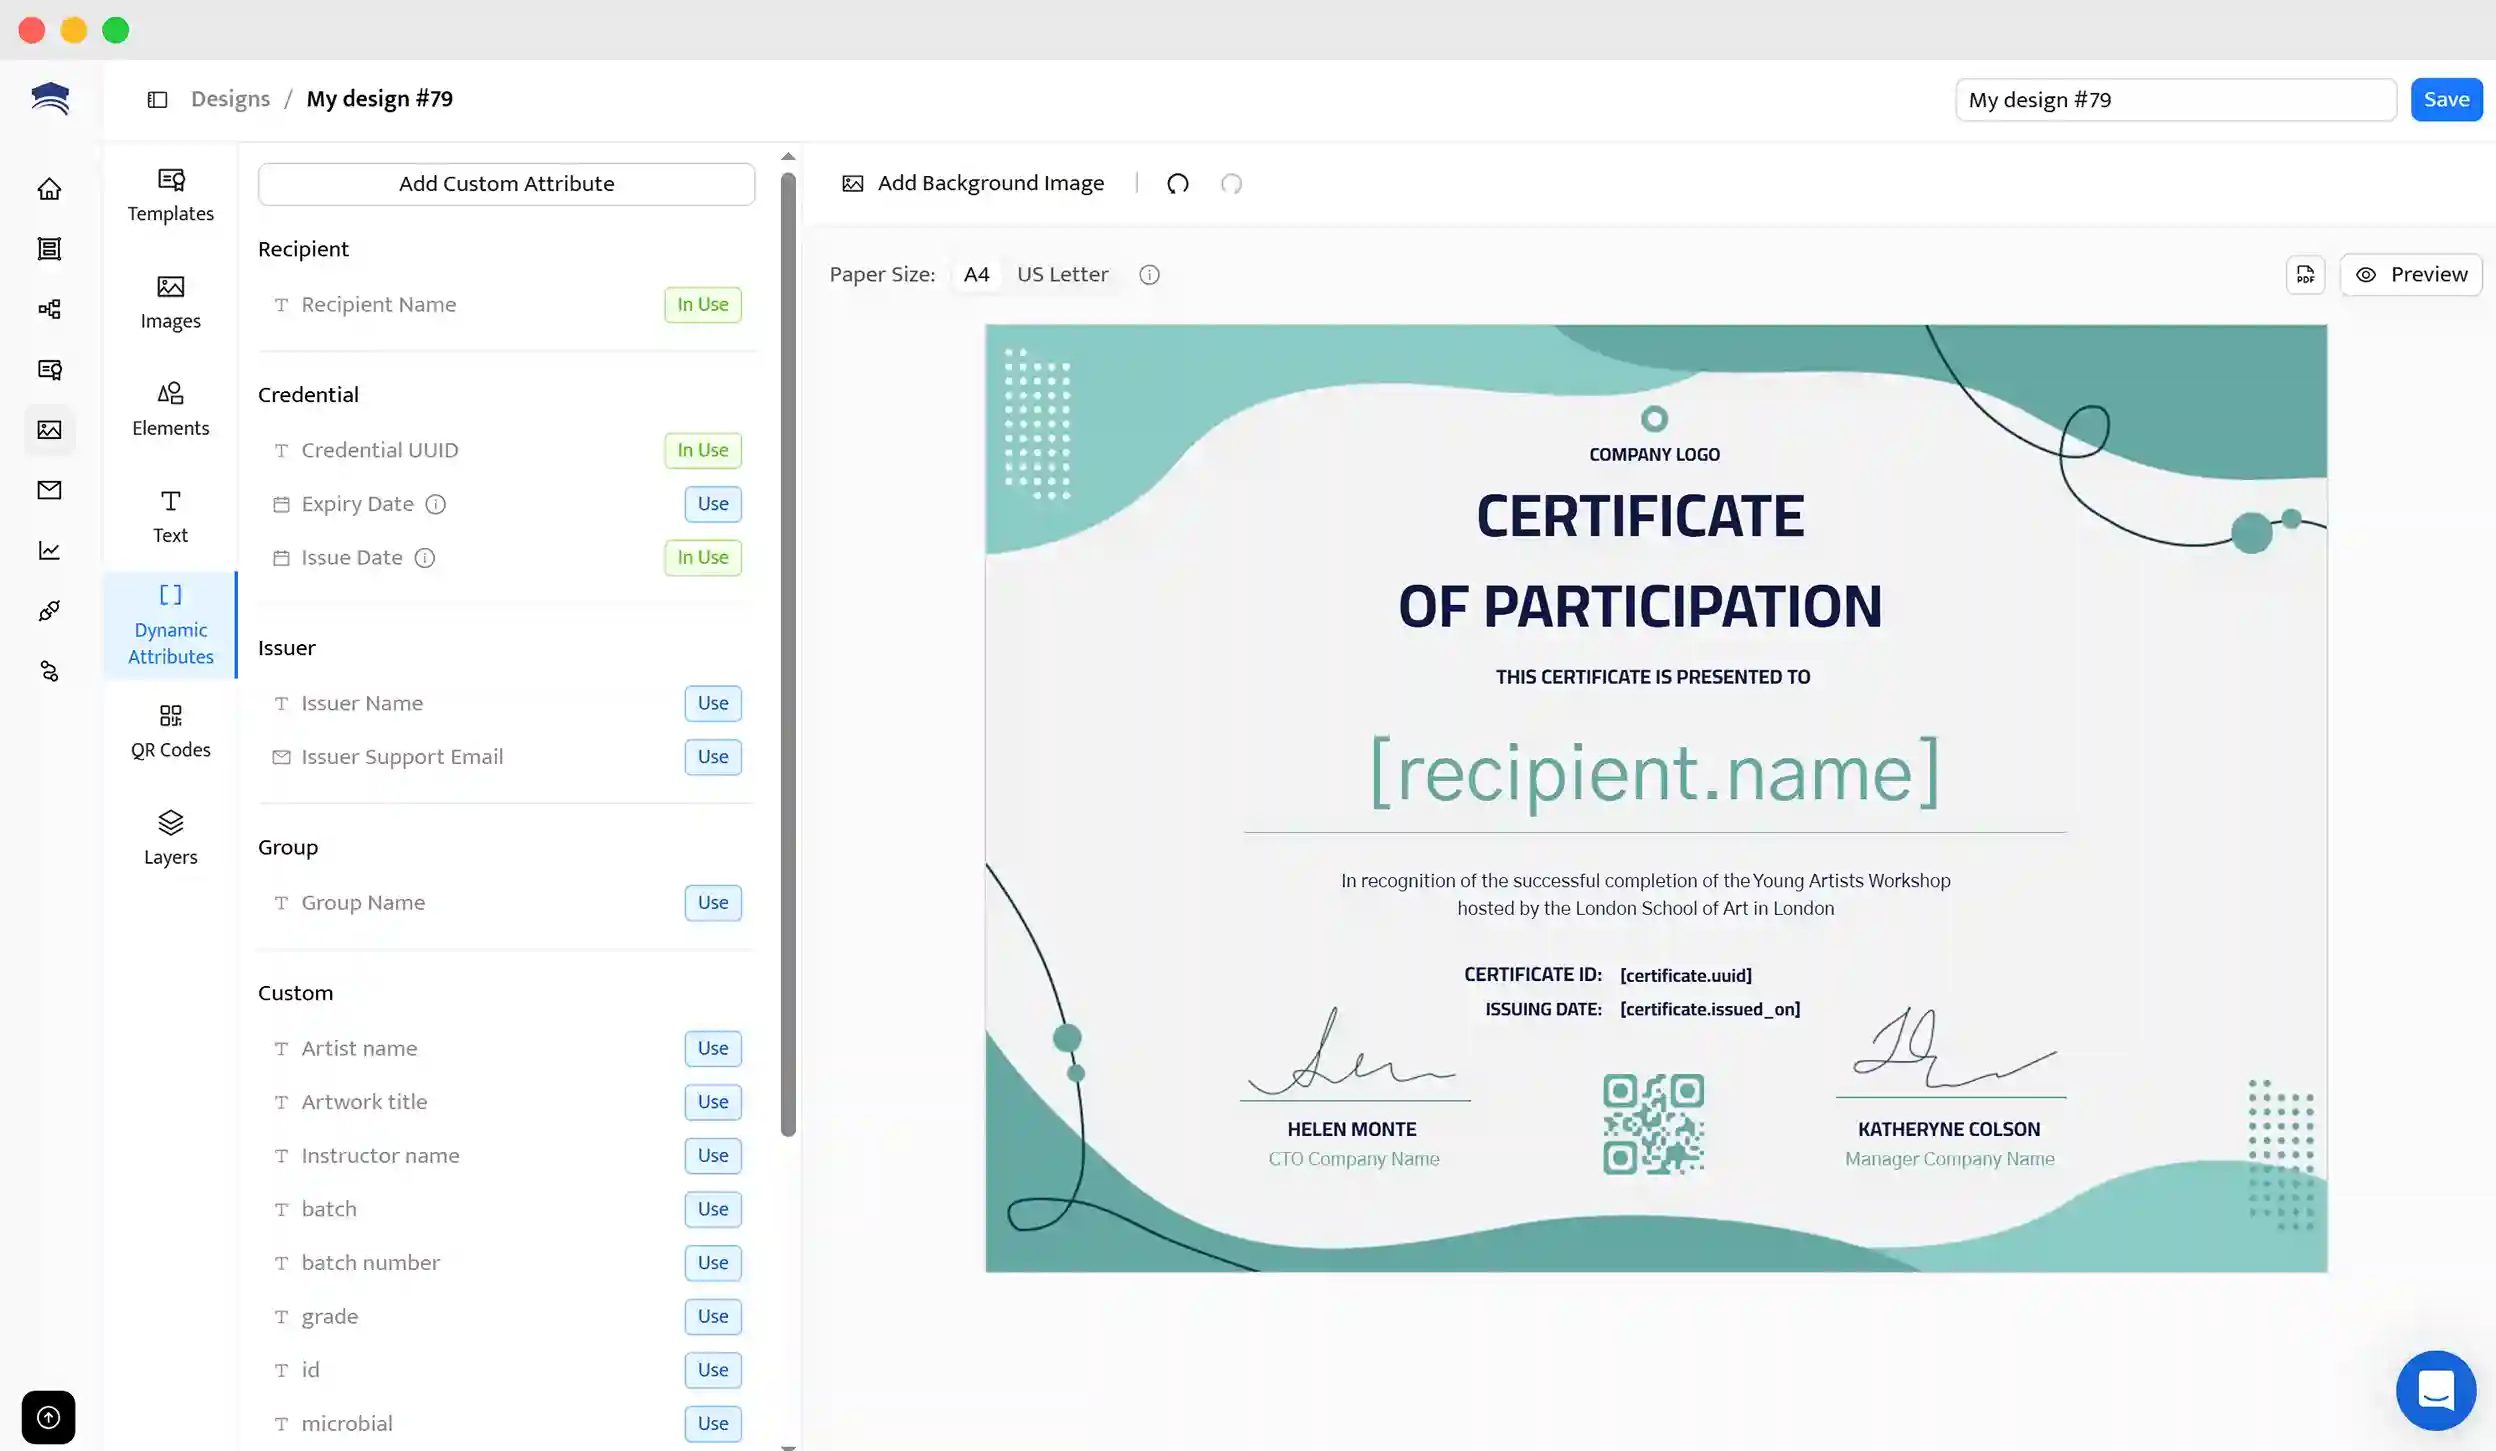
Save the template for use.
If you need more help with creating a certificate template, check out this guide:
09 Create a Group
Now, you must assign your project to a specific Group in Certifer.
To do that, go to the Groups tab and create a new group.
Name the group, choose the template you created, and adjust the email template that will be sent to each recipient after generating the certificate.
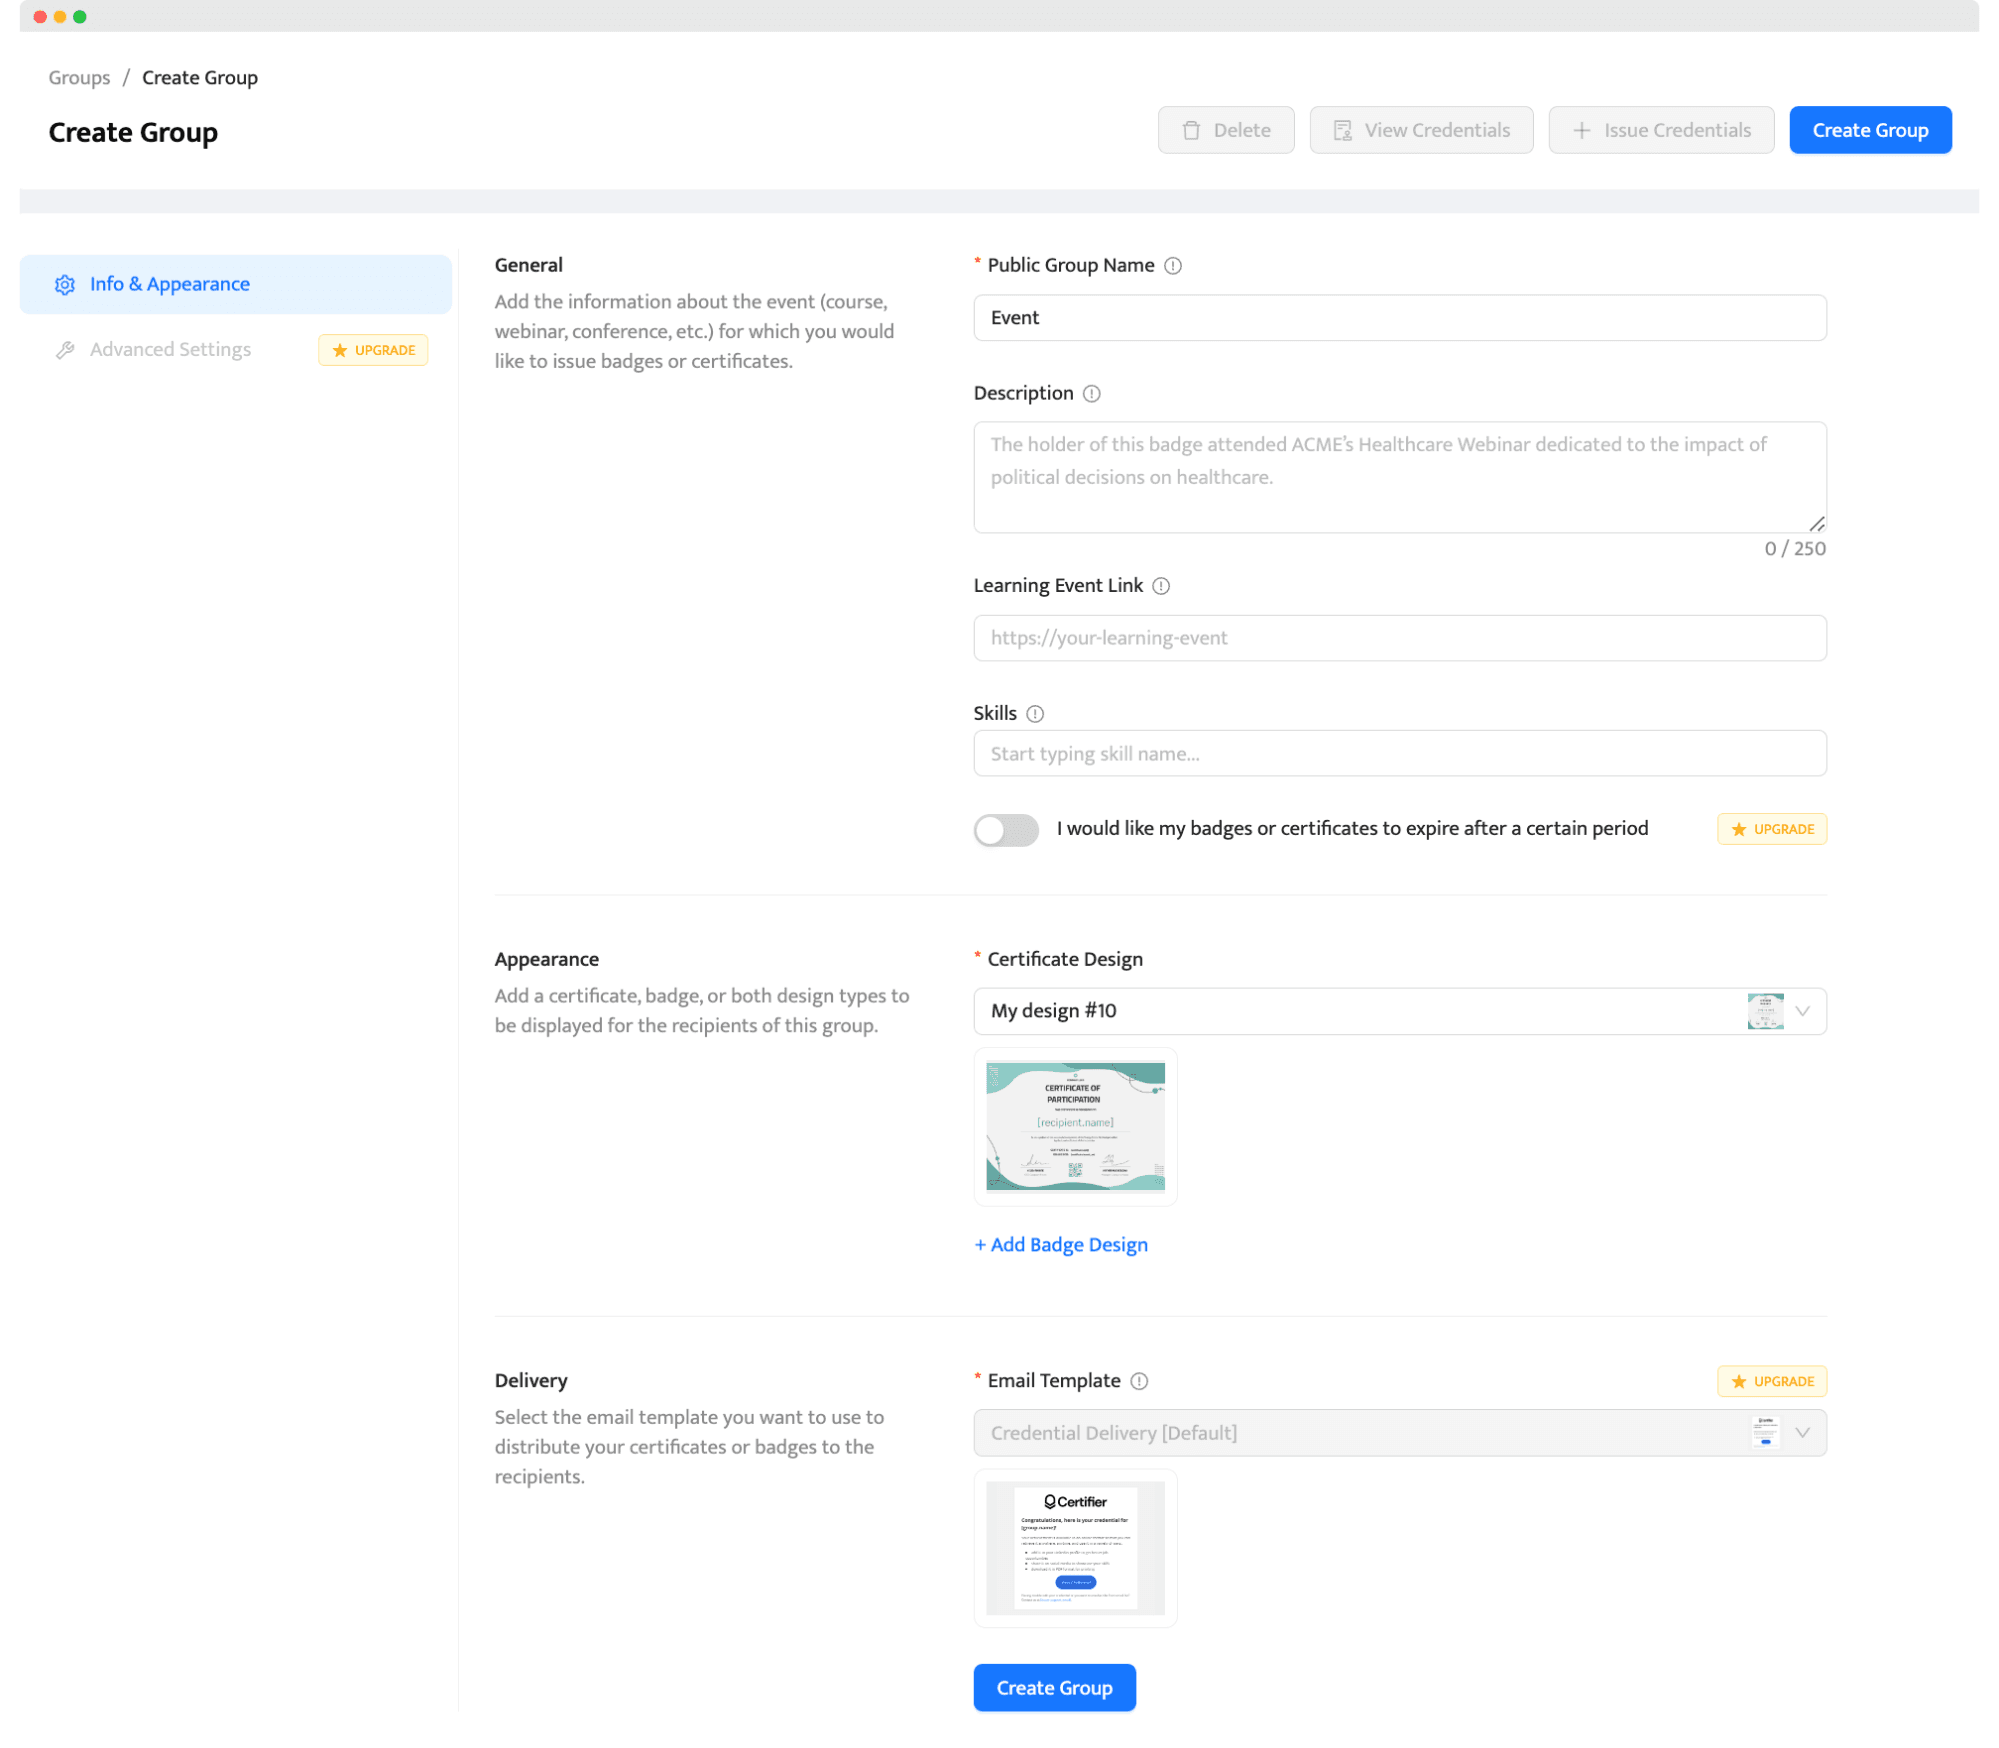
It means that after the survey response is submitted, the Certifier will automatically generate the certificate and send it to the email address provided. You will not even have to lift a finger.
10 Choose Certifier as the Action in Zapier
Come back to Zapier again.
You'll now choose the action that follows the Typeform trigger. Here, select “Certifier” from the list of available apps. This means that once a Typeform entry is received, an action will be started in Certifier.
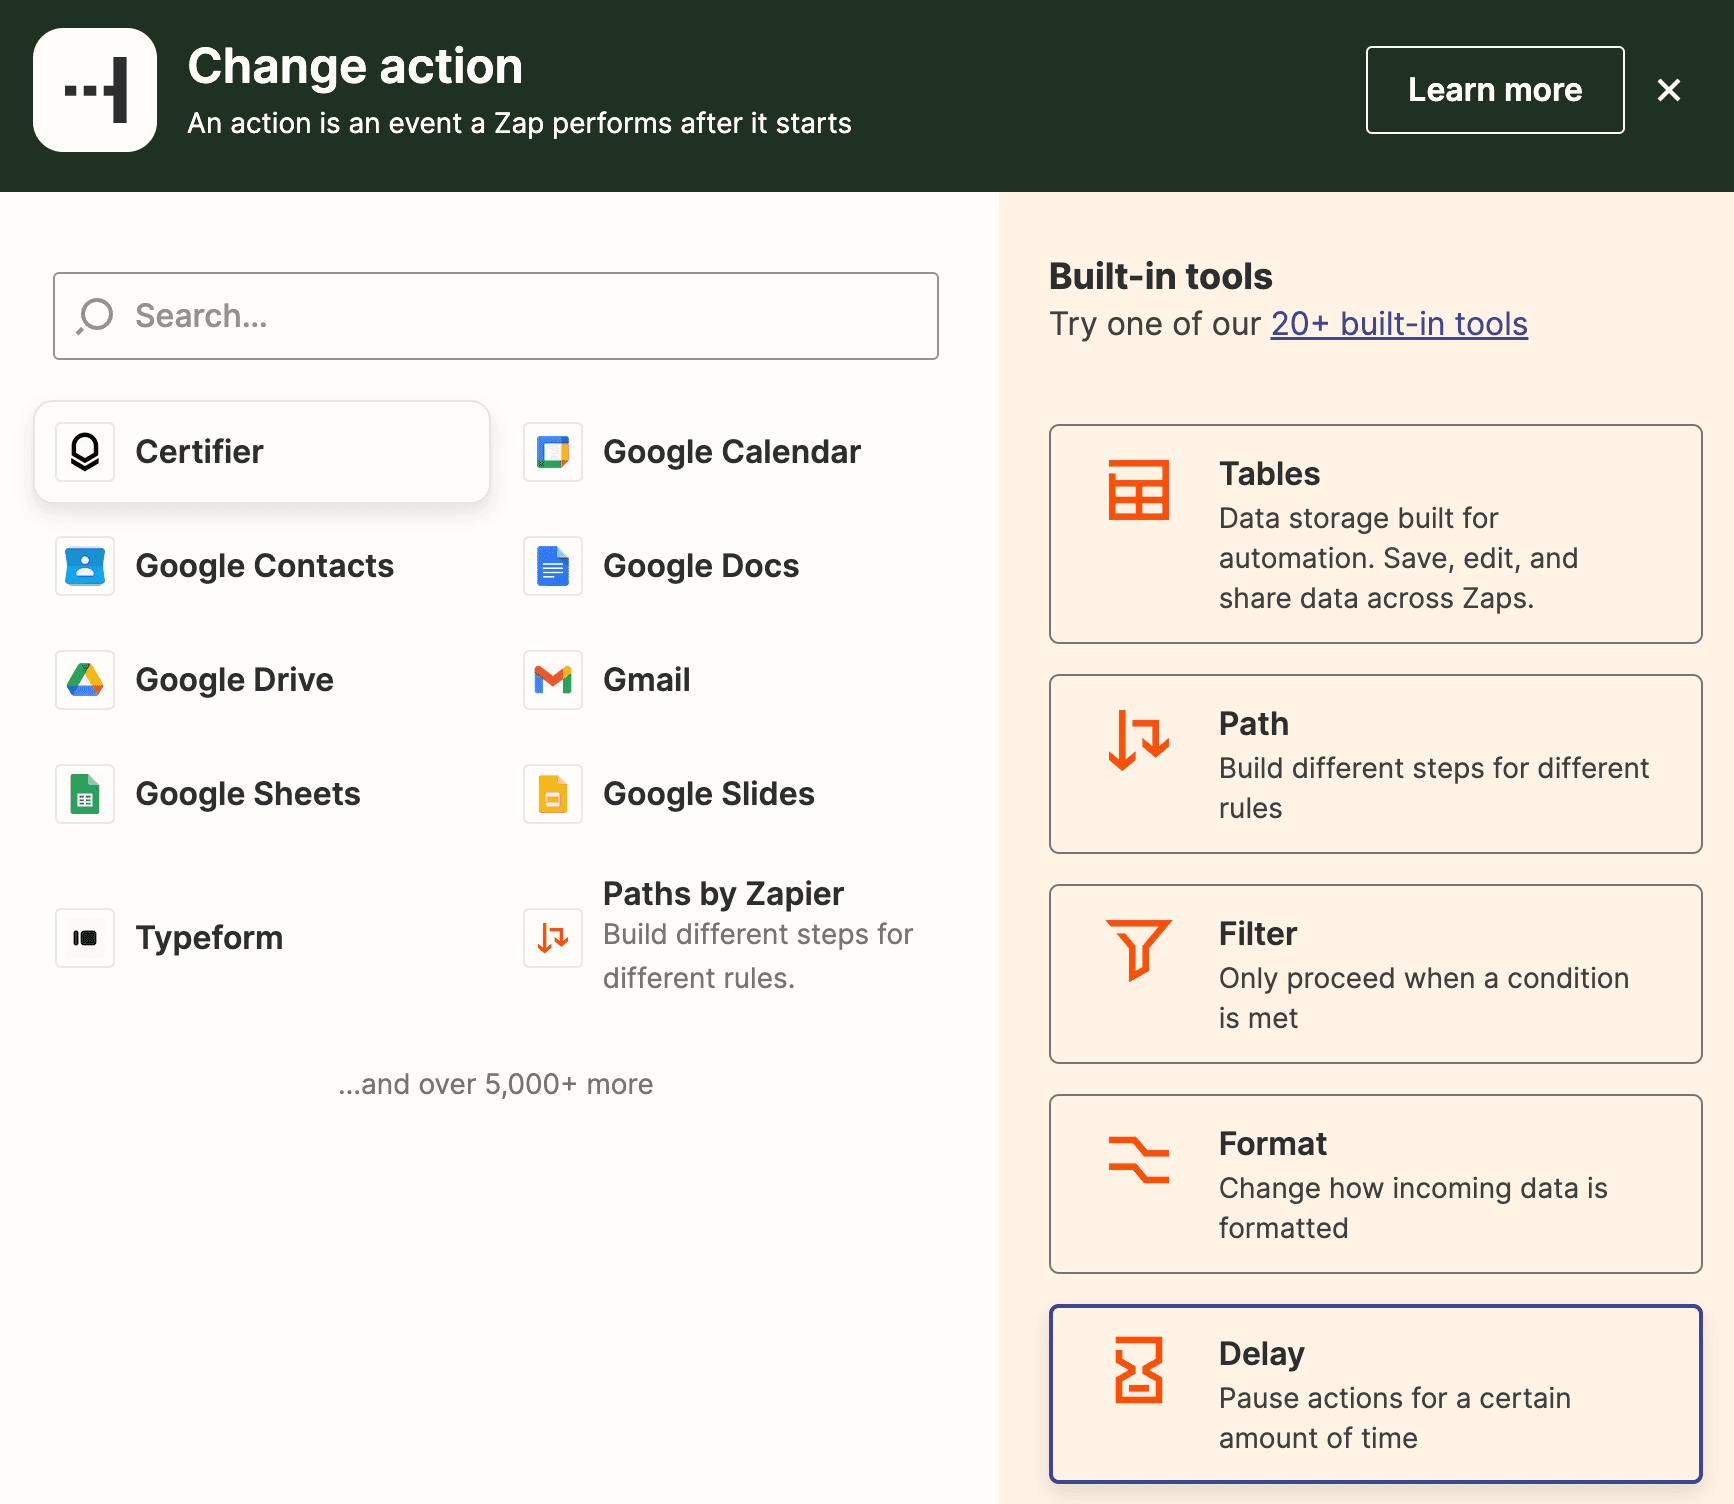
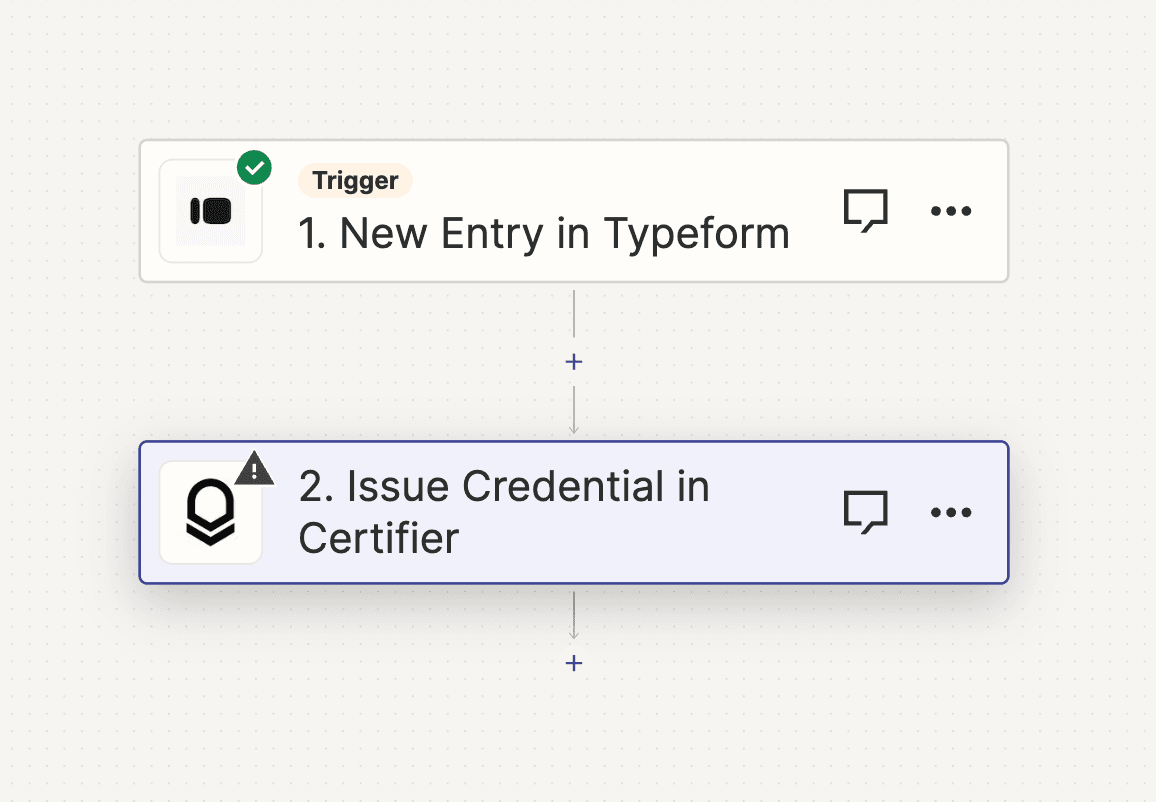
Select “Issue Credential". Your Zap should look like this now:
11 Connect your Certifier account to Zapier
Log in to your Certifier account through Zapier.
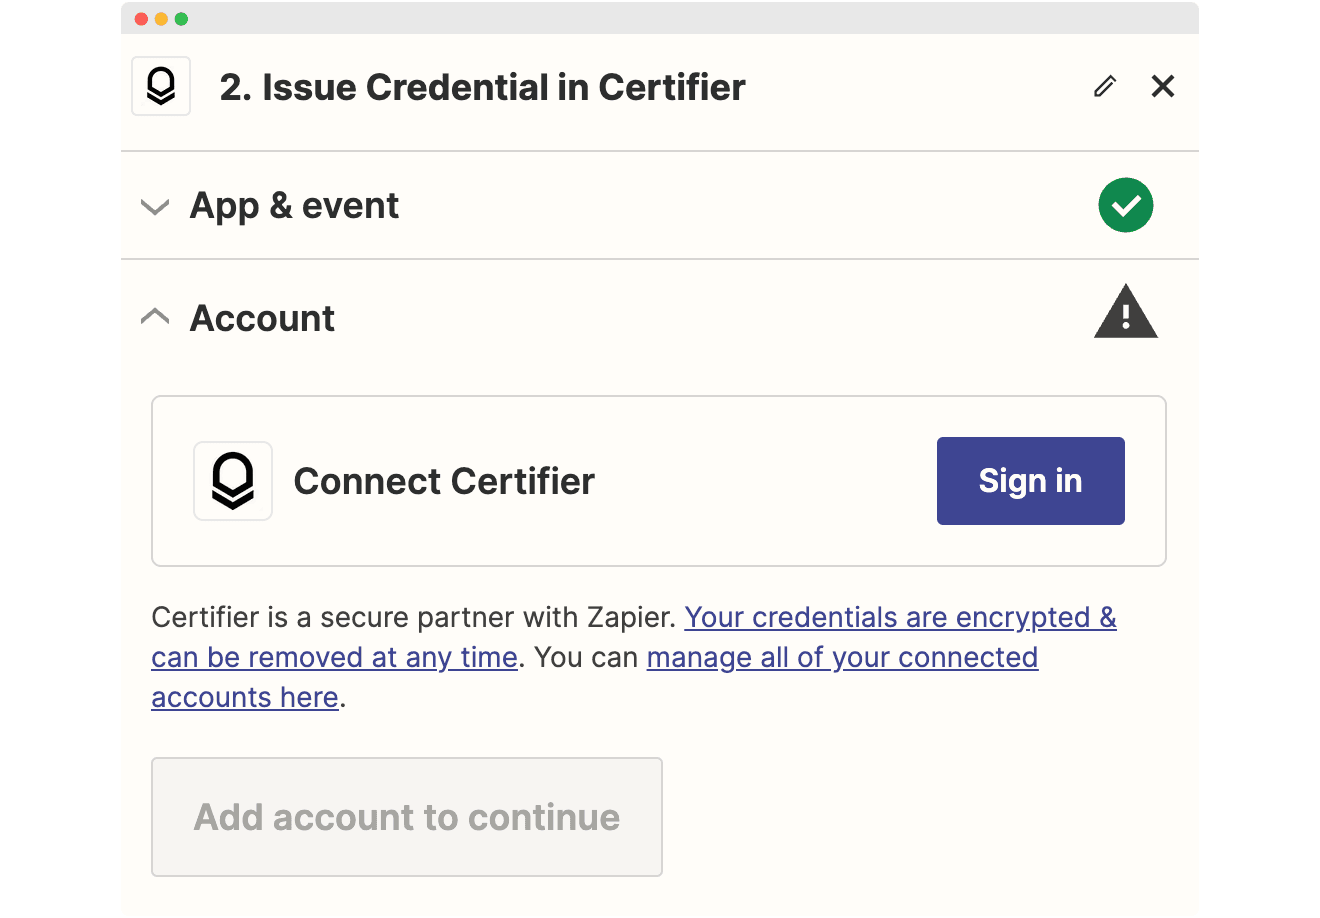
Click “Sign in.” You'll see a window with a token code to paste. To generate it in Certifier, you must go to Settings > Developers > Access tokens.
Click “Generate Access Token.”
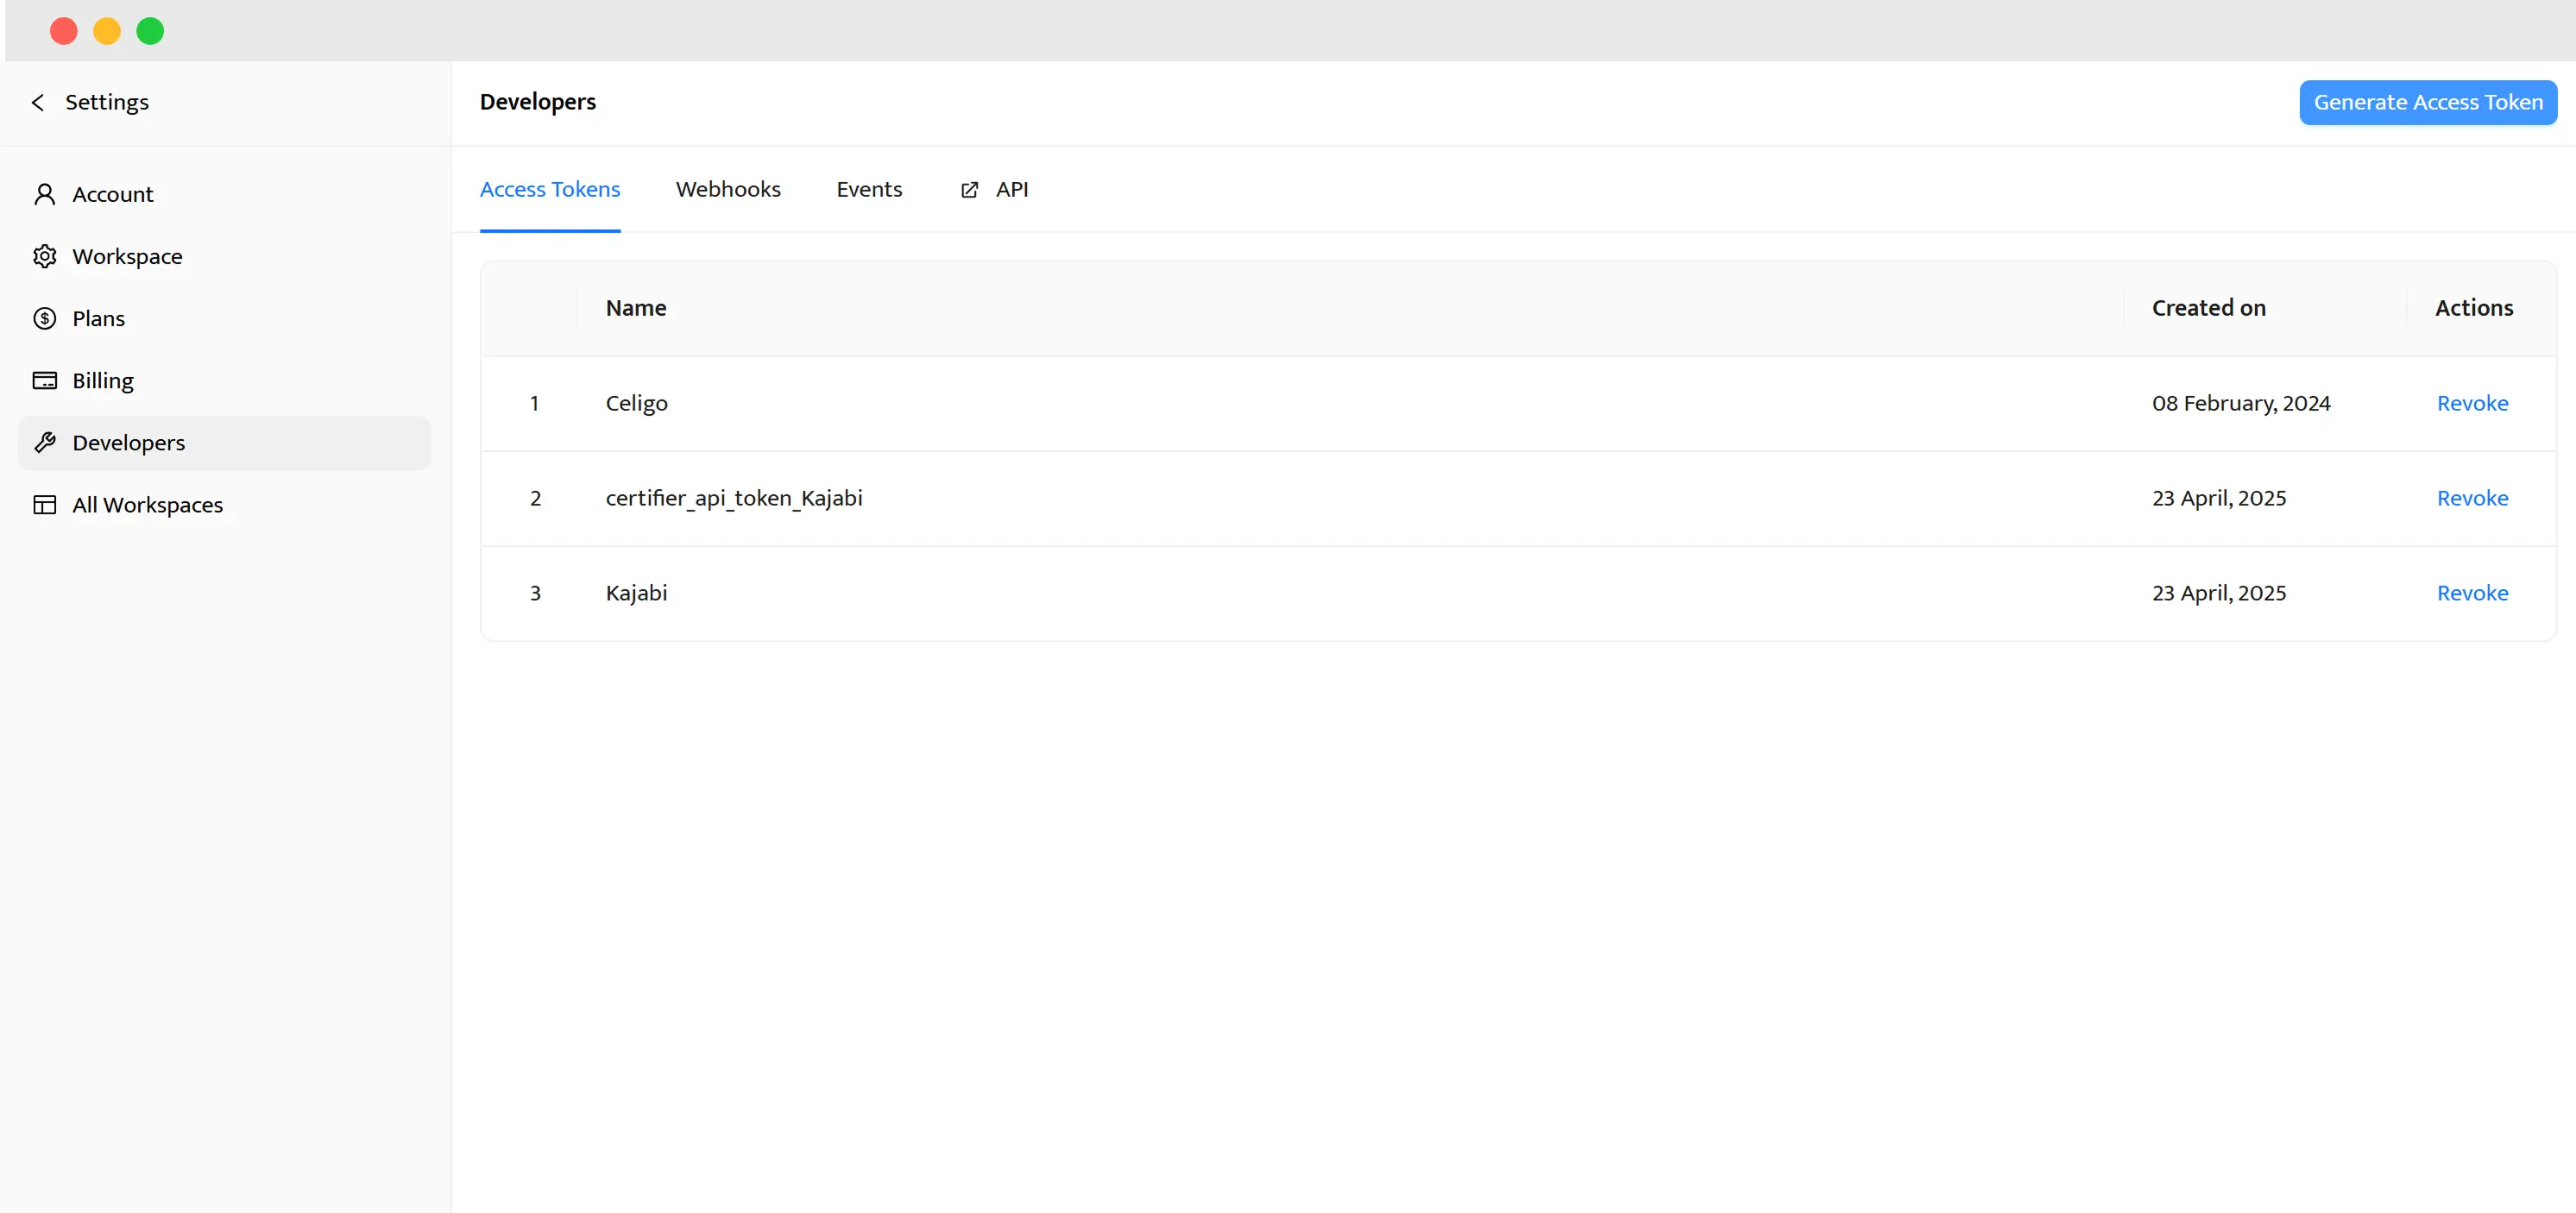
Name the token and copy the code you’ll get.
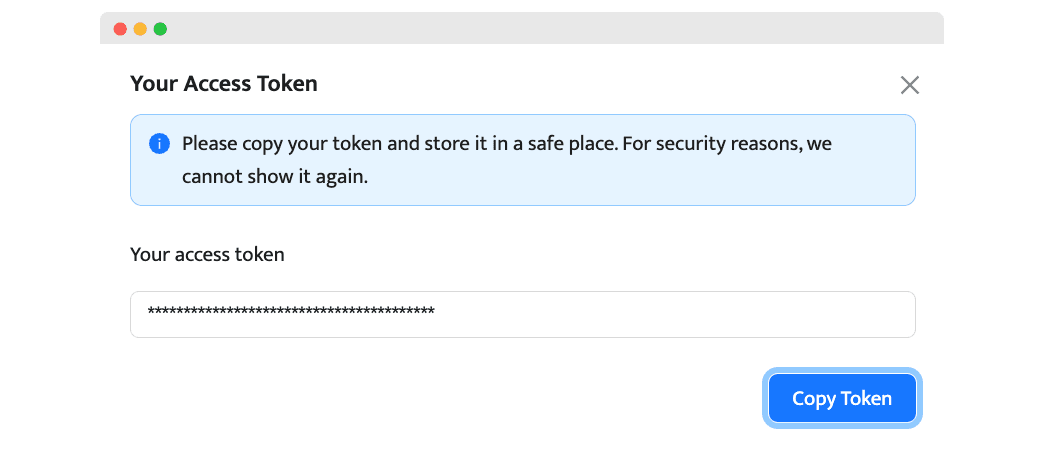
Paste it in Zapier.
12 Set up Action details in Zapier
To trigger the workflow correctly, there are several things to consider.
Choose the Group name.
Next, connect the particular Typeform fields to certificate attributes (dynamic fields showing the particular survey data).

Test the step.
Carefully choose and configure Certifier action details in your Zap. So the certificates you generate are tailored to recipients’ data and are automatically generated after every Typeform submission.
13 Test and publish your Zap
Test your Zap.
Pay attention to any error messages during the test. If something goes wrong, Zapier will usually give you a hint about what needs fixing.
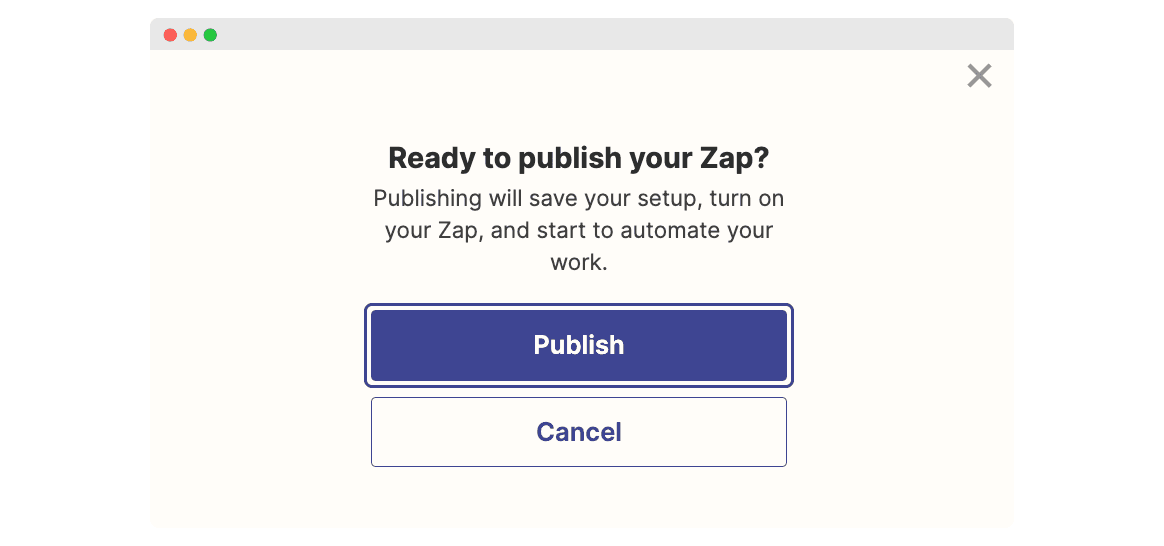
Once you're happy with the test results, it's time to make your Zap live.
Simply click the “Publish” button.
Your workflow is now active, and new Typeform entries will automatically trigger certificates to land in recipients' inboxes.
Alternative method: Typeform + Google Sheets + Certifier (no Zapier)
This setup works best if you’re running ongoing courses, events, or surveys where certificates must go out instantly after completion. You can connect Typeform → Google Sheets → Certifier directly, avoiding Zapier. Typeform natively exports every response into a Google Sheet. Once that sheet is linked with Certifier via the new native integration, certificates are issued automatically whenever a new row is added.
How to set it up:
Step 1: In Typeform, enable Google Sheets integration to collect all responses in a sheet.
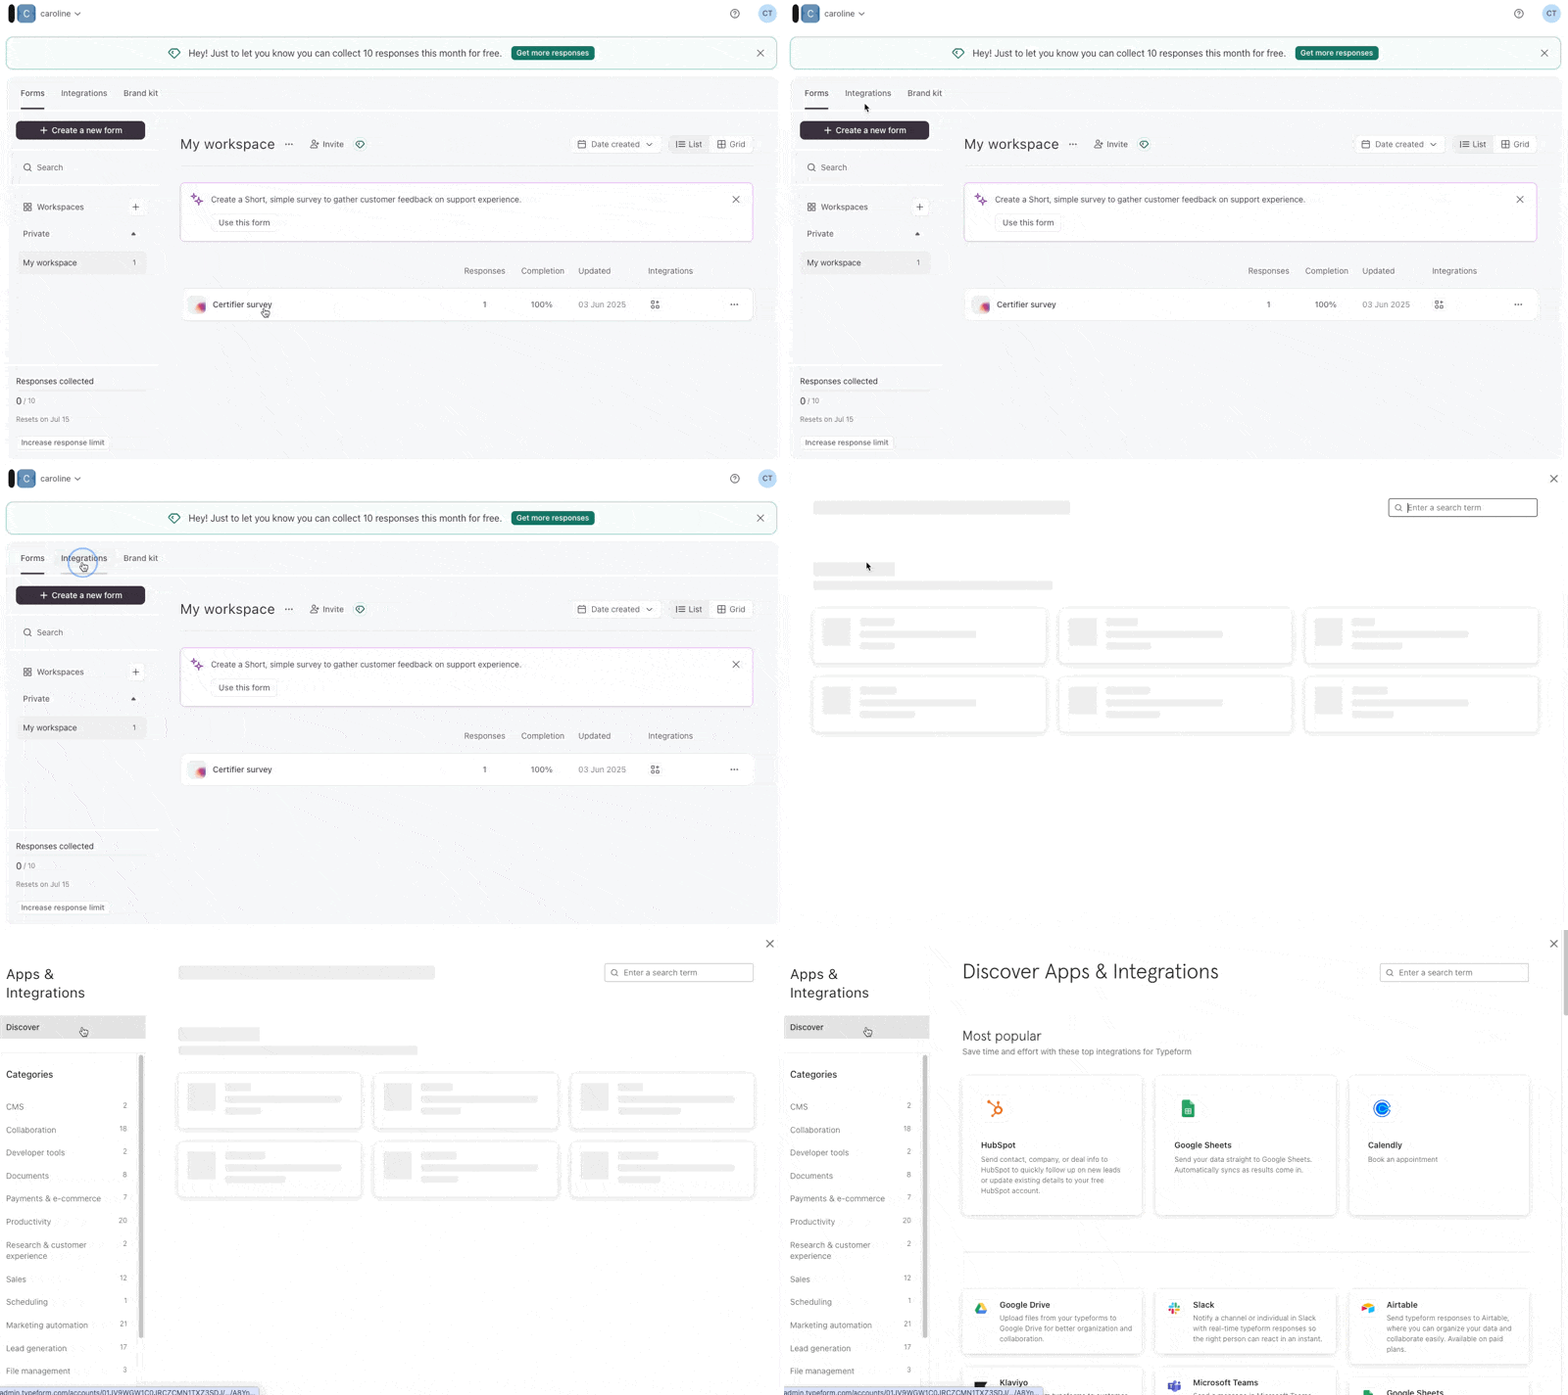
Step 2: In Certifier, go to Automations → +Create Automation. Select the Google Sheets template and connect your Google account. Pick the spreadsheet linked to your Typeform and select the worksheet with responses.
Step 3: Connect your Google account, pick the right sheet, and map columns like name and email.
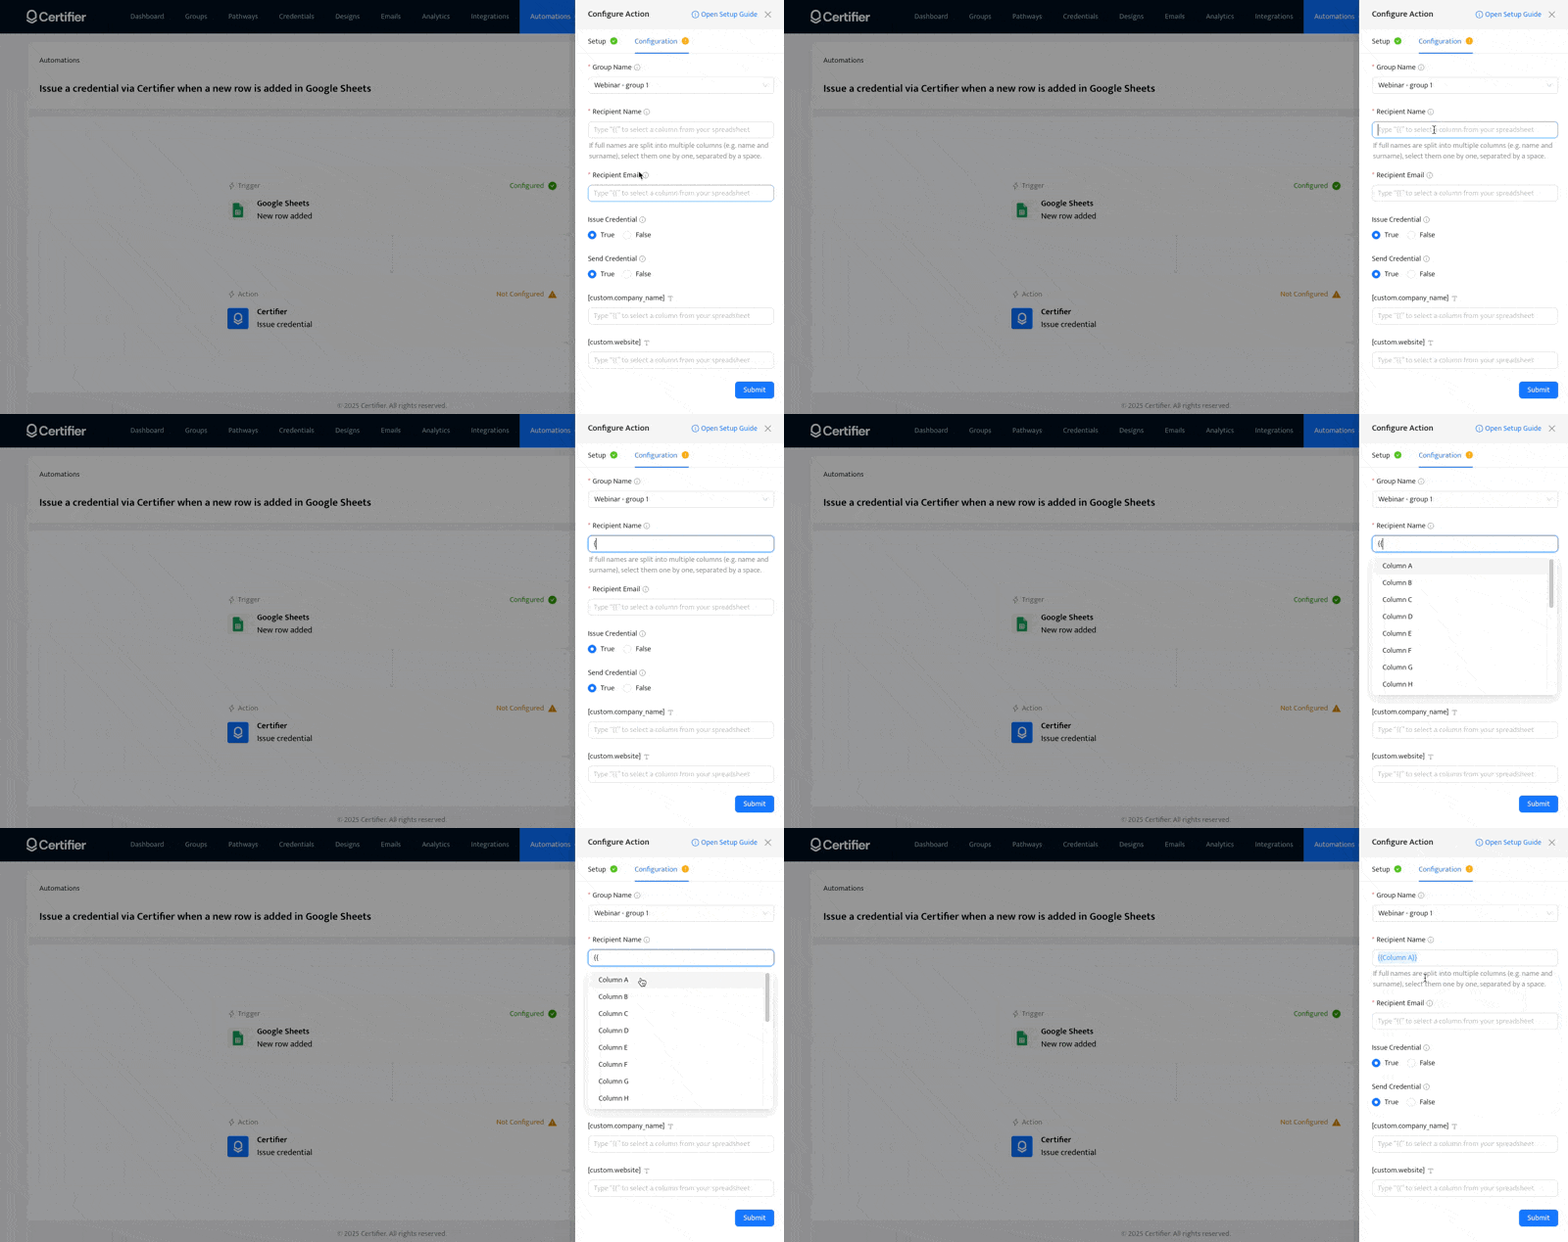
Step 4: To turn automation on, choose whether certificates should be issued automatically or saved as drafts.
Decide if they should be emailed right away or sent later. Click Save & Activate. From now on, every Typeform response will instantly trigger certificate issuance.
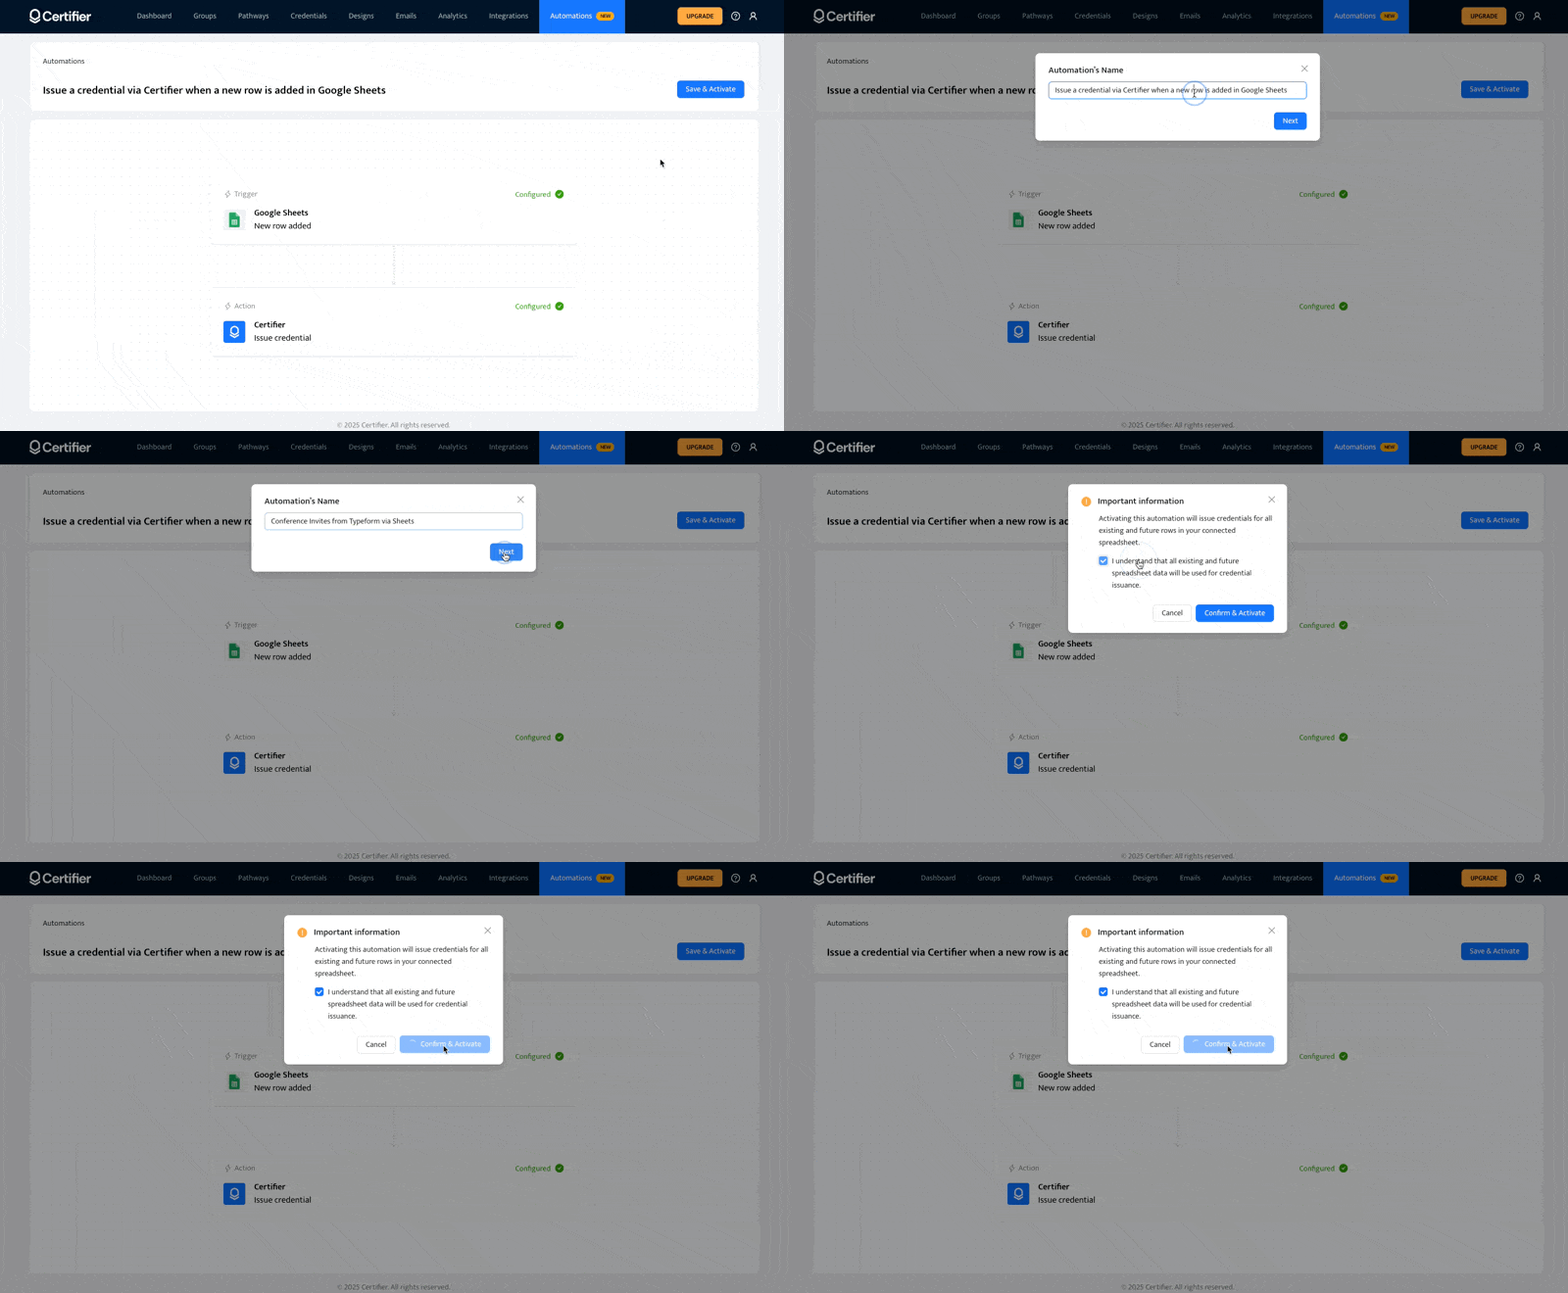
For the full details, read how to connect Typeform to Certifier via Google Sheets.
Enjoy your new automated certificate workflow
Well done on getting your automated certificate system up and running! Now, you can sit back and relax a bit more. You know that your certificates are being handled smoothly and swiftly.
It's time to enjoy the benefits of your hard work and see the happy faces of your participants as they receive their well-earned certificates!
You can learn more about Certifier and Typeform integration here.
FAQ
Here is the list of the most common questions.

