Set and update certification expiration date
Involve your recipients in a cycle of ongoing learning and inspire them to refresh their credentials with the certificate expiration date. These critical deadlines serve as a clear signal when it's time for recipients to update their knowledge base. It's a move forward to retain revenue and boost retention loops. The outcome? Your credentials gain a reputation for being more credible, valuable – and applicable.
Certifier is a market-leading certificate generator with expiration date creator


How to manage the certification expiration date with automatic notifications?
With Certifier, you can set the certificate expiration date for any credential. The process is straightforward and requires just a few simple configuration steps. Ready to make your credentials even more exclusive?
Did you know? Certifier sends two automatic emails when the certificate is about to expire. Two weeks before and at the moment of the expiration. Thanks to that, your recipients will know exacly when they have to renew their credentials. The outcome? Boosted retention and learners’ engagement. And that’s just the tip of the iceberg!
Step 01: Sign up to Certifier
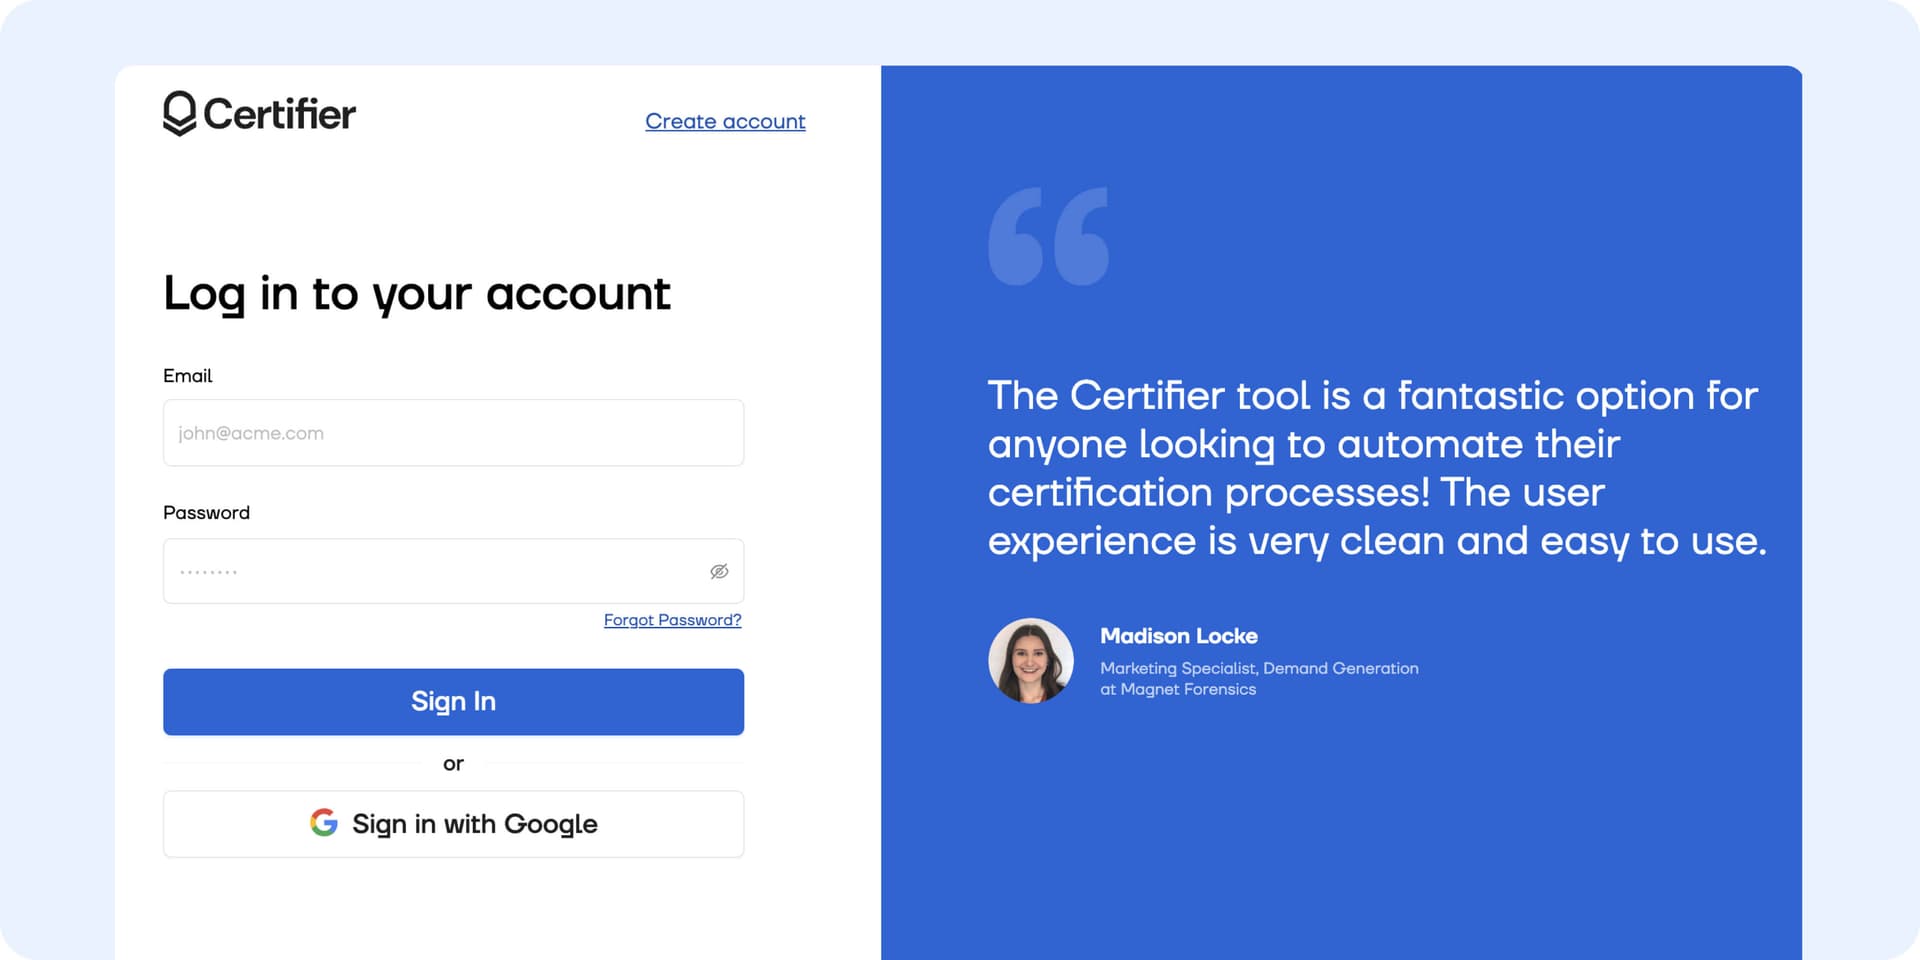
Create an account for free (or sign in if you’re already a Certifier member). Certifier provides a forever-free plan, so it’s the best option if you want to check the ground before committing. No card details are required!
Step 02: Create a credential design with an expiration certificate format
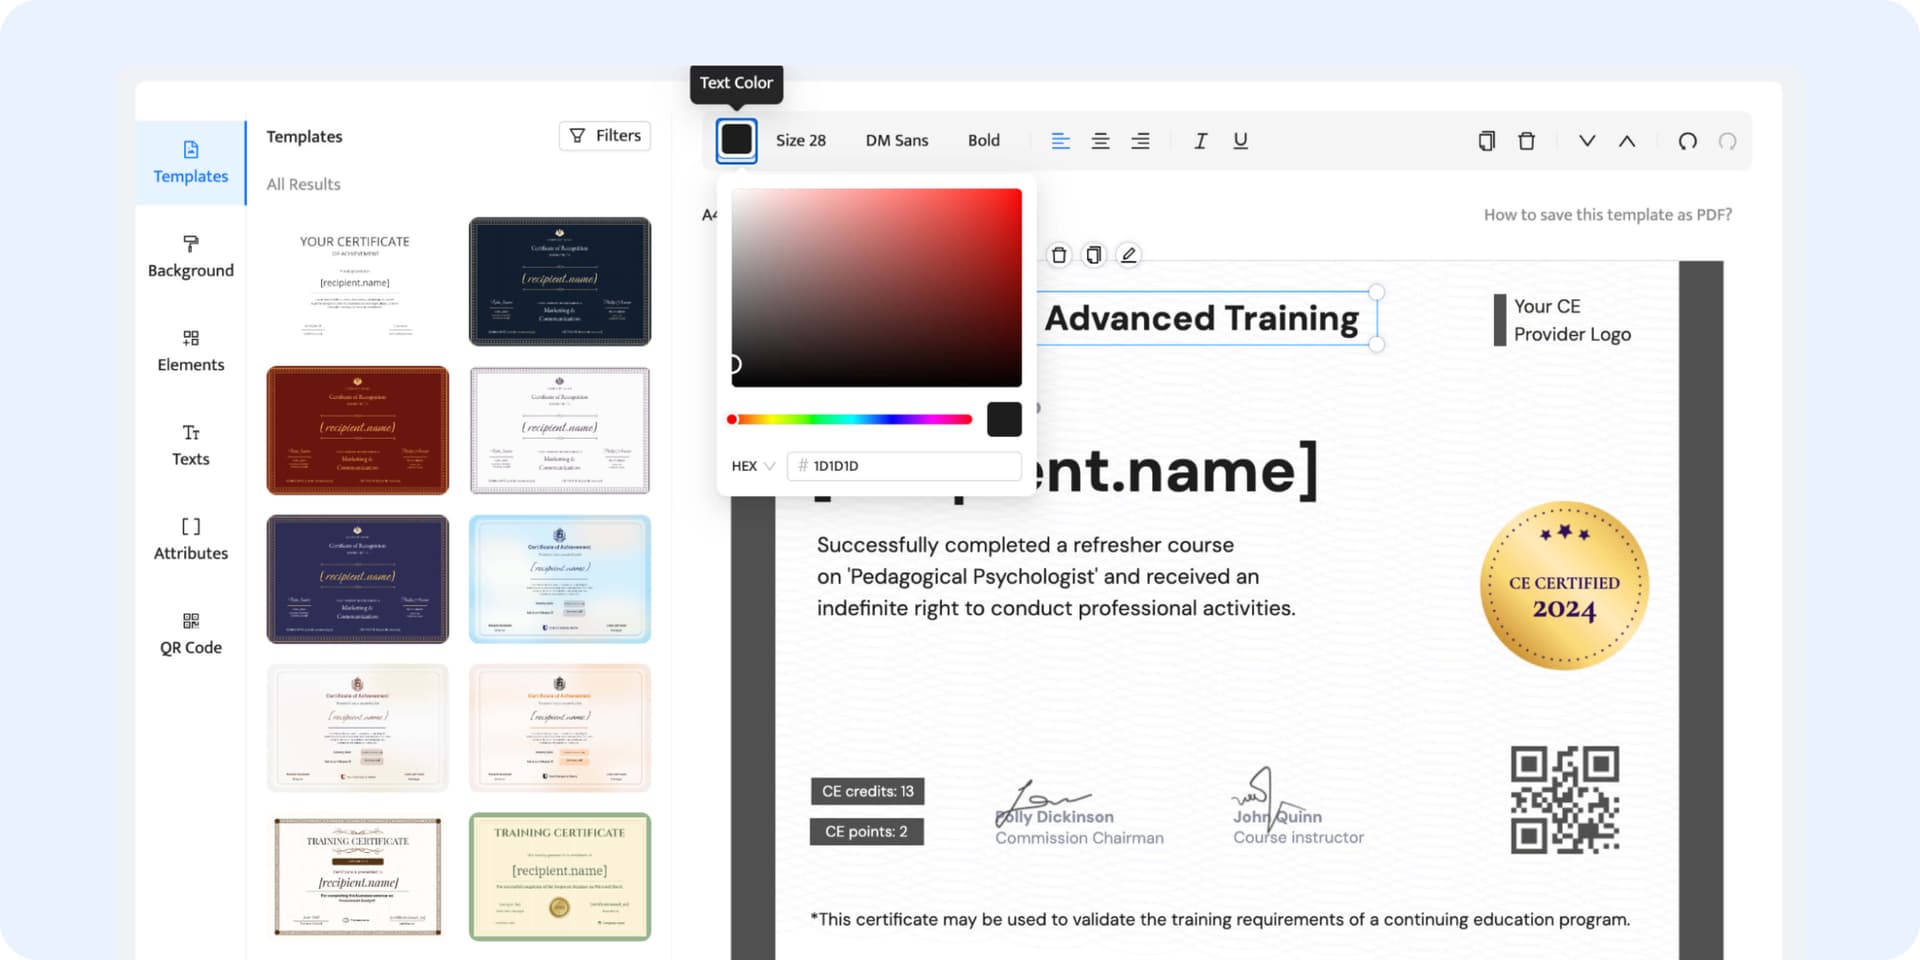
Once you’re in, create a new certificate design. Choose the template and customize it however you want to. There’s no limit here – drag and drop elements until you find your perfect design. With Certifier, you can upload your images and the company’s logo or change colors, fonts, and backgrounds. It’s up to you how the final design will look like.
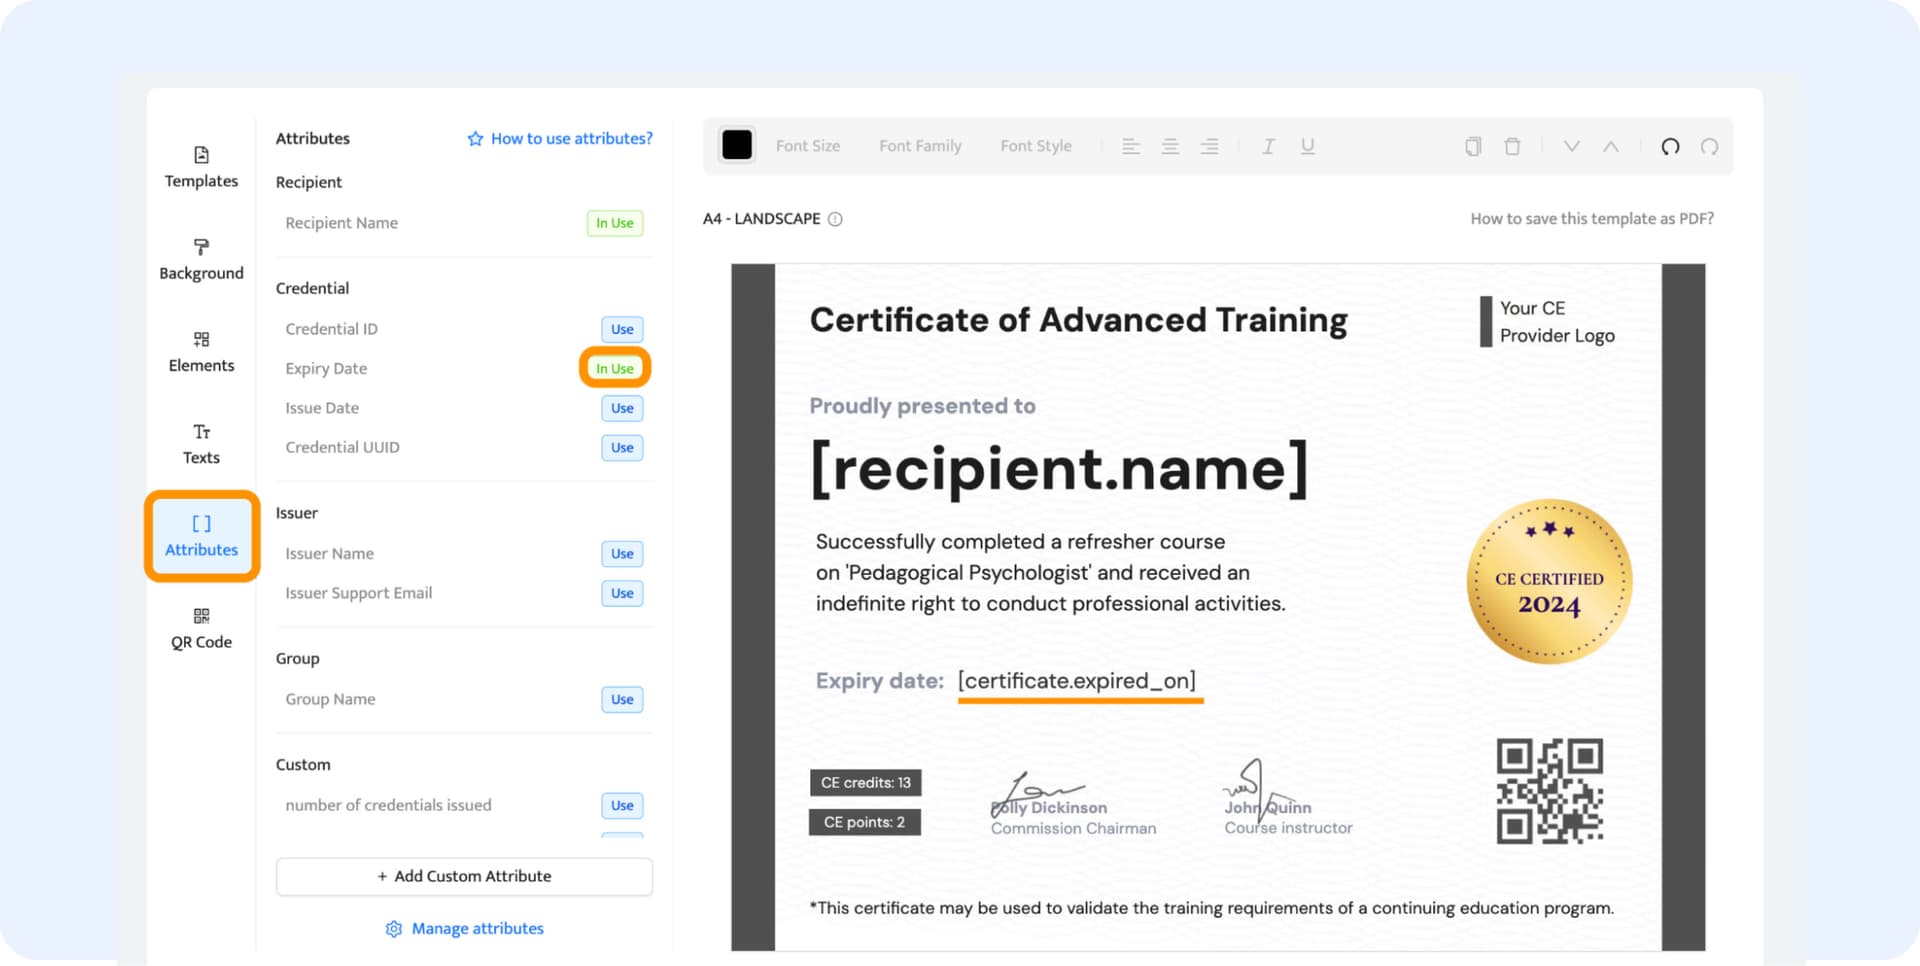
Recommended: If you want to make the most out of expiring certificates, add the dynamic attribute “expiry date.” (it’s not obligatory in order to enable the expiration feature). Thanks to that, all viewers will see the certification expiry date on the credential. Go to the Attributes tab and choose the appropriate value.
What is a dynamic attribute? Dynamic attributes in Certifier are the content placeholders that contain the information created for the individual recipient. So, for example, if you add the dynamic attribute “Recipient Name,” your credential will include the name generated automatically from the list of recipients, without your manual work (and changing each name one by one).
Save the certificate design by clicking the Create Certificate Design button.
Step 03: Set up certificates expiration date
Go to the Groups tab and assign the certificate design to the particular course or event. If you don’t have the group yet, choose the Create Group button. Add all the information needed and choose the certificate design you’ve just created.
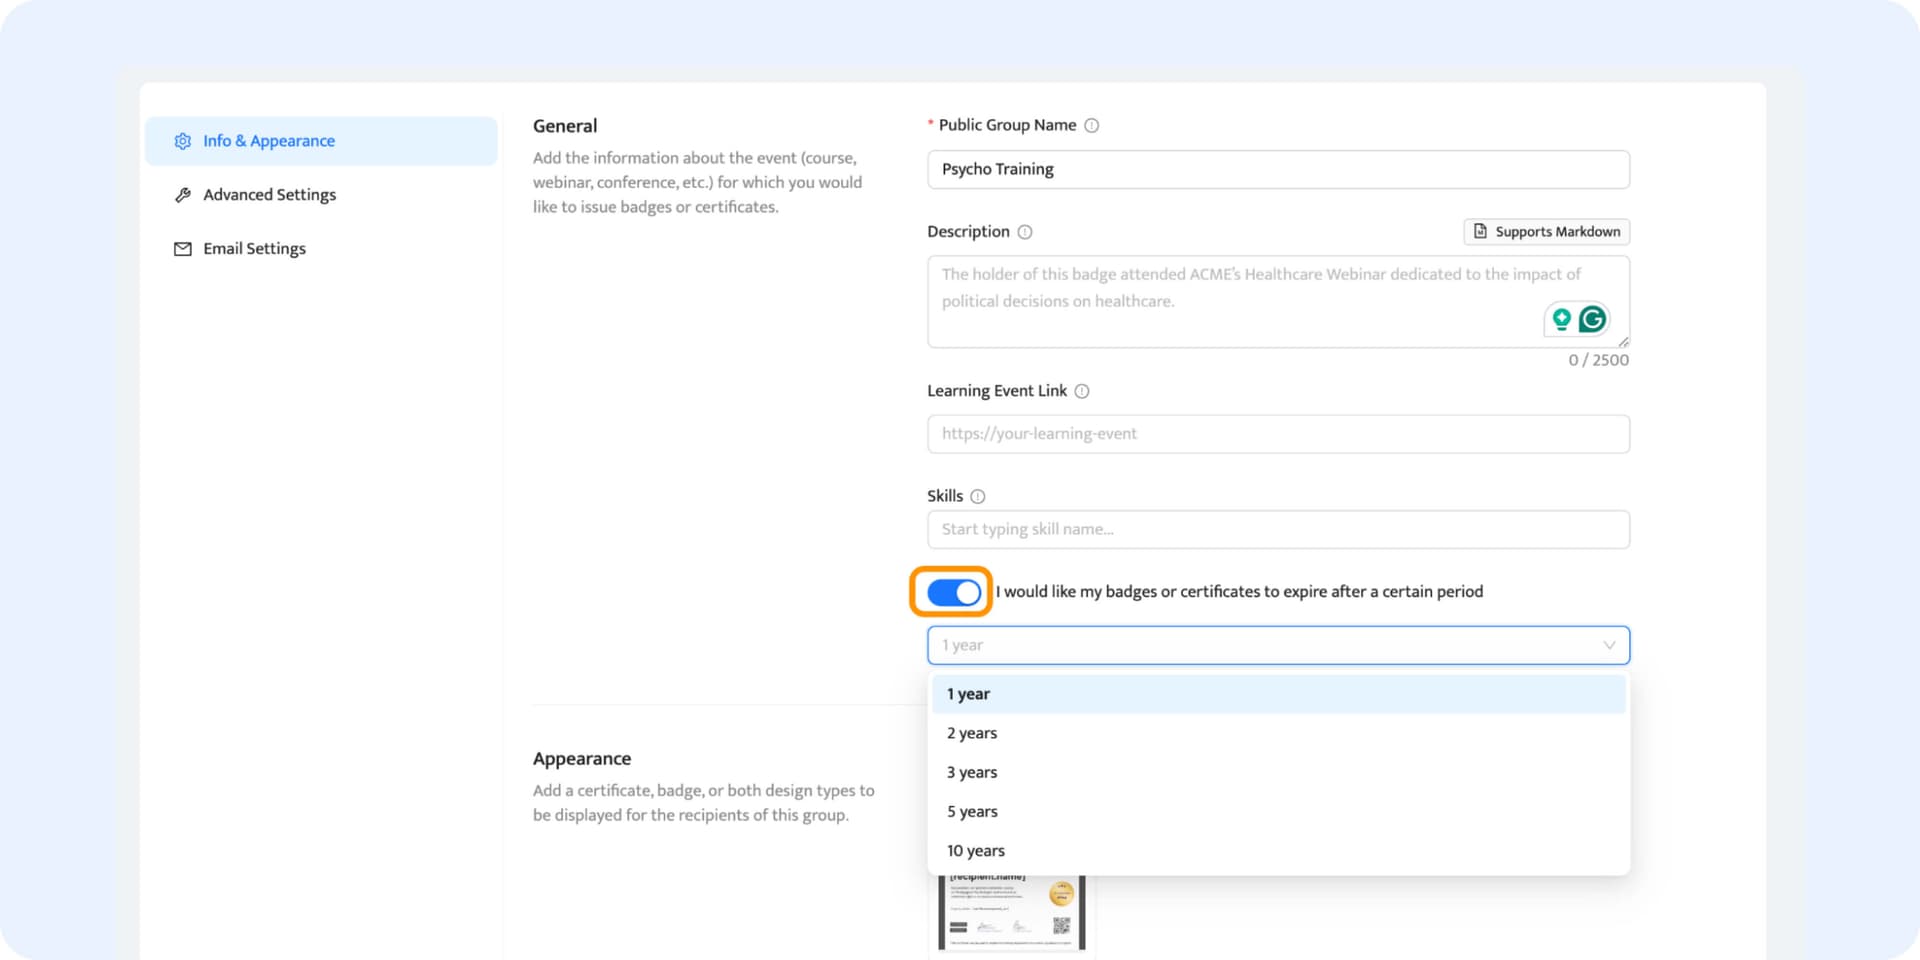
In this expiration date creator, you can also toggle that you would like the credential to expire. You must decide how long the credential will be valid. After that period, your recipient can no longer download or share their credentials.
Step 04: Customize the certificate expiration reminders
Here’s the feature we love the most! The certification expiration date feature goes hand in hand with expiration reminders that notify your recipients about credential validity. They’re all set by default, but you can customize the expiration certificate format to suit your brand’s tone of voice. Certifier provides two email notifications:
email reminder when their credentials are about to expire (2 weeks before)
email with information that the credential has already expired
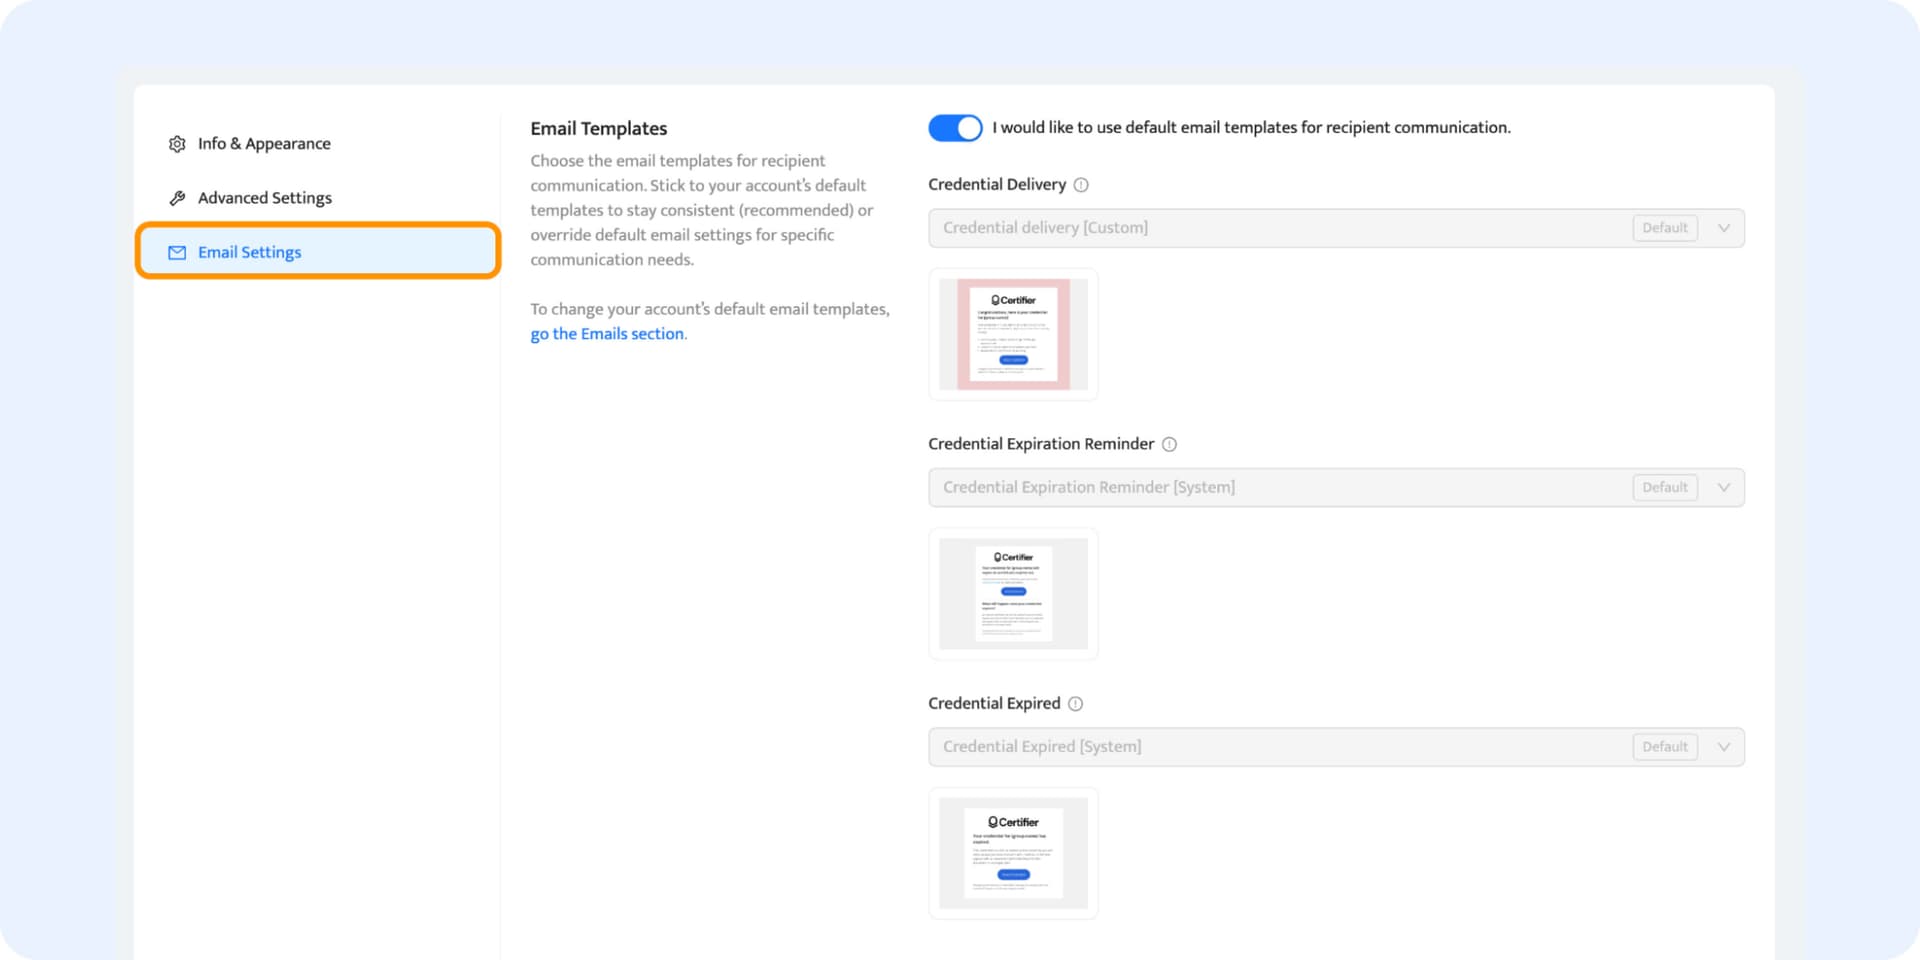
You can set up both emails in the Email Settings section from the left menu in the Groups tab. You can see all the details: credential delivery, expiration reminder, and credential expired emails. You can choose the default templates or custom ones.
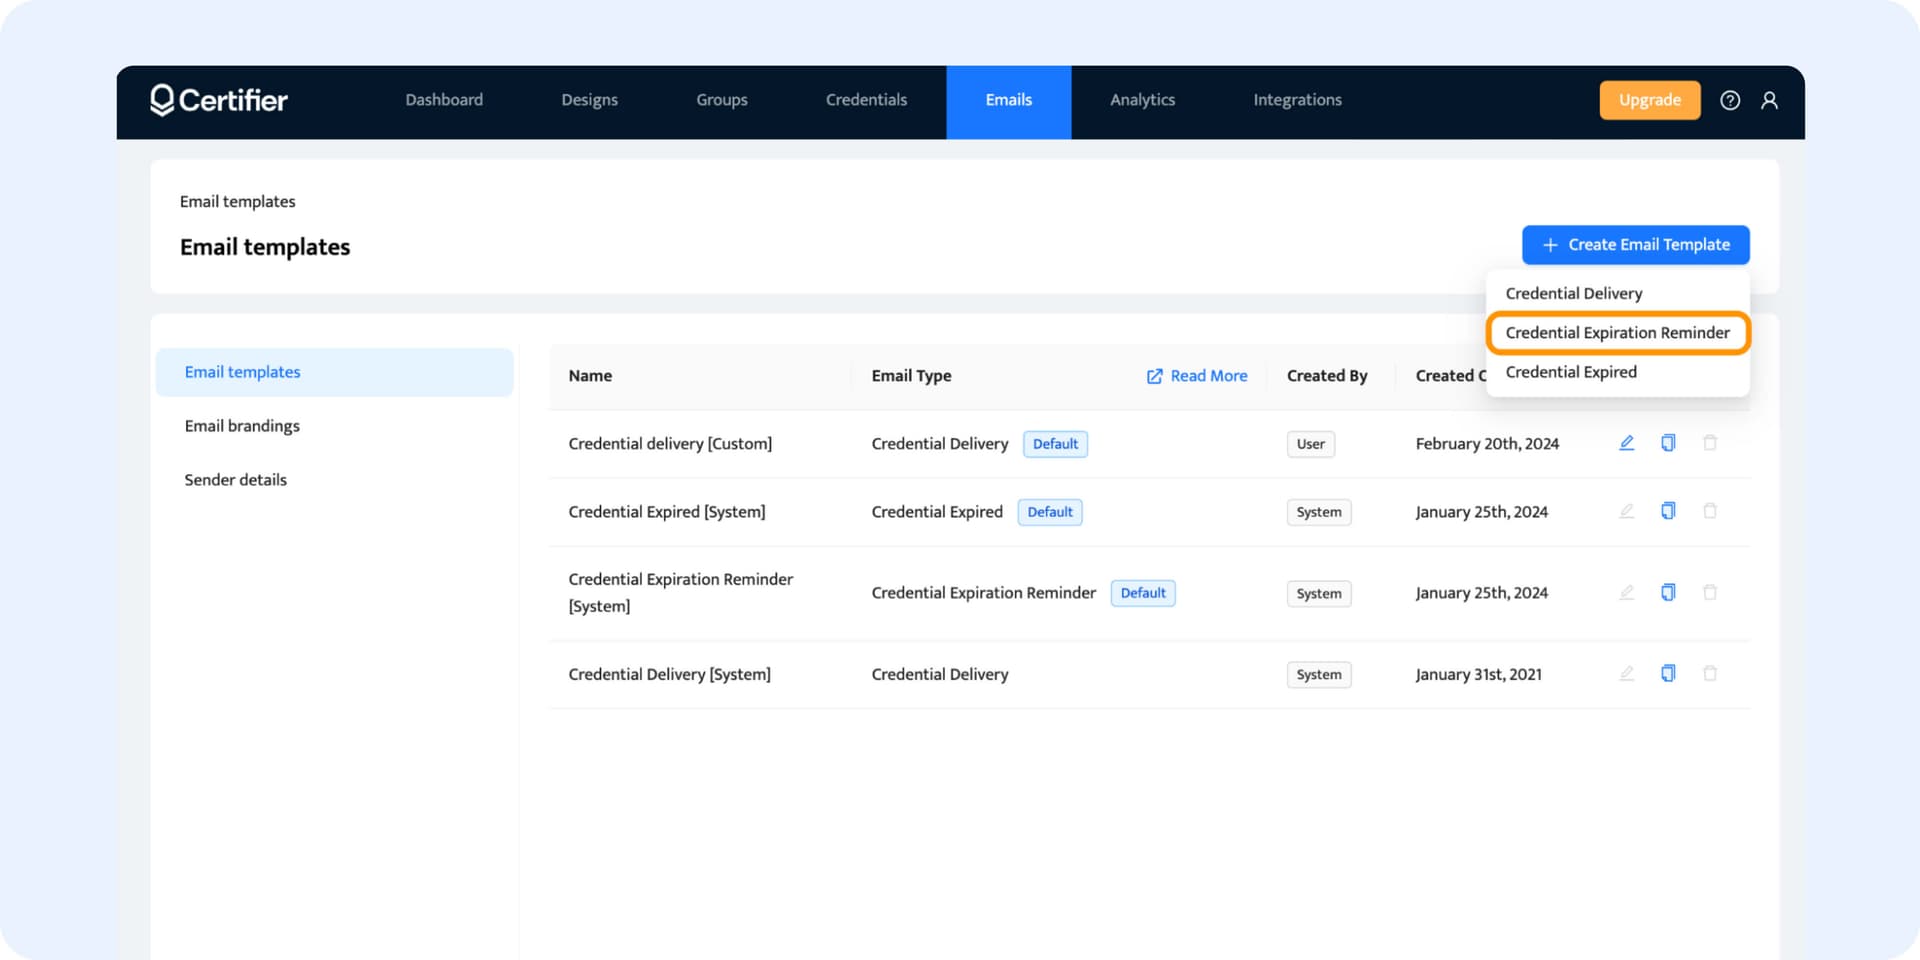
If you want to create or change some details in any of these email templates, go to the Emails tab from the Certifier menu. Click Create email template and choose the type of template you want to change.
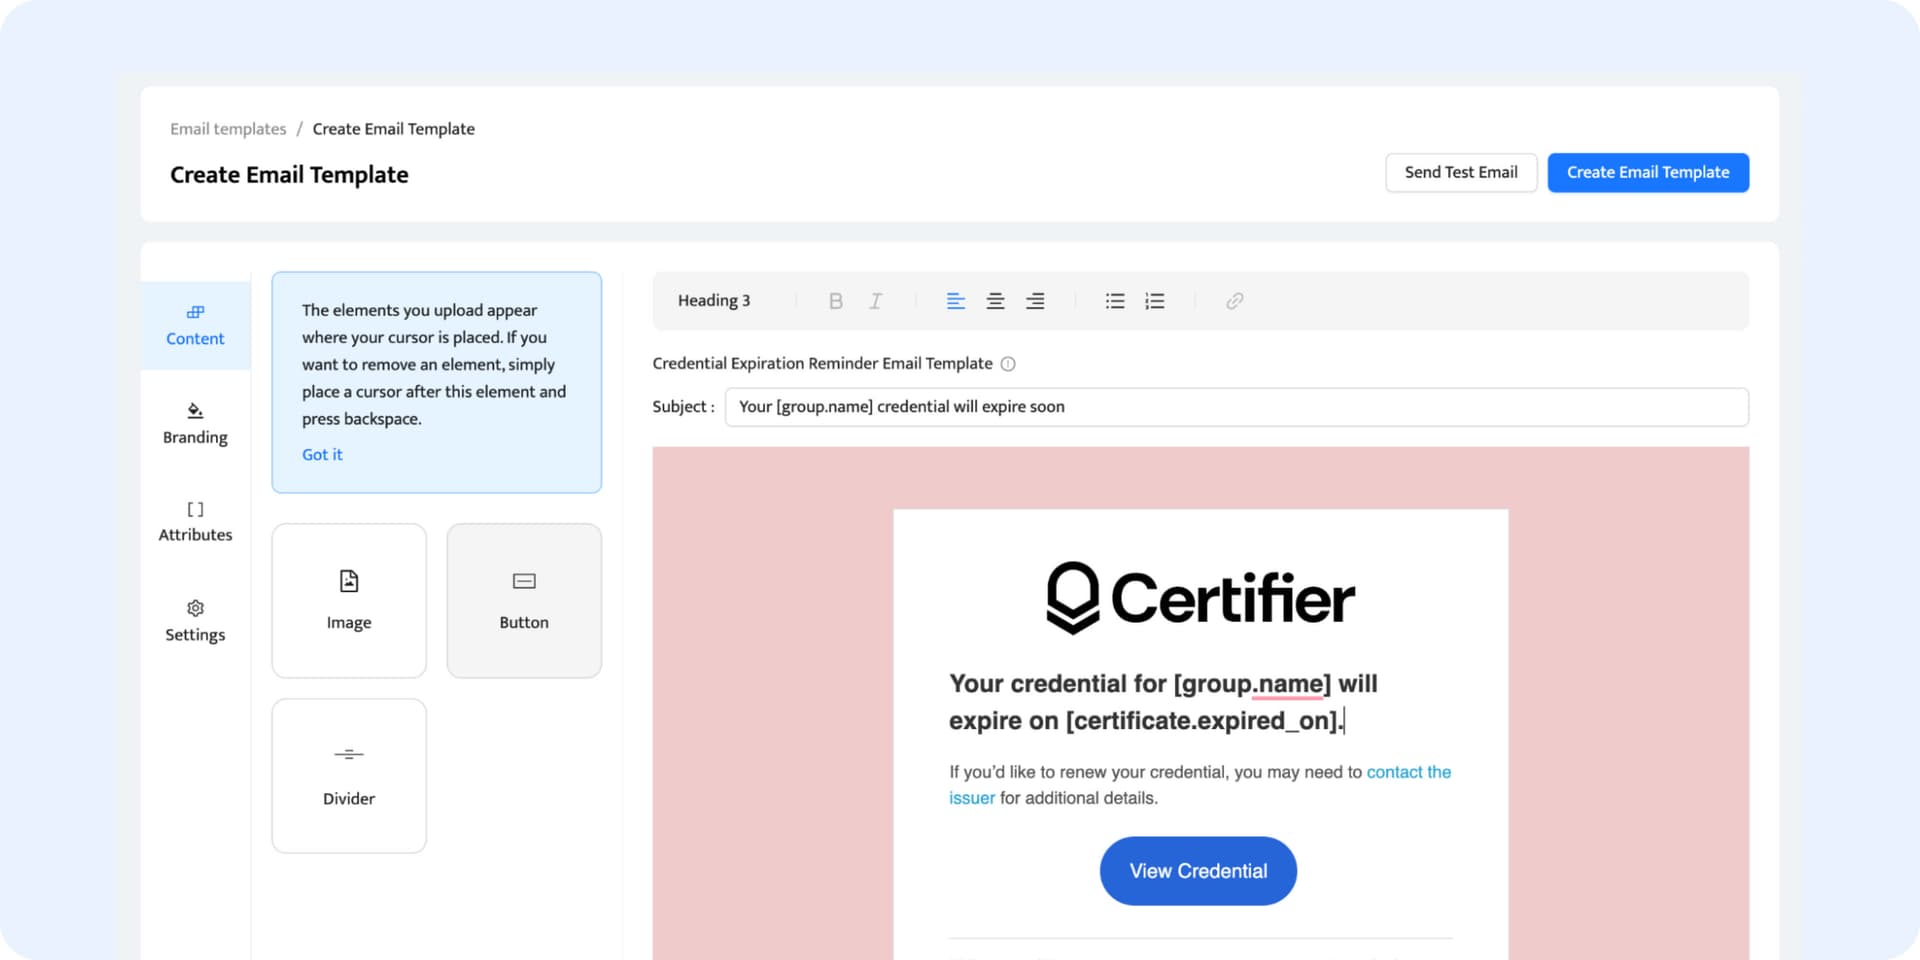
Add the customized message there, e.g., about the information on how to renew the credential.
Tip! In the email with the expiration information, include a link to your new learning event to encourage learners to participate in the course and renew their credentials. It’s a strategic tip to promote continuous learning and maintain a steady stream of revenue! That approach not only keeps your learners up-to-date and engaged but also reinforces the importance of professional development. It's a win-win strategy that boosts both – learner engagement and your bottom line!
Step 05: Upload recipients' data and generate credentials
To generate and send certificates in bulk, you have to prepare a list of recipients. Go to the Credentials tab and click the Issue Certificate or Badges button. Select the group you’ve just set and decide in which way you want to upload recipients' data. There are two possible ways:
Entering recipient details individually into the system
Via the spreadsheet with all the necessary information (that covers the dynamic attributes you used in the template).
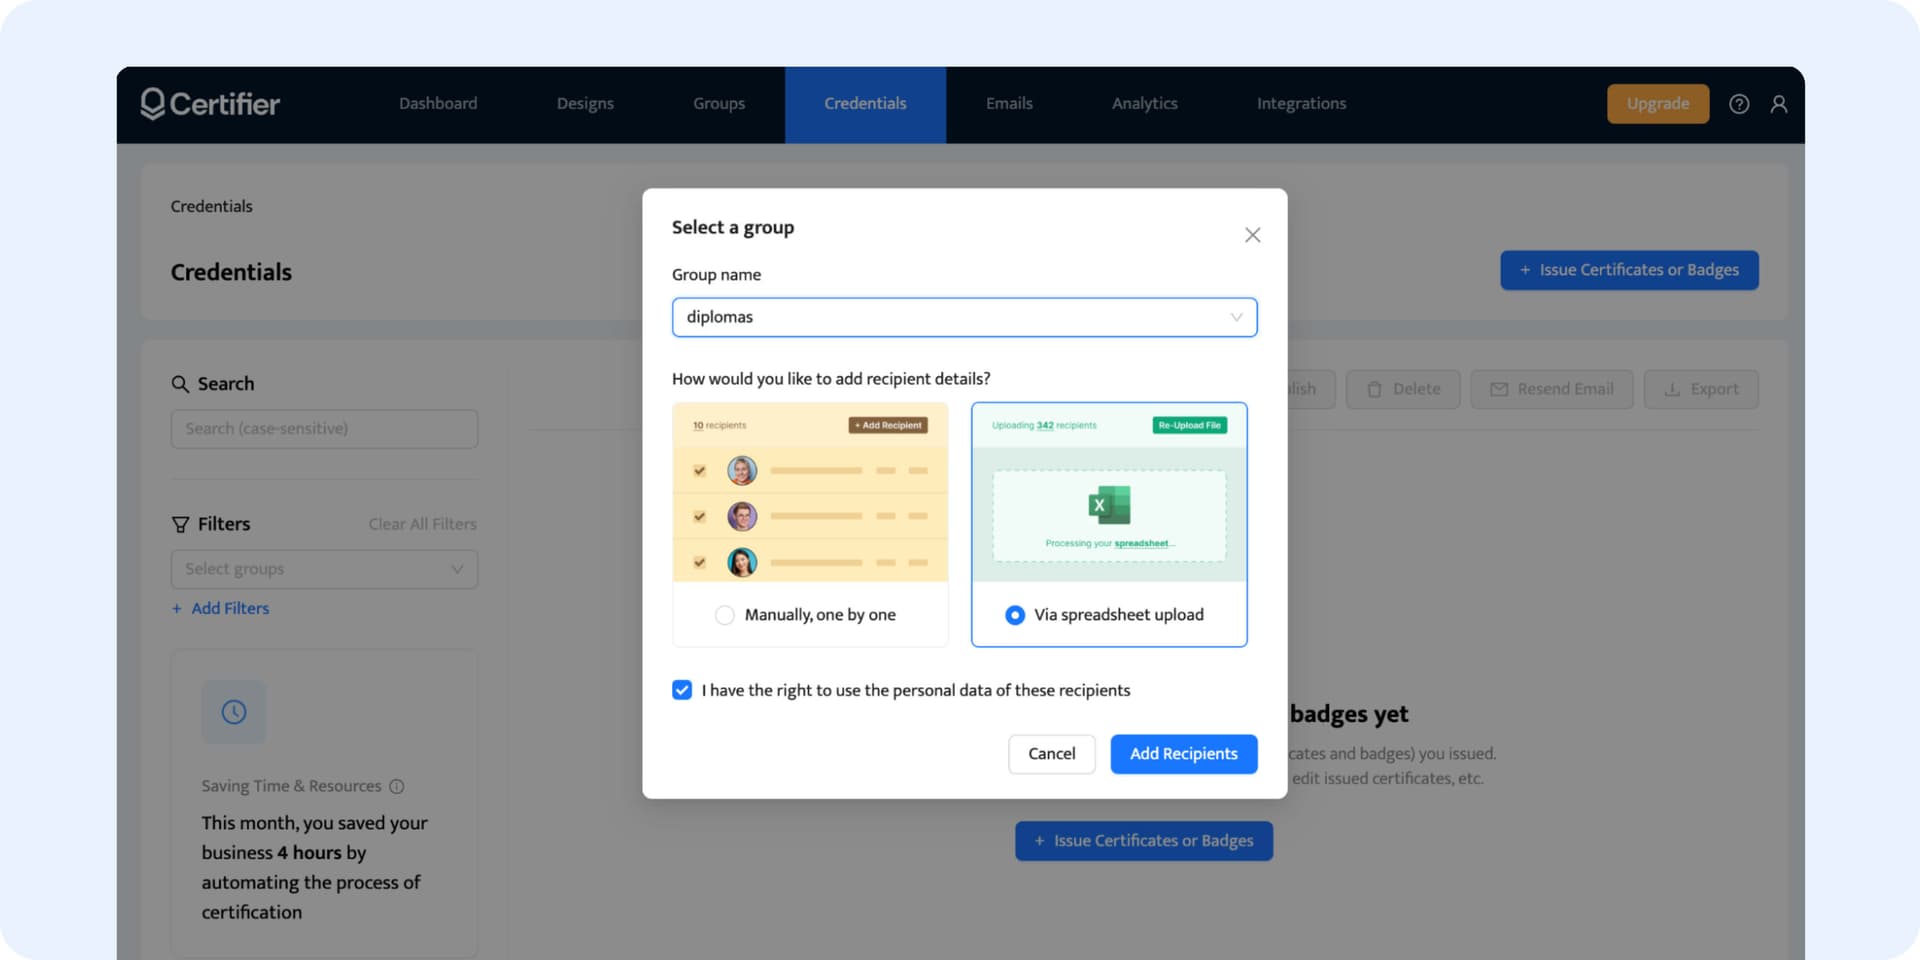
To upload the recipients’ data faster and with less risk of error, we recommend using spreadsheets. Compared to manual entry, this method lets you bulk upload recipient info, saving you time and effort. Click Add Recipients, then upload your own spreadsheet or download the spreadsheet template first.
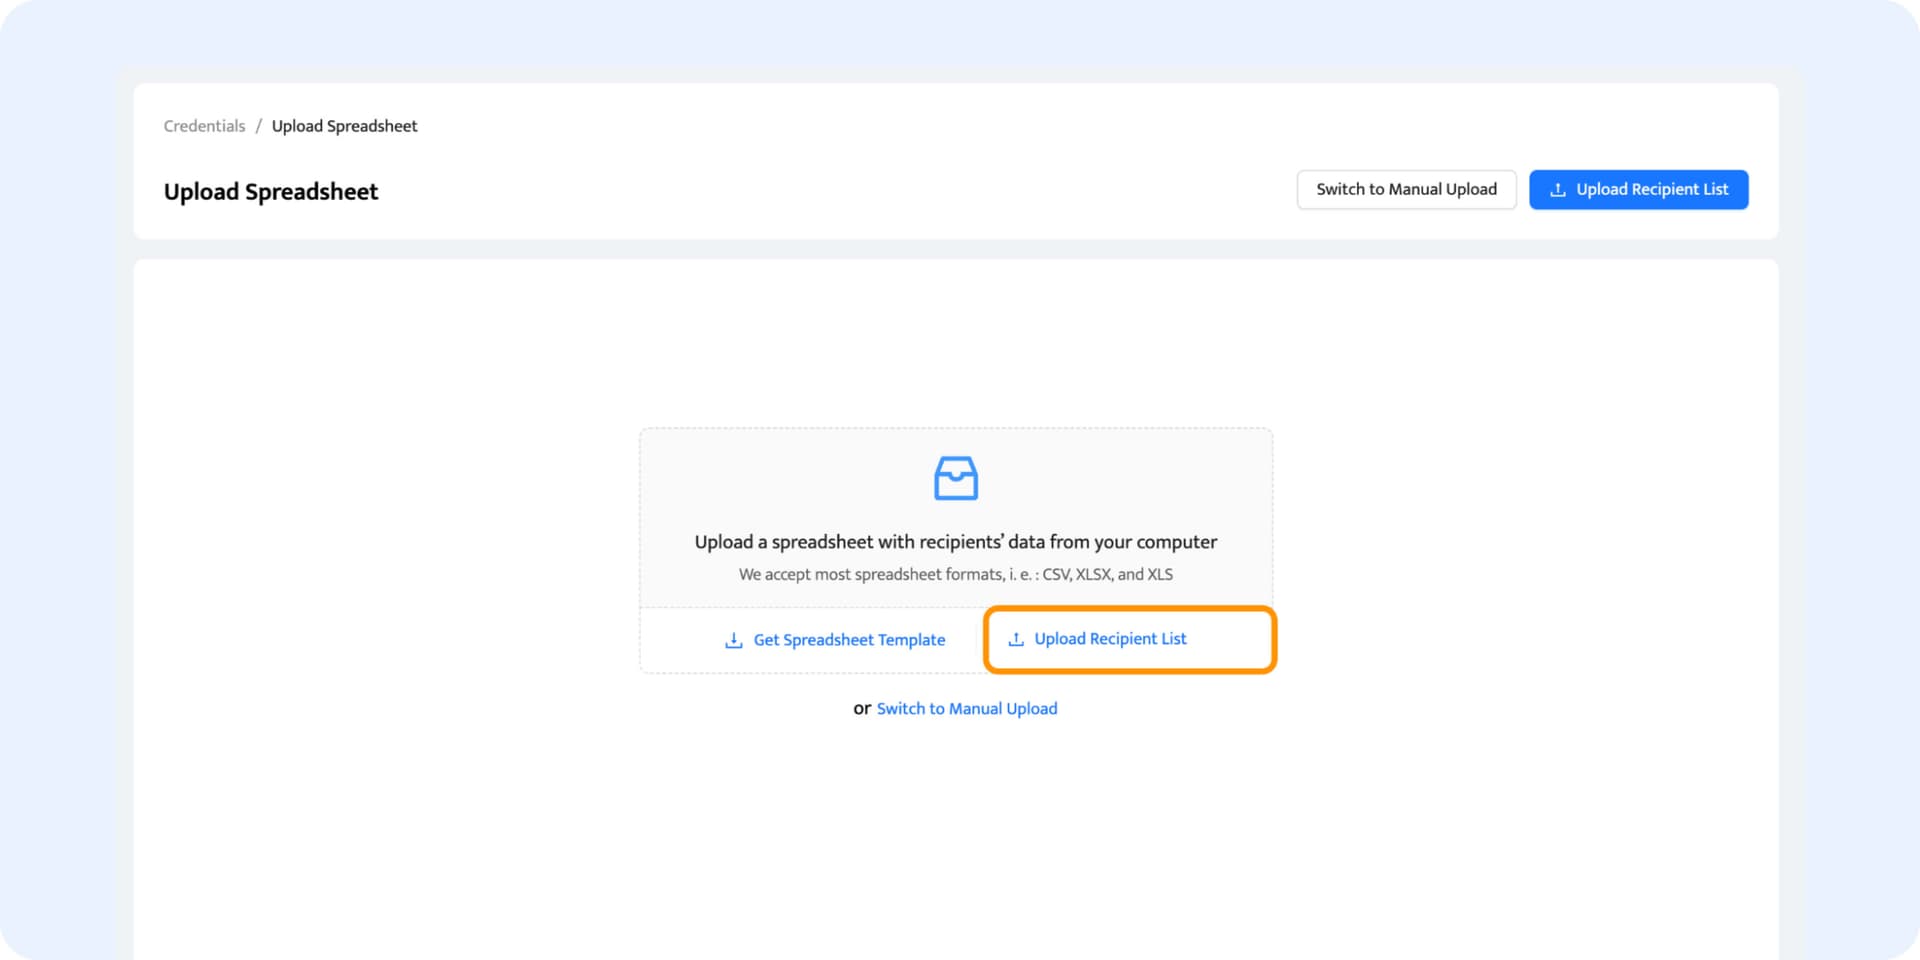
Once the spreadsheet has been uploaded, map the column with the appropriate dynamic attributes. The Certifier tool is designed to make it easy for you to match the columns in your spreadsheet with the right attributes. This means that names will be matched with names, emails with emails, etc. You can skip any columns that you don't want to include. Make sure to double-check everything before finalizing to ensure accuracy.
Please note: You won't have to map the expiration certificate format attribute since once it's set at the group level, it will be automatically generated based on the timeline you specified.
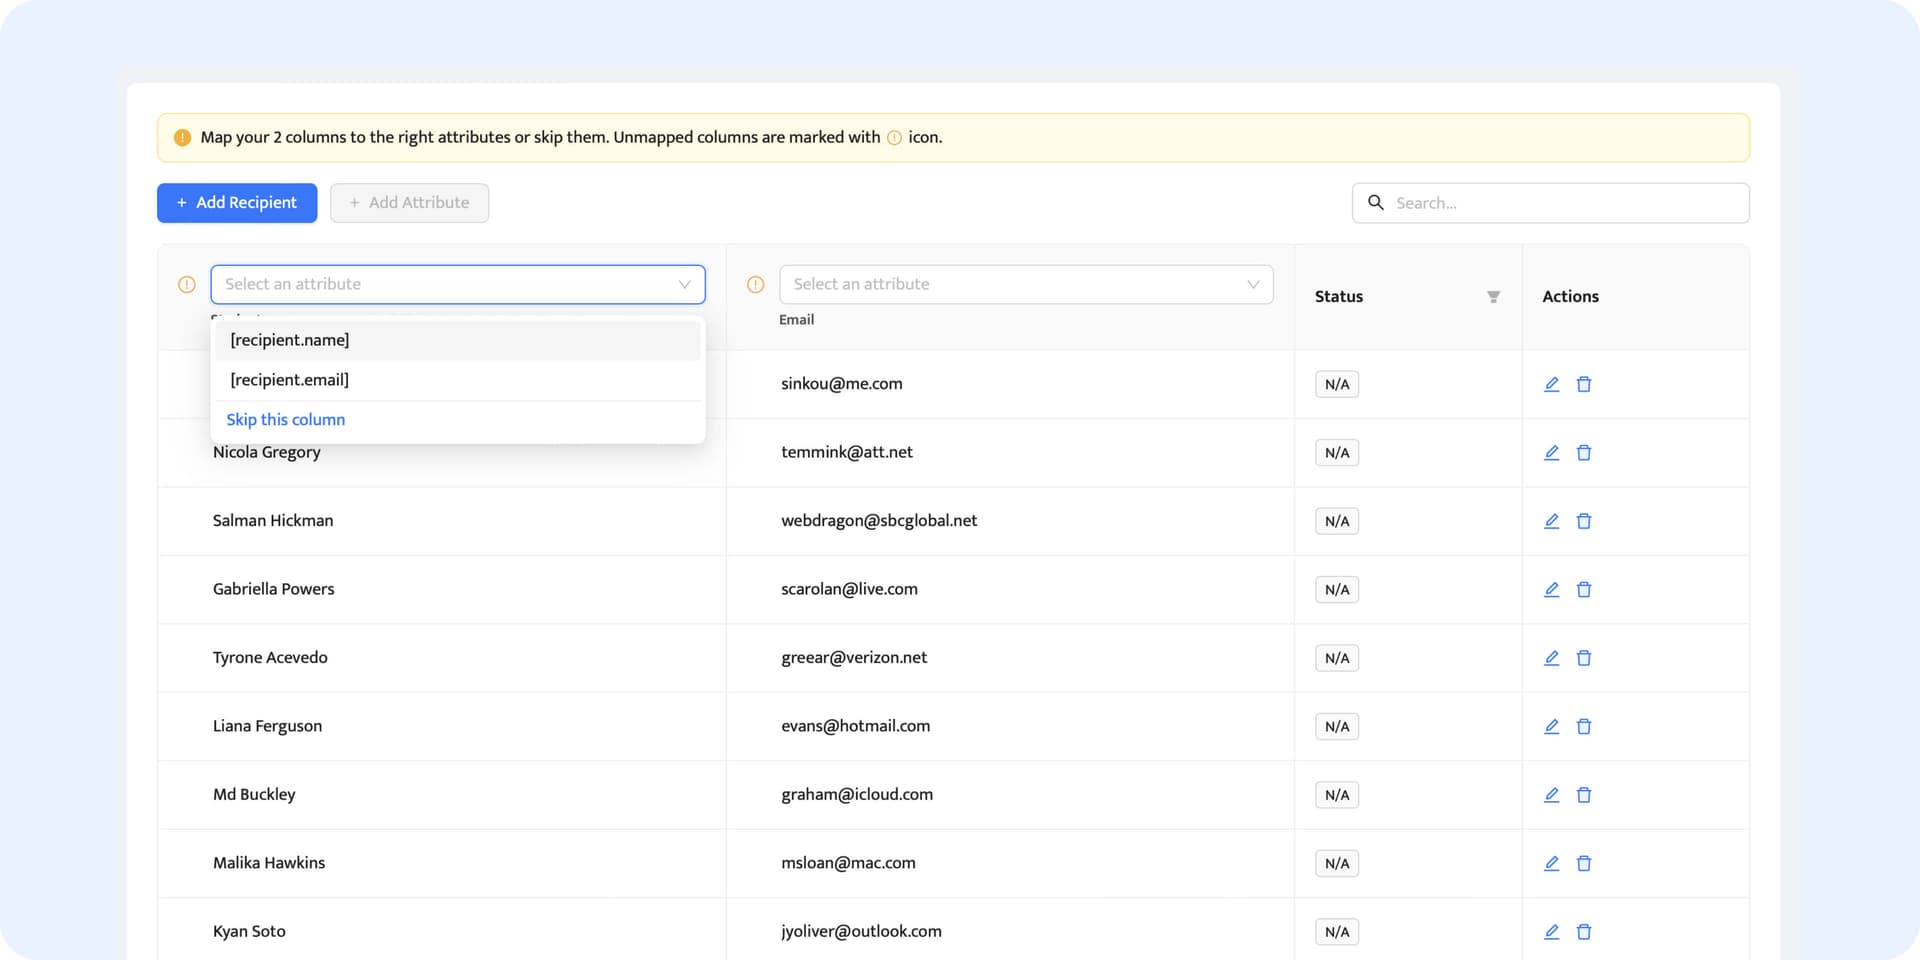
Once you’re ready, click the Preview Before Publishing button. If everything looks perfect, your expiring certificates are ready to send out.
Step 06: Update the expired credential
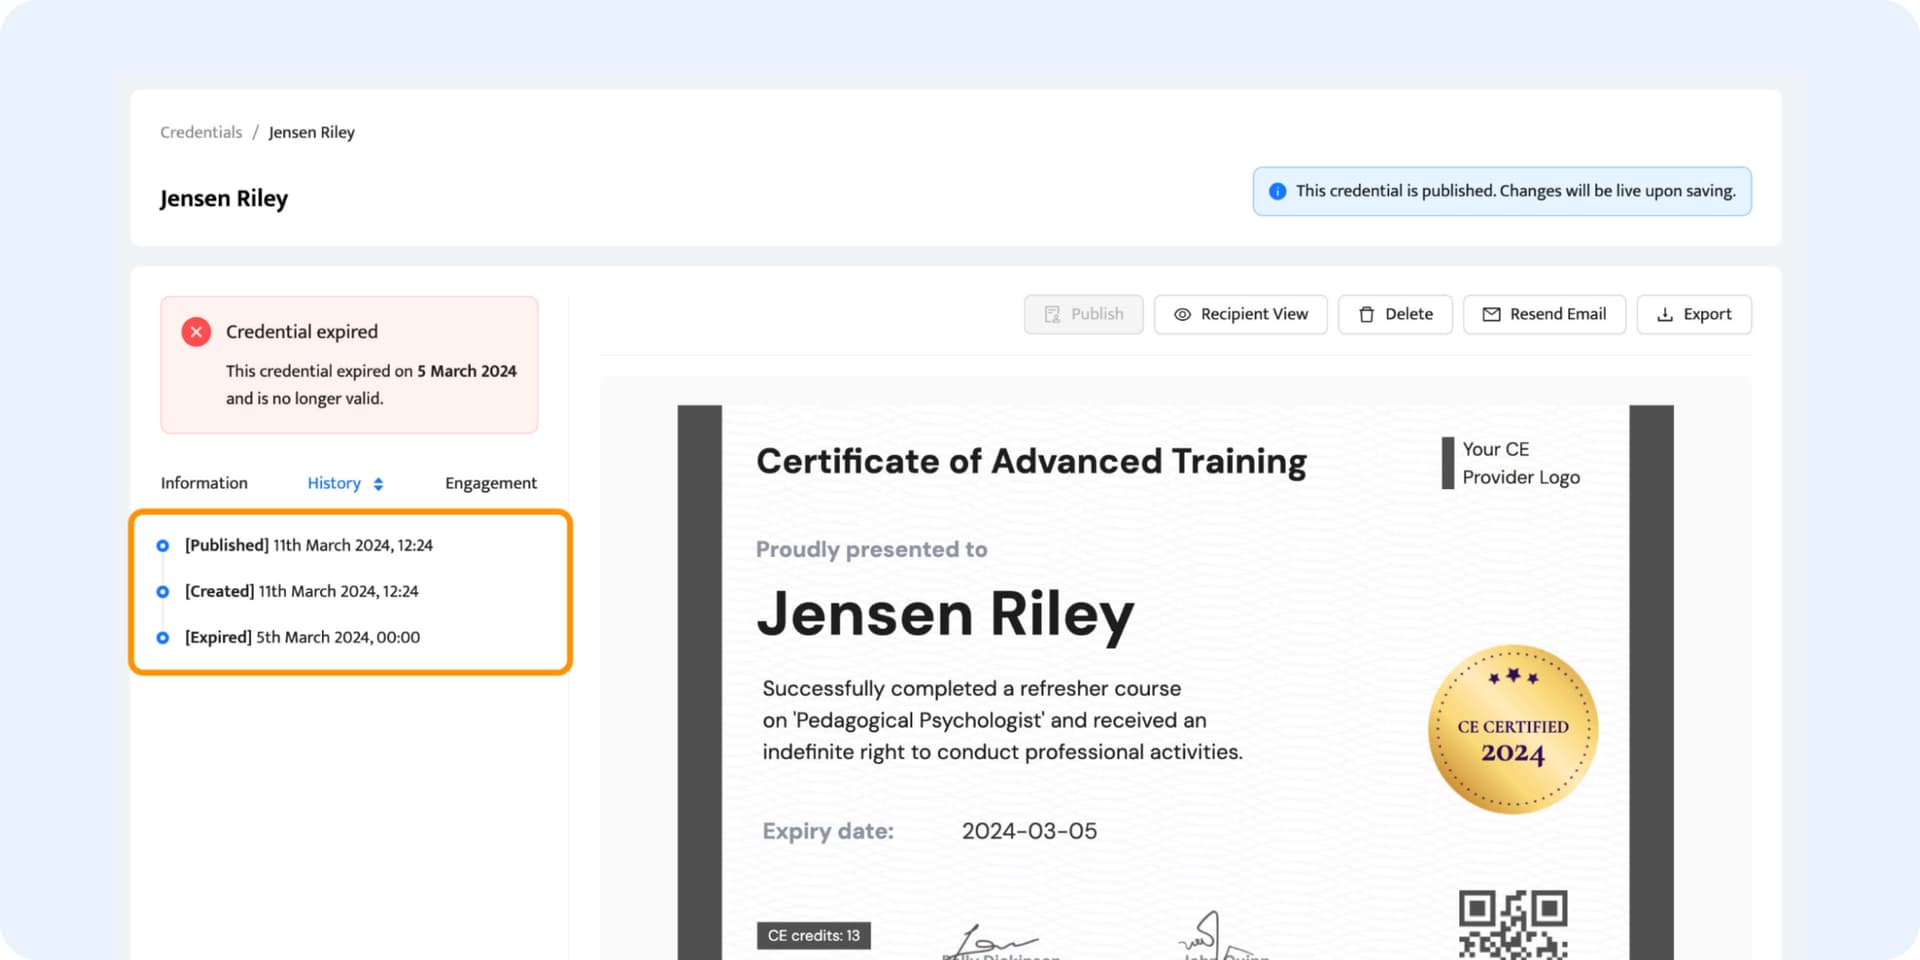
What happens if your certificate expires and credential is no longer available? Your recipients will get notifications in their emails. Further, the document can no longer be downloaded or shared via the recipient’s wallet. Also, anyone who clicks the link with the credential will see the red banner with the information that the credential is no valid anymore.
All of these safety measures make it impossible to legitimize with an invalid credential.
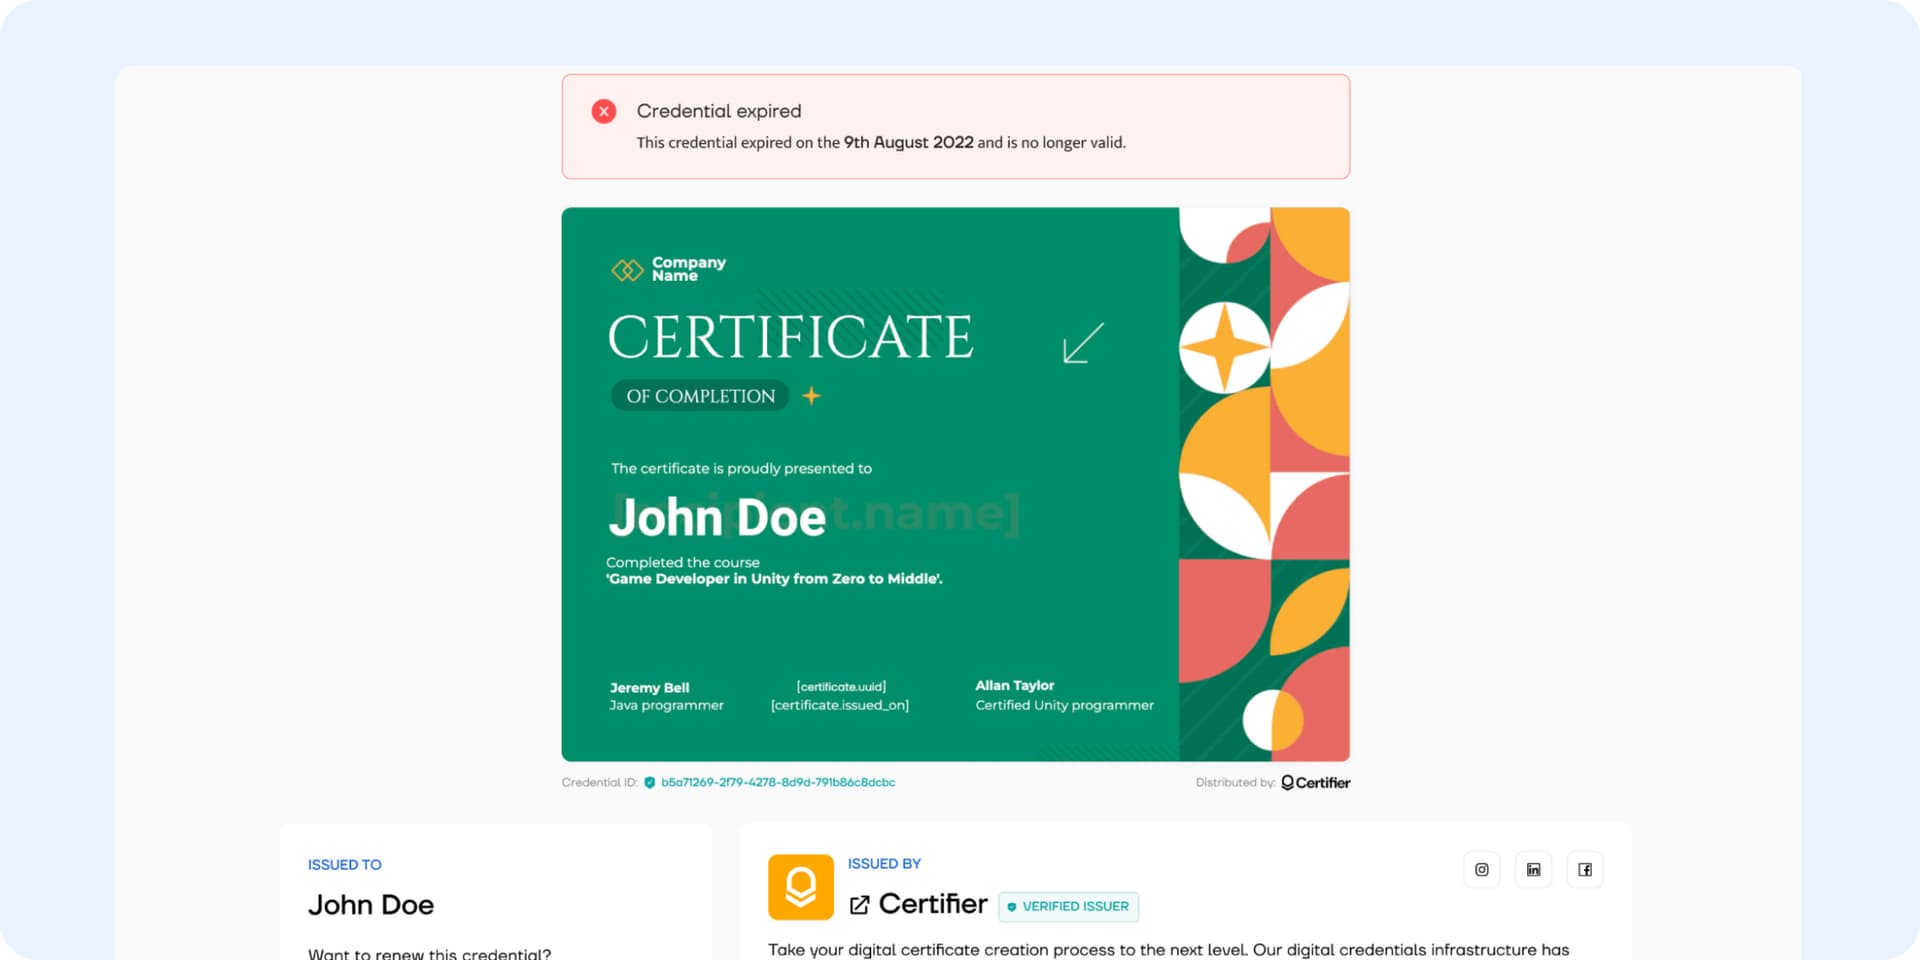
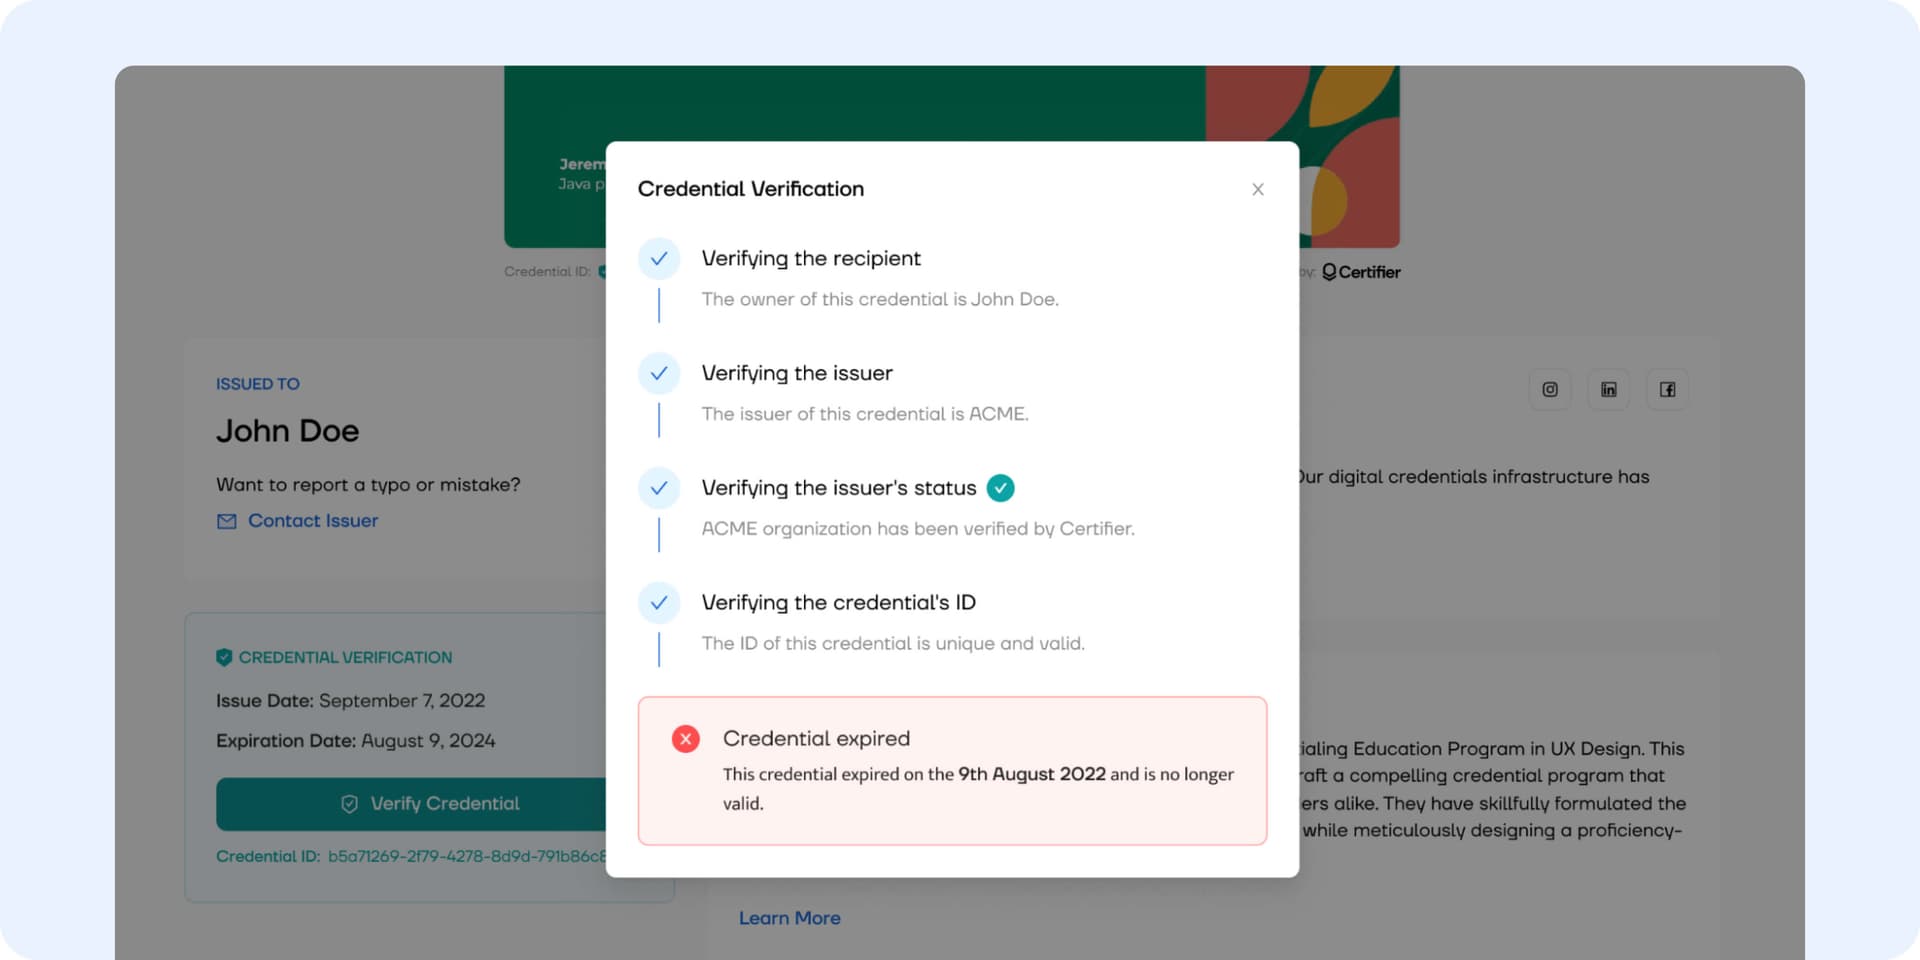
An icon Contact Issuer appears under the recipient's name. In one click, the recipient can inform the issuer that they want to renew their credentials. It is very handy to, for example, send new course offerings. Also, the fact that the credential has expired will be visible after clicking the Verify Credential section, which gives the viewer a transparent view into the whole credential timeline.
As an issuer, you can also see the information that the credential has expired via the Credentials tab (next to the expired credential you will see a new status icon – a red clock). Using the filters, you can easily filter out credentials that are expired and see only those.
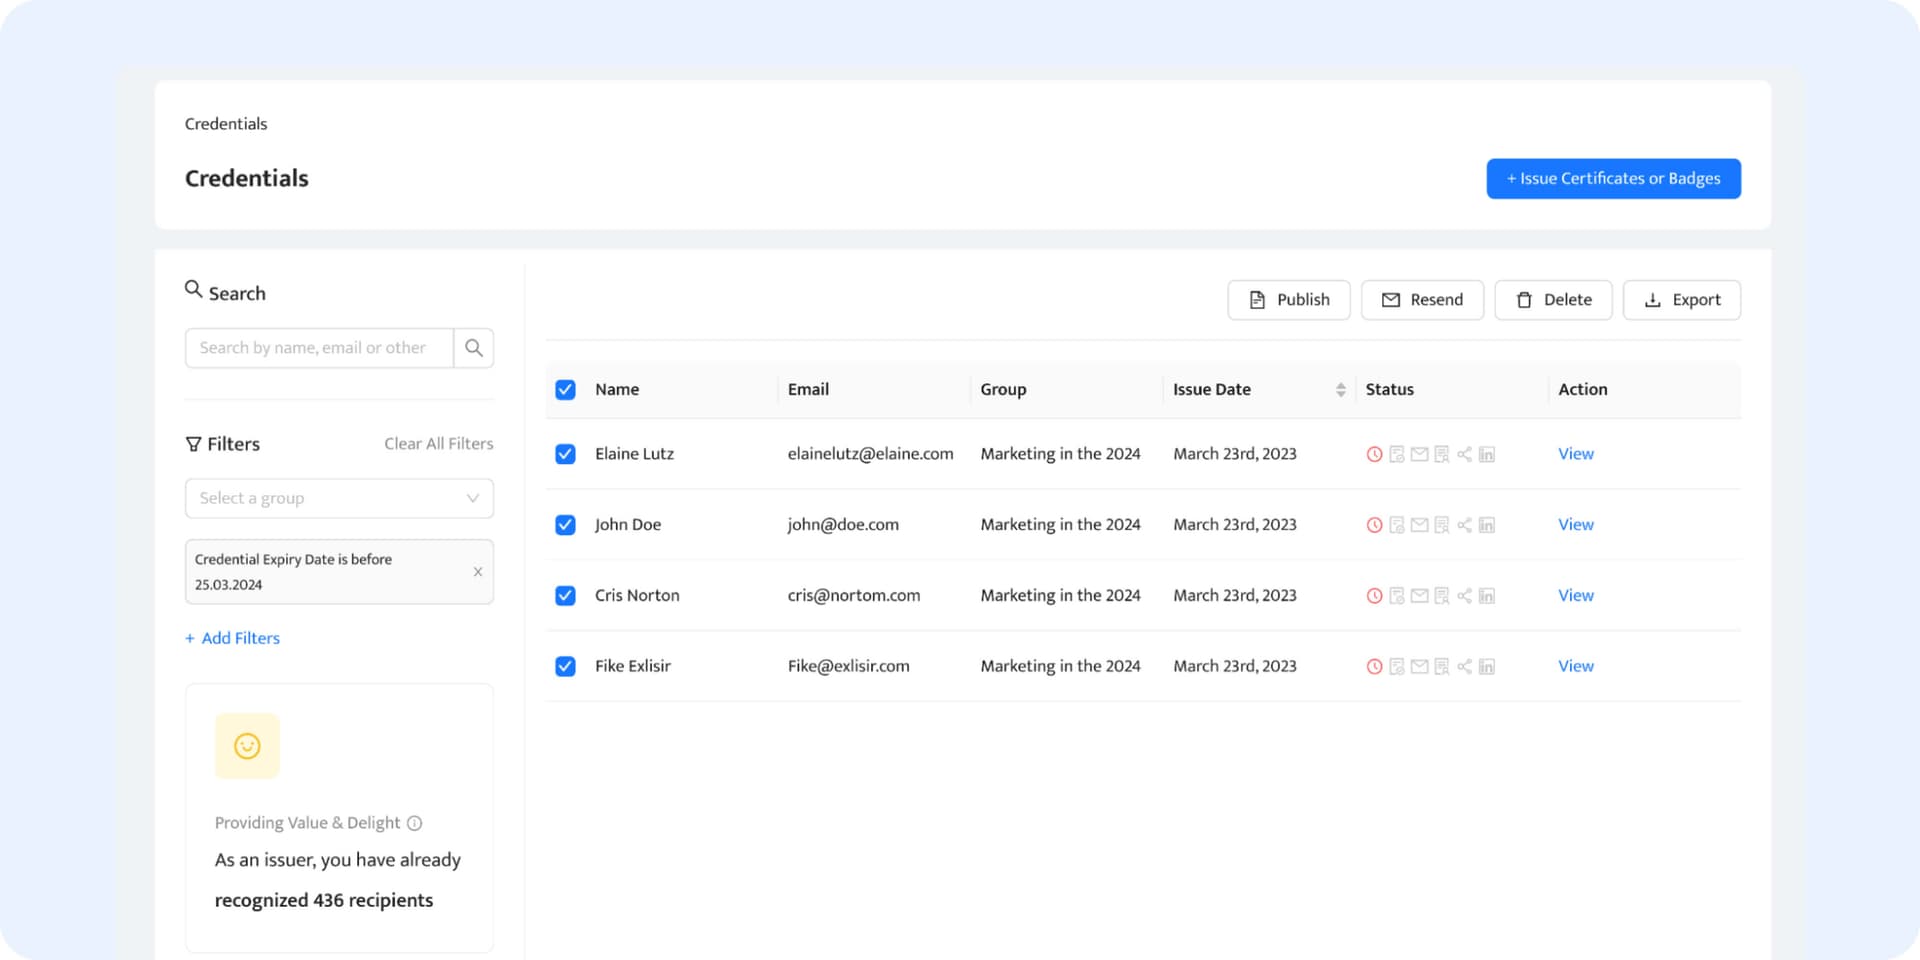
Click the View to see the details and the whole credential history. Using that feature, you can manage all the credentials and change certificate expiration date more easily. Update the date from there or via the Groups tab and Info & Appearance settings
Do you want to extend certificate expiration date to the already-issued credentials? If you wish any credential to expire sooner (or later), you can set up a unique expiry date for a particular recipient. Go to the Credentials tab, choose View next to the recipient to which you want to change certificate expiration date, and set up a separate date.
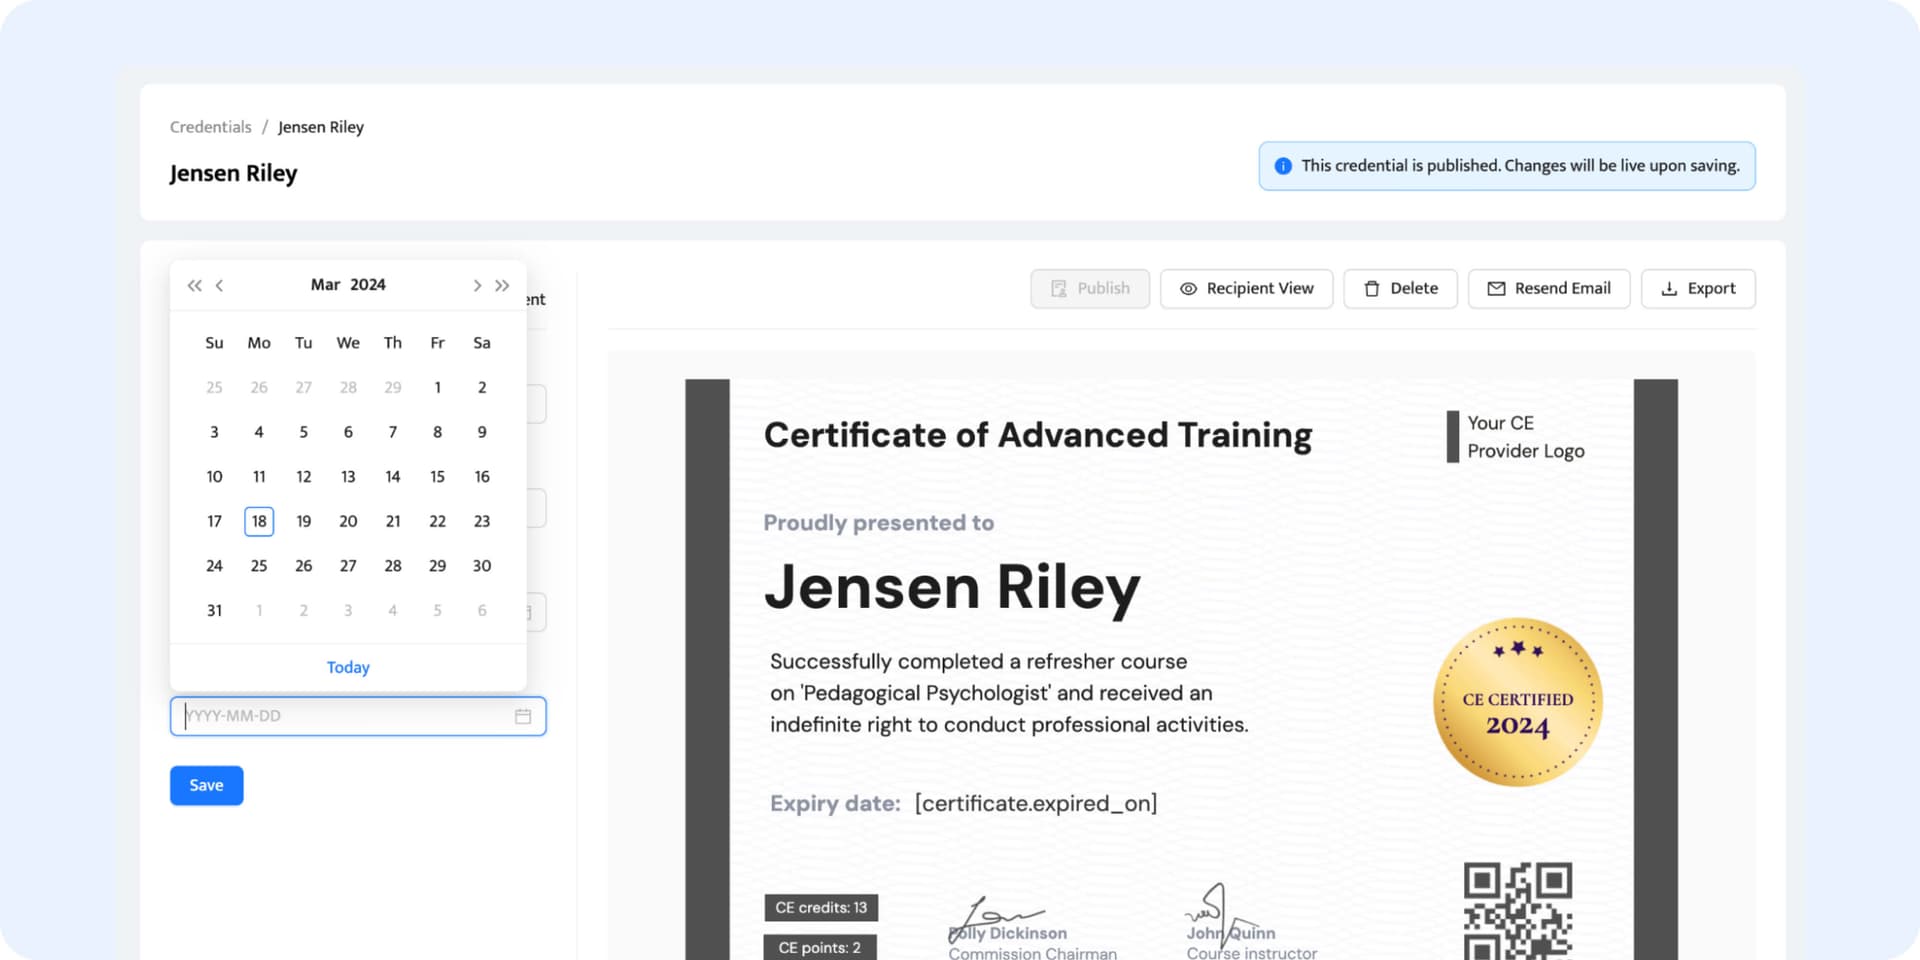
Please note: You can change the certificate expiration date anytime you want, even if the credential has already expired.
It's easy to manage certification expiration date with Certifier
The best tool to create and send certificates! Easy to use, user-friendly for both sender and receiver, allows sharing to social media... The analytics give great insights...

Karolin Zeugträger
Head of Impact Academy
Helpful for issuing a large amount of certificates easily and efficiently. Simple to use. Lots of templates and attributes options that simplify the process.

Nazariy Kovalyuk
Intern
Intuitive design creators, similar to Canva. Groups issuing and template on Upload page are straightforward and helpful. The free plan is generous for badging/certificate tools.

Ian Matthews
Instructional Designer
Use certificate expiration date and make them exclusive
Your courses offer up-to-date knowledge? A limited time validity can make them even more valuable! Upgrade your certificates with Certifier's user-friendly maker and manage expiration dates with ease. Join Certifier to see the impact of expiring credentials firsthand!
Certifier is the best certificate software with an expiration date creator
Certificate expiration date in a full control
With Certifier, you have the power to set and adjust the certification expiration date. Whether it's a certificate for a short course or for a multi-year program, you decide how long each credential remains valid. You can always get back and change certificate expiration date (even if the credential has been issued).
Direct editable email reminders
Put an end to manual tracking and reminders. Our platform sends out customizable email notifications for credential expiration and renewal. Your recipients get a reminder two weeks before a credential expires and then once again – when it runs out. These emails are fully customizable. You can change the message and its look to maintain a unified look while automating.
Transparency in certification
Every credential tells a story. With Certifier, the history of each certificate is an open book. Viewers can validate the credential directly from the recipient’s wallet and see its expiration status. And the issuers can do the same via the management hub. All of these provide transparency and trust in your certification process. Become a reliable certificate issuer.
Customizable recipient’s wallet
The recipient’s wallet is so much more than just a place to store digital credentials. Certifier allows for a high degree of customization – and enables you to manage skill tags or share buttons. From the recipient's view, they can see the credentials history, check their validation, and even report a problem (that you can manage right from the Certifier dashboard).
Fast certificate generation
With Certifier, you can generate and issue credentials in minutes. Use dynamic attributes to personalize content for each recipient automatically. With our streamlined process, you can create and distribute badges and certificates quickly (without sacrificing quality!). Get to know the efficiency key to meeting the expectations of modern learners and professionals.
User-friendly creation process
We believe that powerful tools can be simple to use. Certifier drag-and-drop builder makes it easy for anyone to design digital credentials. With our certificate system, you will feel like a professional graphic designer. Choose the credential template, add or remove elements, change colors, and upload your own images. With a few clicks, your certificates are ready to send.
Reviews on G2 rank Certifier as the #1 certificate generator


Did you know?
Certifier is not only a certificate tool, it’s the whole management hub for your certification. Along with managing certificate expiration dates, you can set up and customize email notifications and reminders there too. Yes, we're talking about those messages that gently nudge recipients about their certification status. It works as your engagement tool that boosts revenue stream and retention! Want to see it in action?
Extend certificate expiration date anytime
It's no longer necessary to update the credentials over and over again. With Certifier, you can manage certificate expiration dates.

Check how easy it is to change certificate expiration date on your credentials
Configure expiration certificate format on a group level
Set the certificate expiration date for all credentials in a group at once. If you have a batch of certifications that should all expire together, like for a specific course or training – it’s a perfect option. It keeps everything organized and maintains consistency across the board. How to handle it? Go to the Groups tab. Select the group of credential you want to change the date for, then edit it within the Info & Appearance settings.
Remind users to renew their certification before it expires
Automatically shoot out email reminders to credential holders before their certification expires. Such a nudge helps them remember to renew on time and keeps their qualifications up-to-date. Certifier handles all of that for you. Make the emails even more effective and personalize the message and its branding. It’s a simple, yet effective trick to help your recipients stay motivated. And, renew of credentials brings you more money.
Add the “certification expiry date” dynamic attribute
Incorporate the "expiry date" directly into your certificate as a dynamic attribute. It’s a small value data box that you put on your credential, and its content automatically fills up with data. It makes the expiration date clear and visible so holders and verifiers can see when a certification needs to be renewed. Also, use the credential ID attribute. Thus, someone who has unauthorized access to the credential will not be able to use it.
Set strategic expiration setting to remain course valuable
When setting a certification expiry date, it's key to think about what's usual for that industry. In fast-moving areas like tech and healthcare, credentials should have shorter lifespans to keep everyone up-to-date. But in areas where basic knowledge doesn't change much, it makes sense to let credentials last longer. As a result, the credential remains meaningful and useful for the individual and for the industry as a whole.
Add event link to the expiration date email and lead users to take action
Make sure you reach out to your customers every chance you get. Spice up your expiration reminder emails and include a link to an event or a page with an updated learning module, after which they can renew their certification. This direct call to action makes the renewal process smooth and encourages the recipients to take immediate action. Certifier also provides features to customize and adjust the email templates however you want to. So there’s no limit here.
Upload recipients’ data with the spreadsheet for the full experience
For a truly personalized and impactful certification experience, the power lies in the details. Create a spreadsheet with the recipients data (or pull it out from, e.g., CRM) and upload it to the Certifier platform. With this practice, you can generate even hundreds of credentials at once, tailored to each recipient's unique needs. Automate the whole process – and send emails with certification status to all your learners at once. It's all automated.
Would you like to ask a question?
Setting and updating certificate expiration dates can be a bit tricky. At Certifier, we understand the importance of clear, accessible information. That's why we've compiled a list of frequently asked questions to help you better understand our platform's capabilities.
Explore more features that improve certification with Certifier
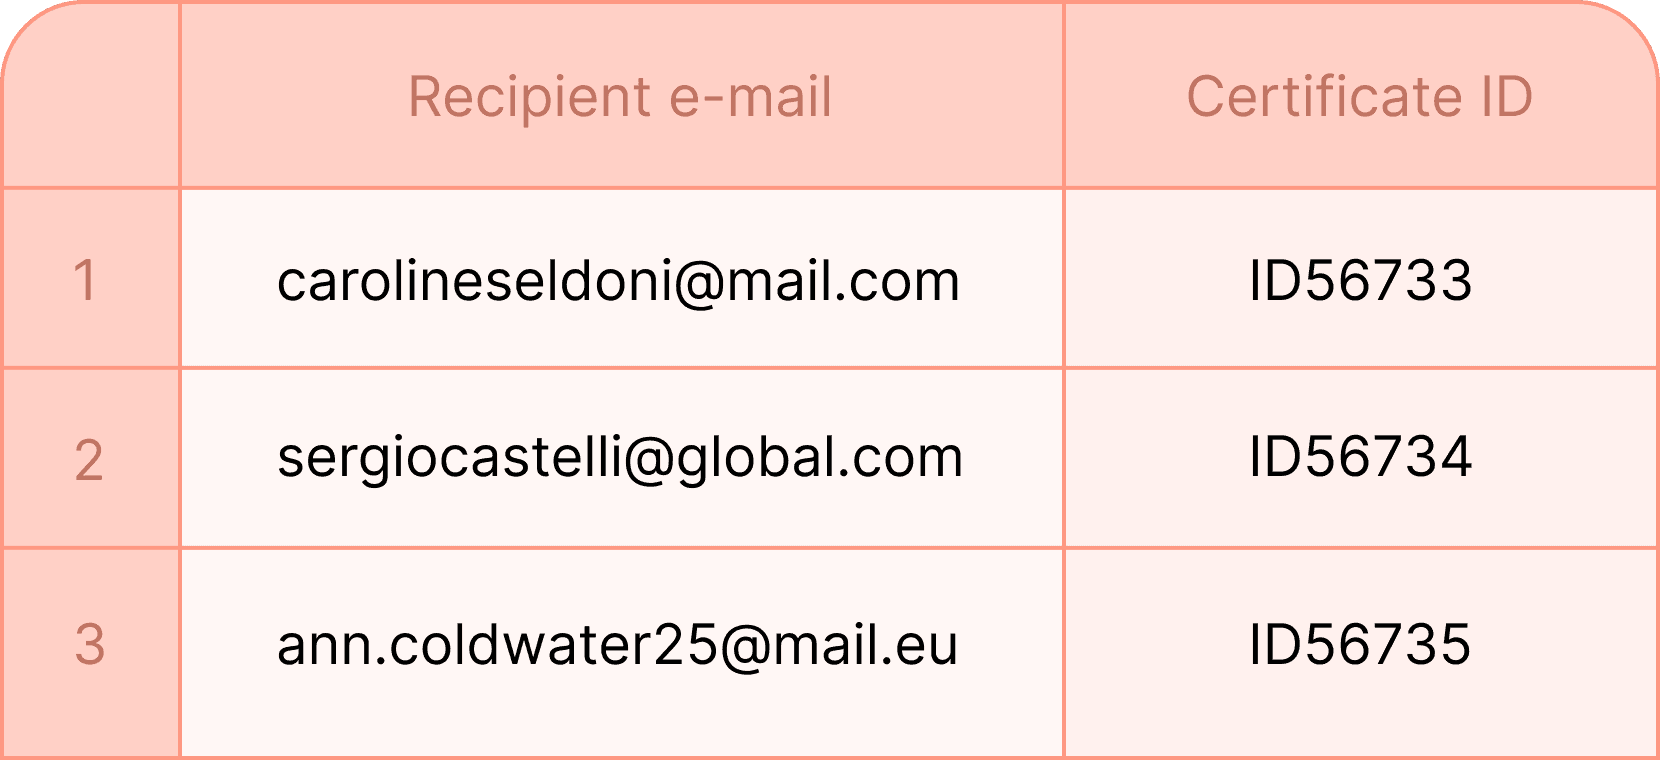
Generate certificates in bulk via spreadsheet
No more slow, manual certificate creation. Generate hundreds of certificates from a Google spreadsheet or MS Excel.
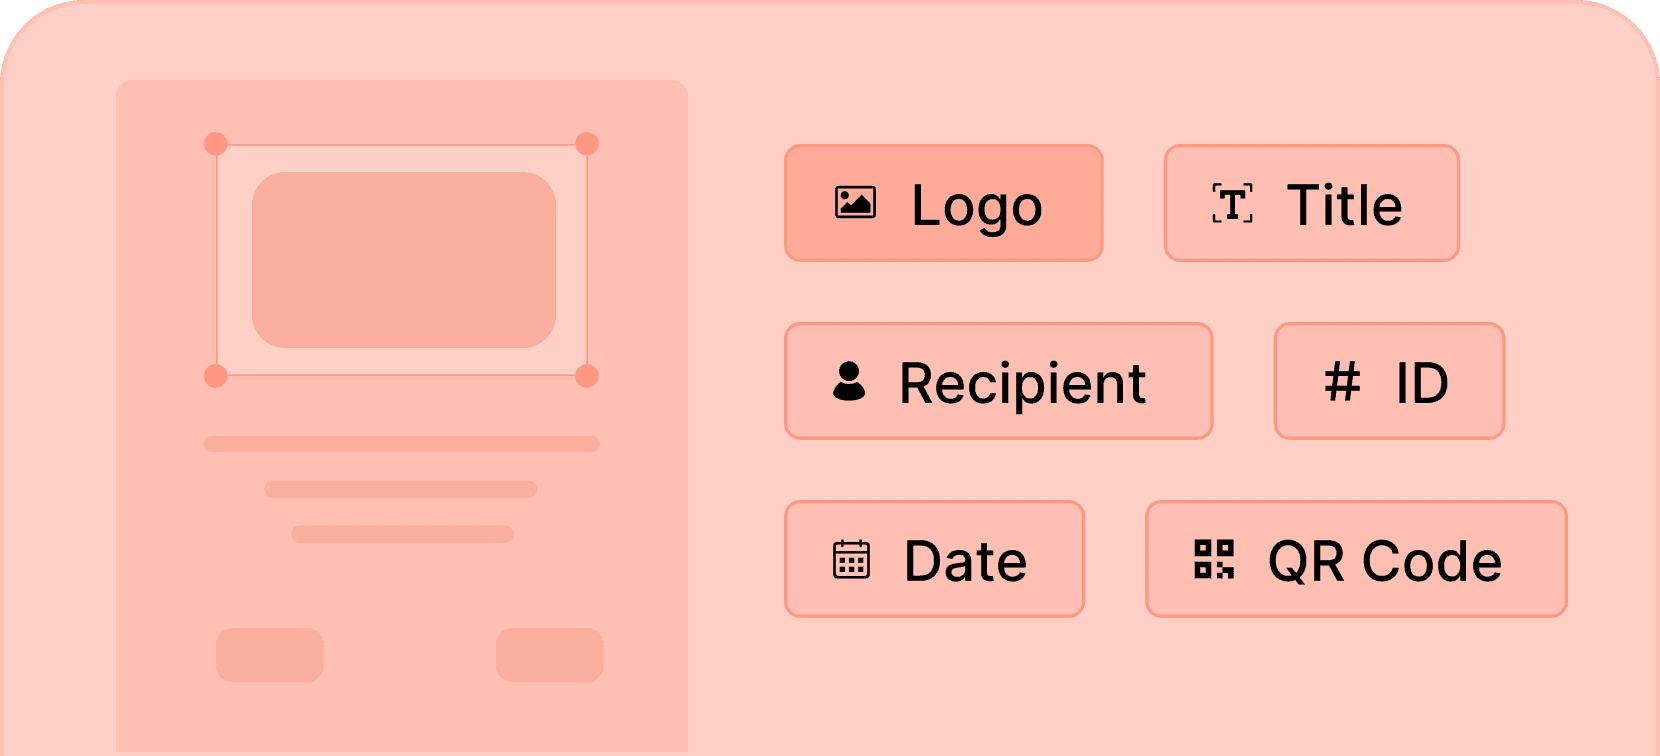
Personalize certificates with dynamic attributes
Personalize multiple certificates at once with unique information like the recipient’s name or grades automatically.
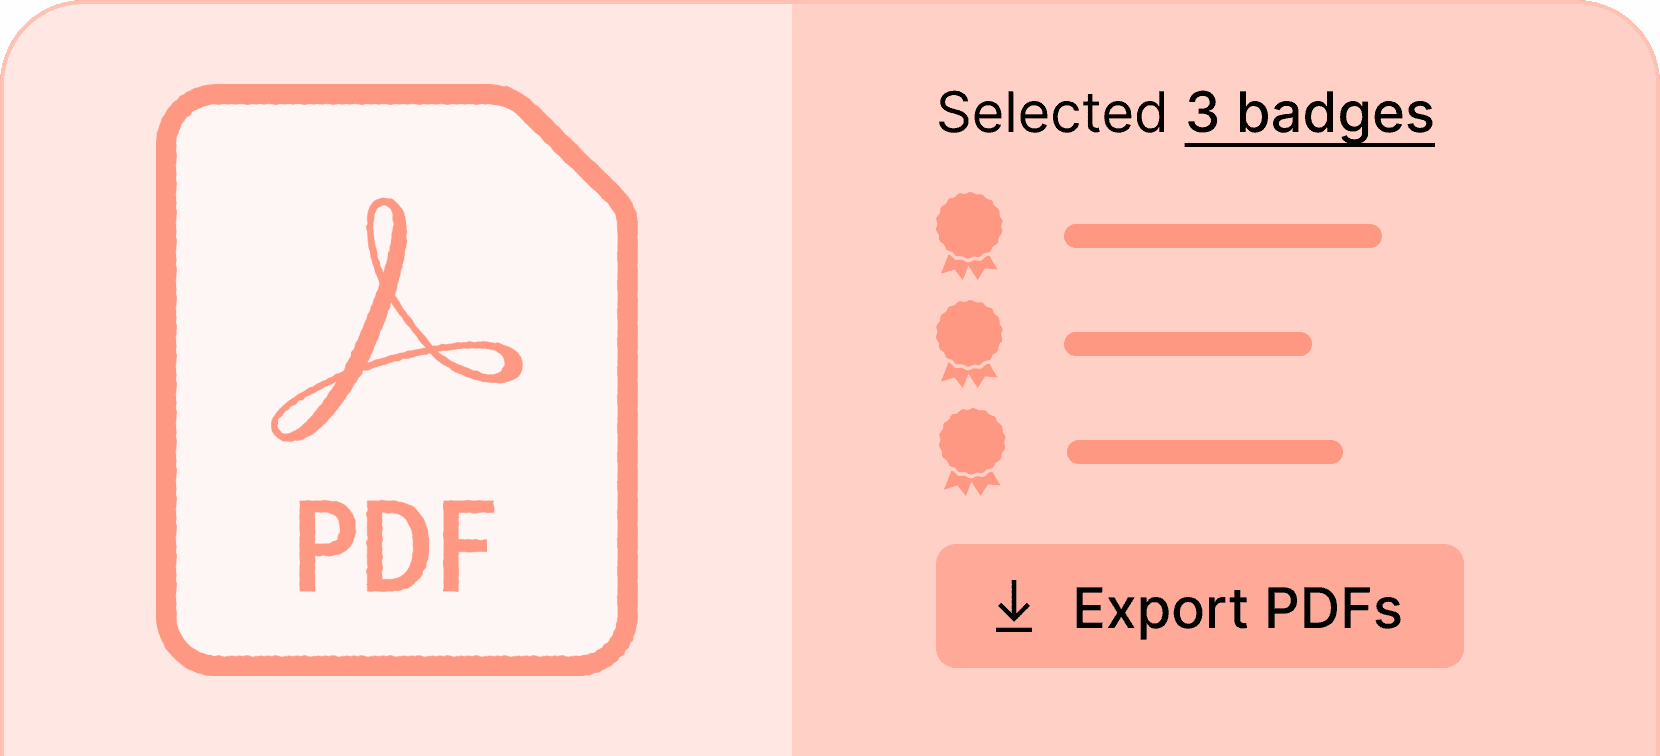
Export & download credentials in PDF
Allow your recipients to one-click export and download their credentials in PDF format for easy sharing and printing.
Set and change certificate expiration date with a click
Work smarter not harder. Managing certificate expiration dates in the Certifier's dashboard eliminates the need to manually update credentials. Simple as pie.