Trusted by:
Updated: September 22, 2025
12 min read
How to Issue Certificates With Google Sheets Using Zapier and Certifier
Generating certificates in bulk should be as easy as sending emails. Turns out, it is even easier! In this blog post, we will show you how to generate certificates with data from Google Sheets, or any other spreadsheet in minutes using Zapier.
Google Sheets is one of the easiest ways to manage your data—and now Certifier makes turning that data into certificates just as simple.
You can either use the user-friendly, native Google Sheets integration with Certifier to instantly issue certificates whenever a new row is added or connect Google Sheets to Certifier with a Zapier workflow for more advanced automations.
Both options let you generate certificates in bulk, save hours of manual work and start automating your credentialing process in just minutes. In this guide, we’ll walk you through both methods so you can choose the one that fits your workflow best.
Do you want to generate certificates via Excel? Here's a detailed guide that helps you: How to Create Certificates from Google Sheets and Excel? Or watch this video instead:
How do Zapier integrations work?
Zapier lets you connect Certifier with thousands of the most popular apps to automate your certification workflow. Among the available apps, one can find a lot of popular apps like Kajabi, Thinkific, Teachable, TalentLMS, Google Forms, Google Spreadsheet, Typeform, Survey monkey, and many others. Learn more about the tools you you can integrate with Certifier via Zapier.
Zapier lets you set up automated workflows called “Zaps” that pass information between two or more apps easily and quickly – no code required. A Zap consists of a Trigger and an Action. A trigger is an event that starts a Zap, an action is an event a Zap performs.
Let’s use an example:
You would like to automatically issue certificates via Certifier when a new row is added to your Google Spreadsheet. Using this example, a new row in Google Spreadsheet would be a trigger, while certificate issuance would be an action performed by a Zap.
What do you need to set up this integration?
free Zapier account
free Certifier account (with at least one group)
free Google Sheet account
Issue certificates from Google Sheets automatically with a native Certifier integration
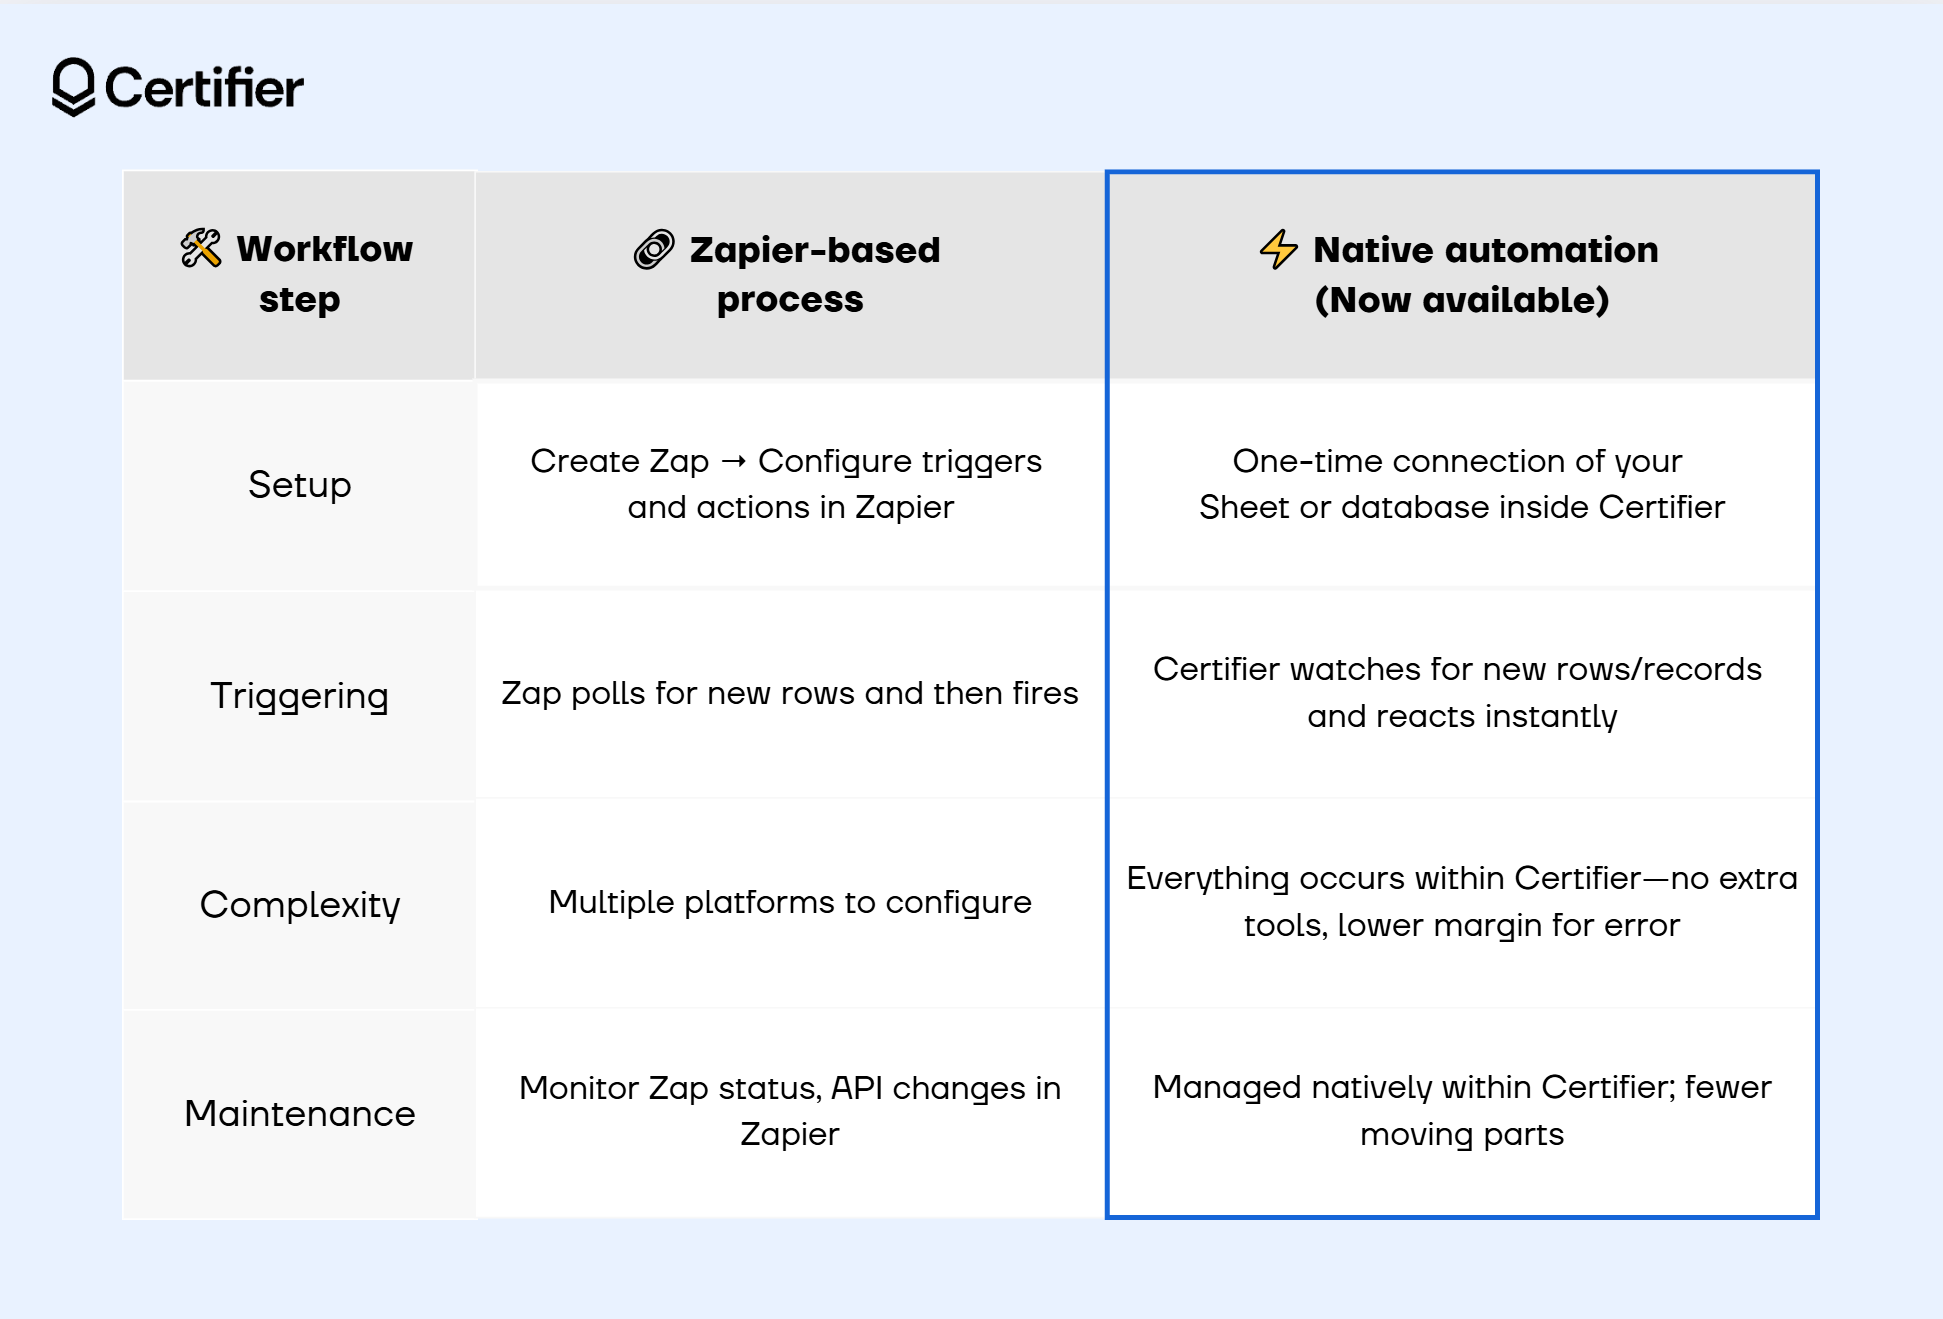
Think you need Zapier to automate certificates? Not anymore. If you don’t have a Zapier account, want to avoid extra costs or simply just prefer a one-click setup, Certifier’s native Google Sheets integration is your shortcut.
With this option, Certifier watches your spreadsheet directly. The moment a new row is added–from Google Forms, Typeform, SurveyMonkey or any other connected tool–a certificate is issued and sent instantly. You get a straight path from data to delivery.
Why should you use native integrations?
Instant setup → Forget building Zaps or mapping various fields as Certifier connects to your Sheet once and does the rest automatically.
Rock-solid reliability → With no third-party middleware in the chain, there’s less that can break or delay your workflow.
Works with almost anything → If it can send data to supported tools, it can trigger your certificates without you being involved.
Zero context switching → Manage everything from one place, right inside Certifier so you never have to bounce between multiple dashboards.
Quick start: Connect Google Sheets to Certifier
Note: This is a quick overview. For a full, step-by-step walkthrough with screenshots, check out our detailed Knowledge Base guide.
Before you begin:
Copy our sample spreadsheet to get started faster.
It includes three helpful tabs:
Instructions & tips: Quick reminders for each step.
Input sheet: Where you can safely draft recipient data before going live.
Live sheet: The tab Certifier monitors to issue certificates.
Important: Start with the sample file or an empty spreadsheet. Add real recipient data only after you’ve set up and activated the automation. Otherwise, every existing row will trigger certificate issuance immediately.
Here are the steps you need to take to set up your Certifier + Google Sheets integration in minutes:
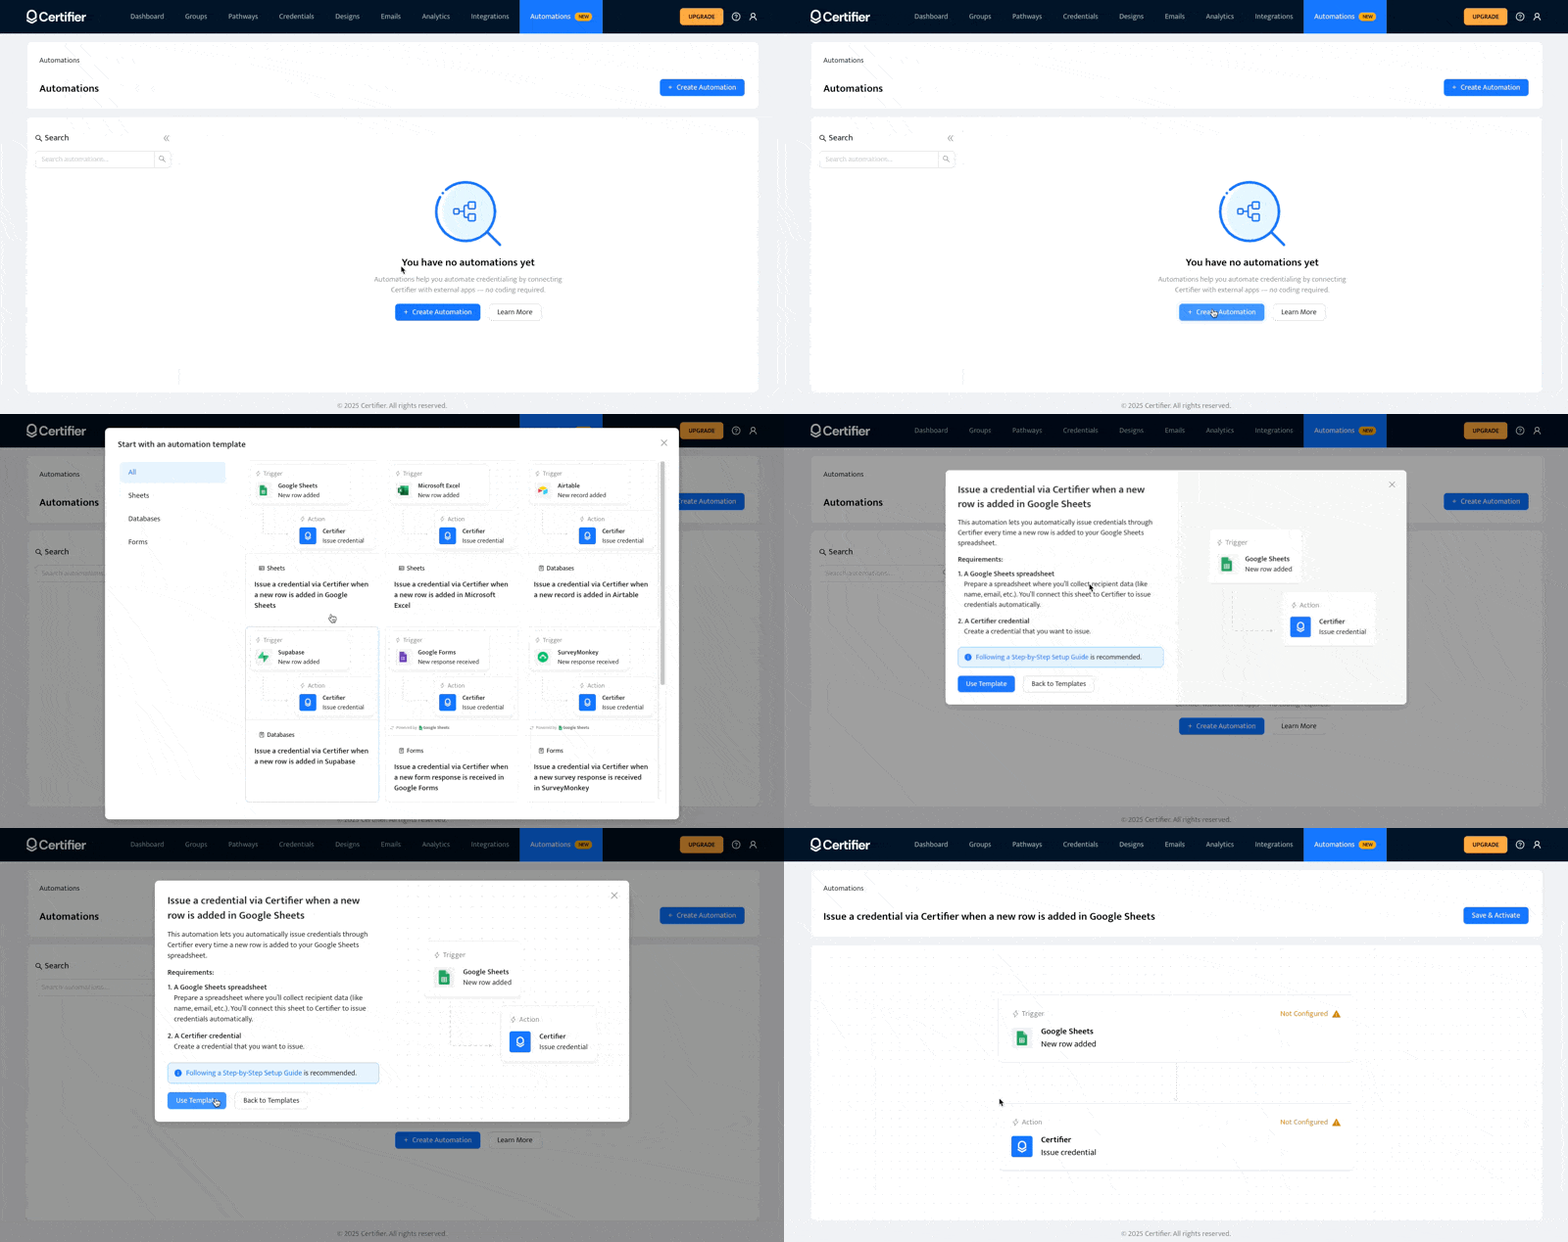
01 Create the automation
In Certifier, go to Automations → +Create Automation and select the Google Sheets template.
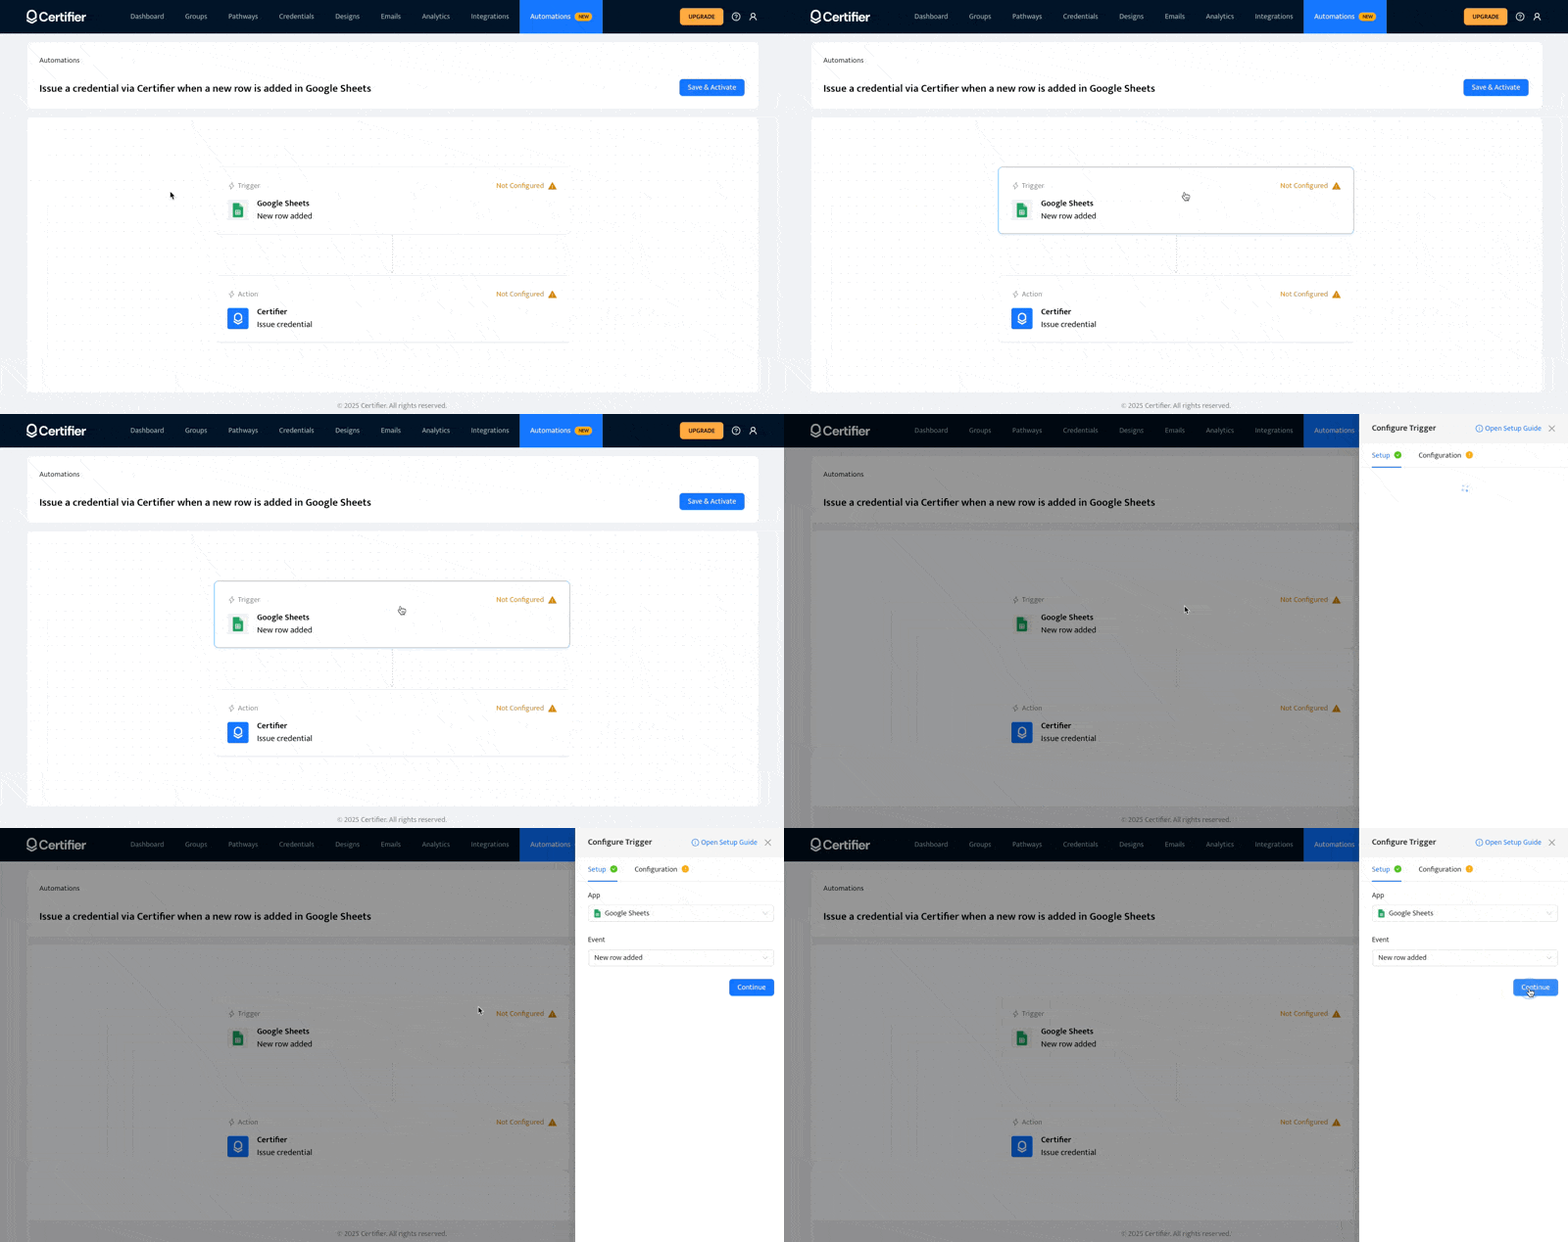
02 Configure the trigger
Click on the Trigger—it’s already preconfigured for you. Just press Continue, connect your Google account and select the spreadsheet and worksheet you want Certifier to monitor.
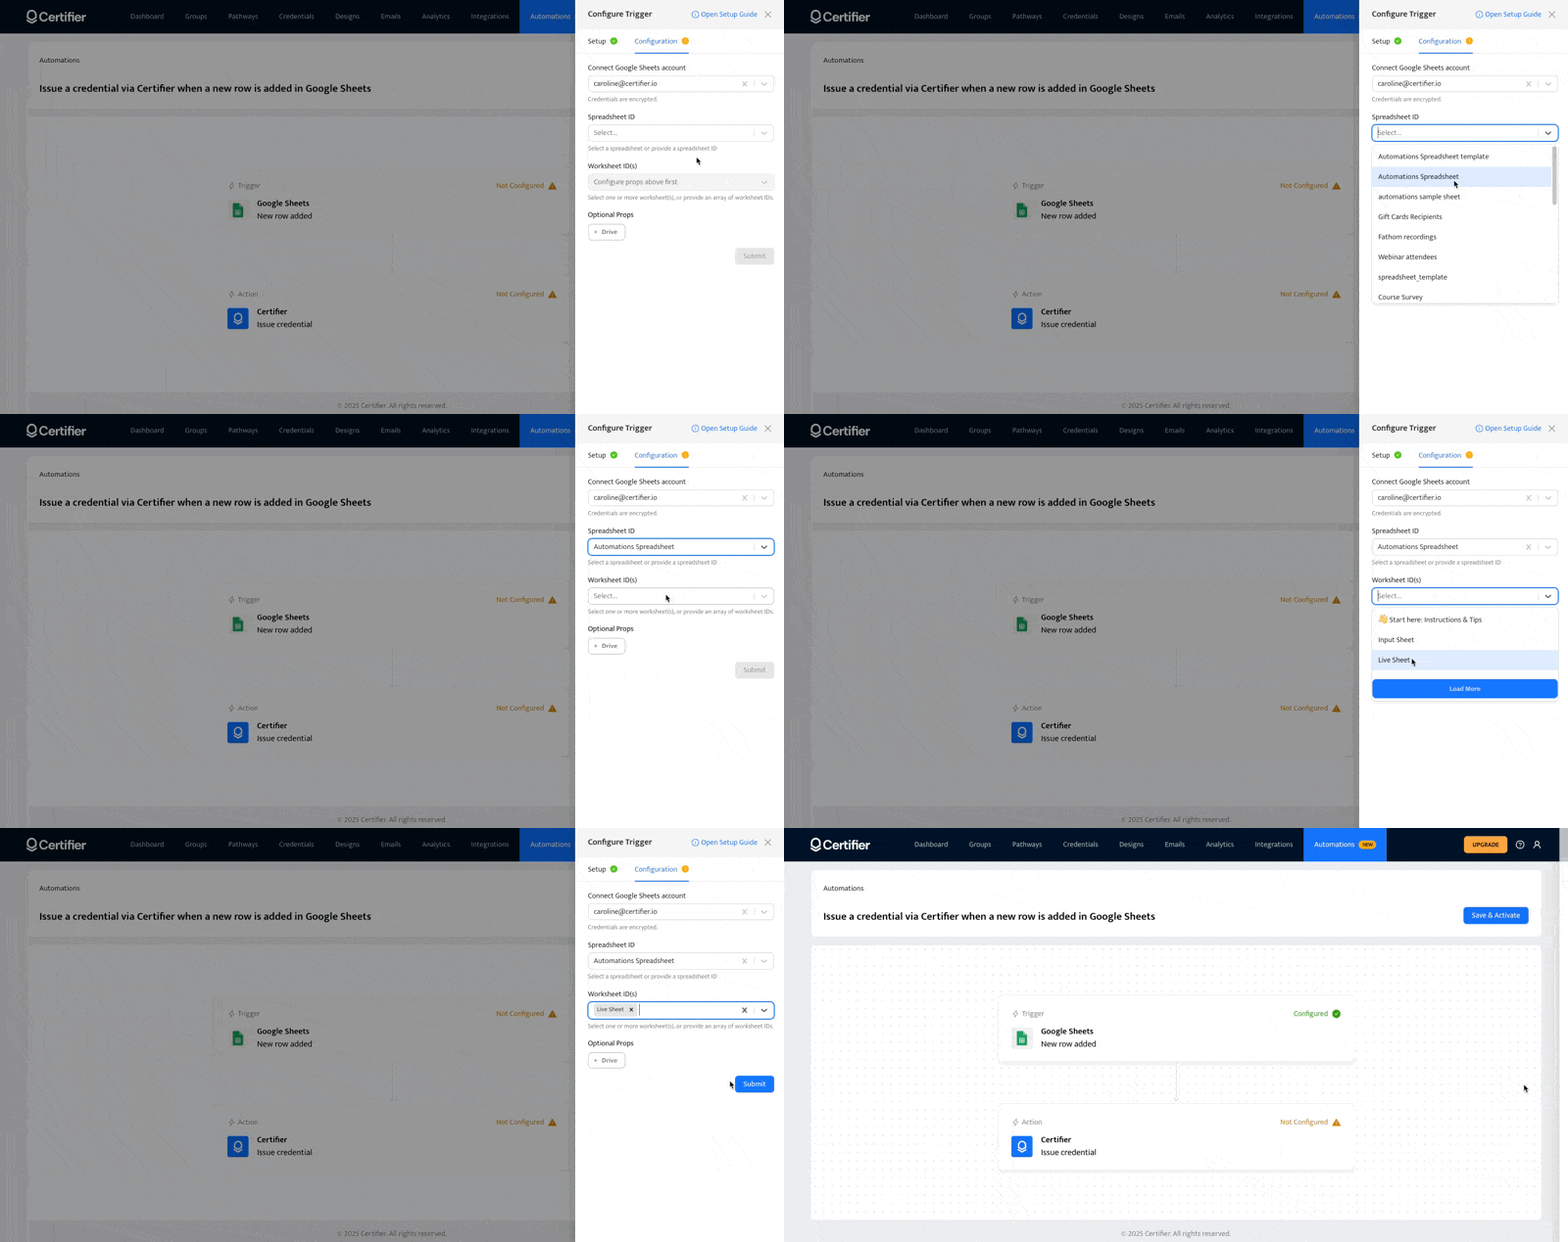
03 Connect your sheet
Sign in with your Google account, pick the spreadsheet and worksheet you want to use.
04 Map your data
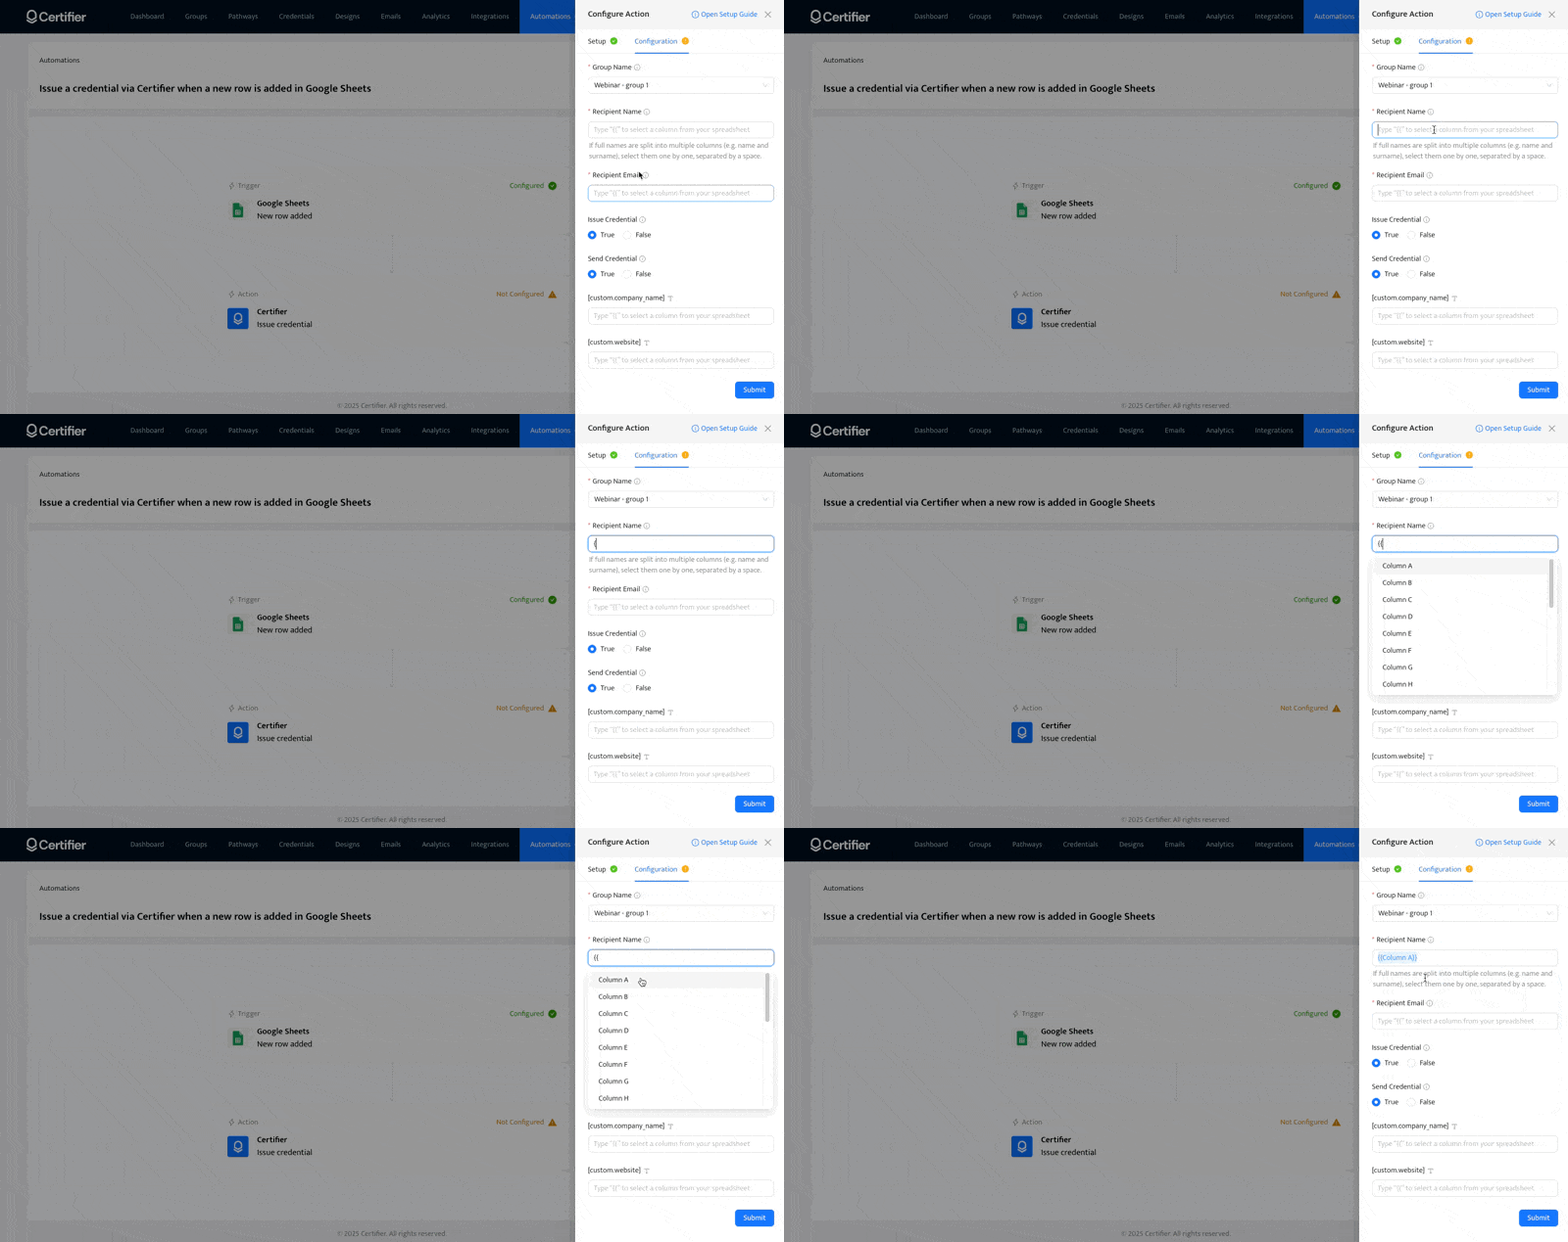
05 Activate and test
Save your automation, add a new row to your Sheet and watch a certificate issue instantly.
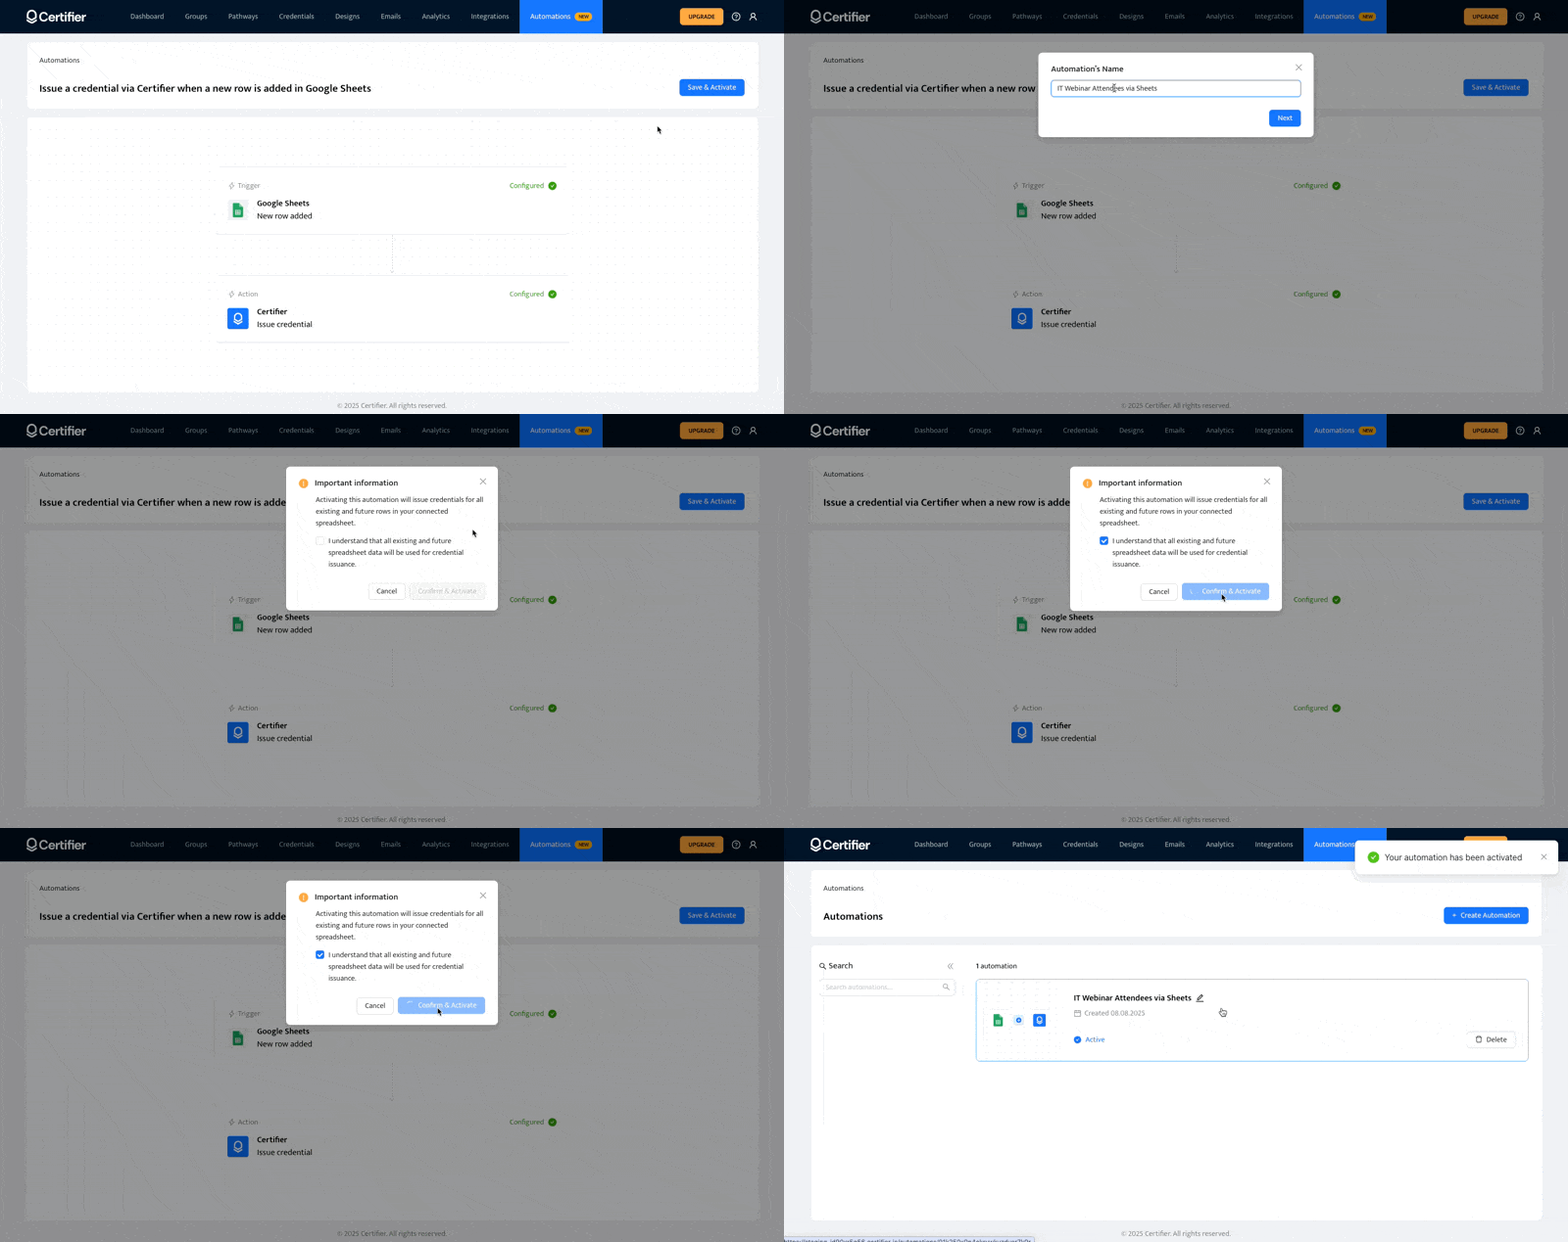
Once it’s active, Certifier handles everything automatically––without involving Zapier at all.
Tip: If it feels like too much, don’t worry. Our Knowledge Base guide walks you through every step with detailed screenshots, tips and troubleshooting help.
How to issue certificates with Google Sheets using Zapier and Certifier? Step-by-step tutorial.
Once you have signed up for Zapier, it is time to create your first Zap. In this article, we will explain how to set up an integration between Certifier and Google Spreadsheet via Zapier. The event “New Spreadsheet Row” in Google Spreadsheet will be used as a trigger, while the “Issue Credential” event in Certifier will be used as an action.
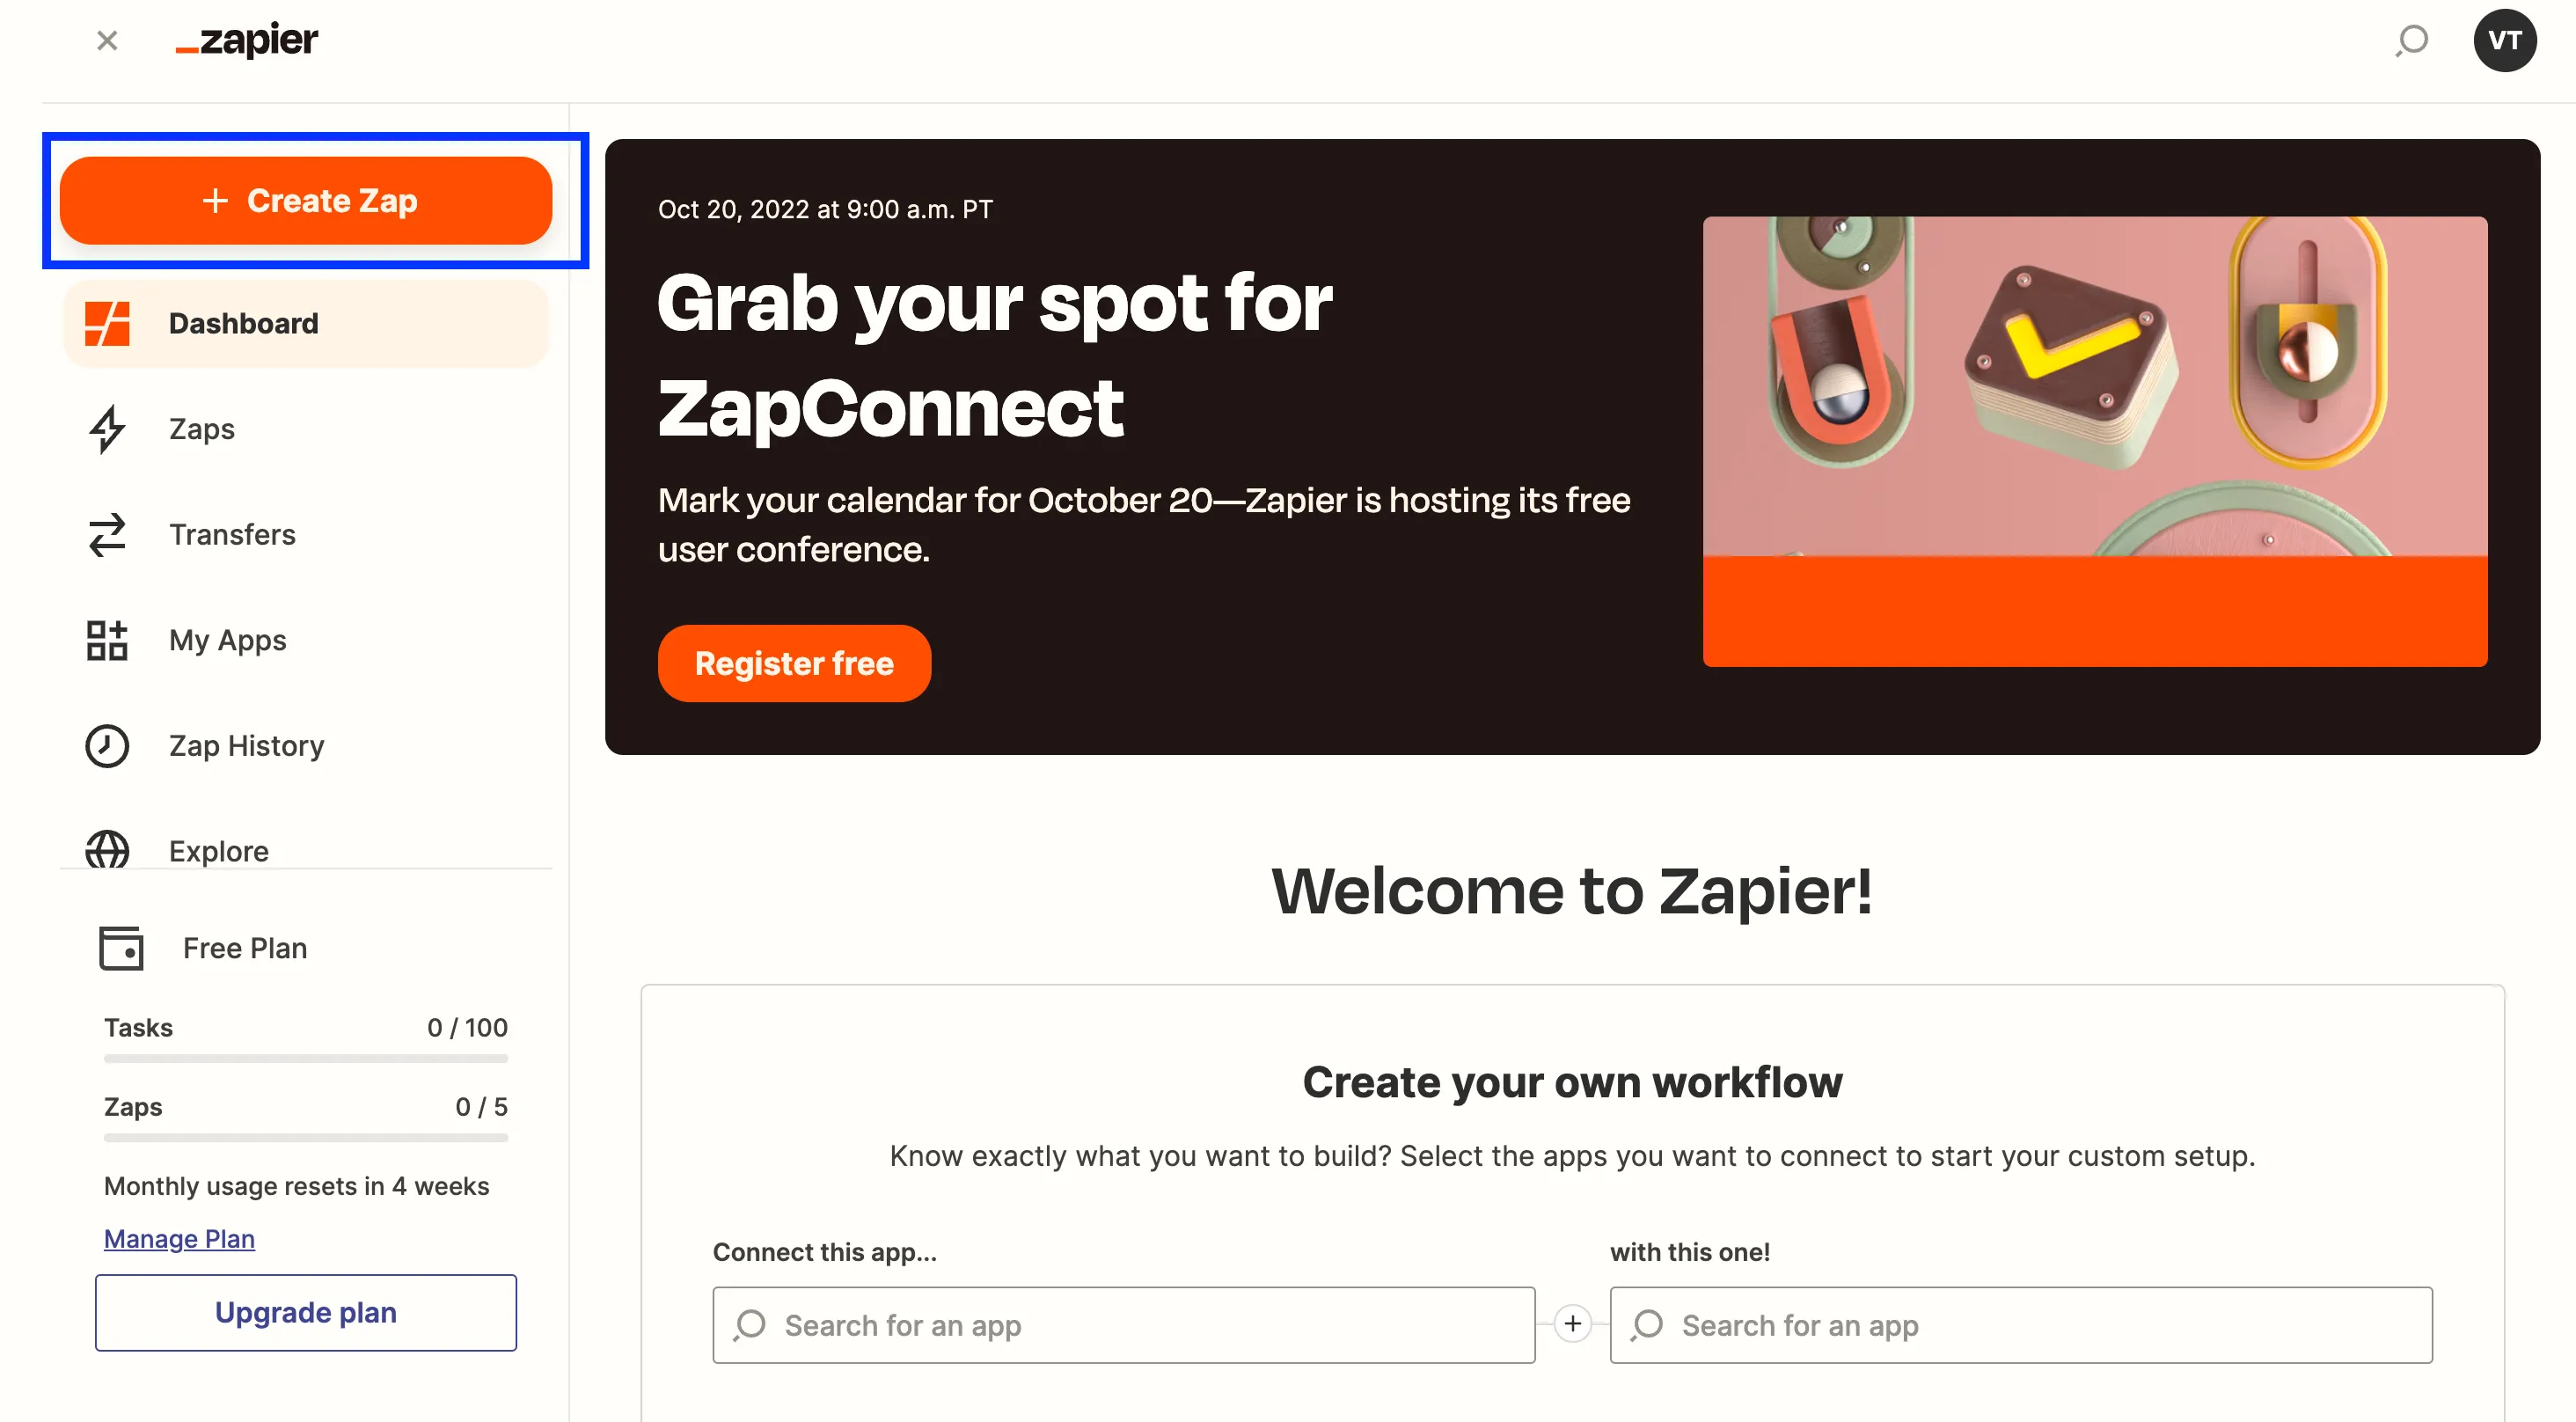
1. Log in to Zapier and press "Create Zap"
2. Start configuring a trigger
Select an app you want to use as a trigger – Google Spreadsheet;
Select the event that should perform the trigger – “New Spreadsheet Row”;
Press “Continue”.
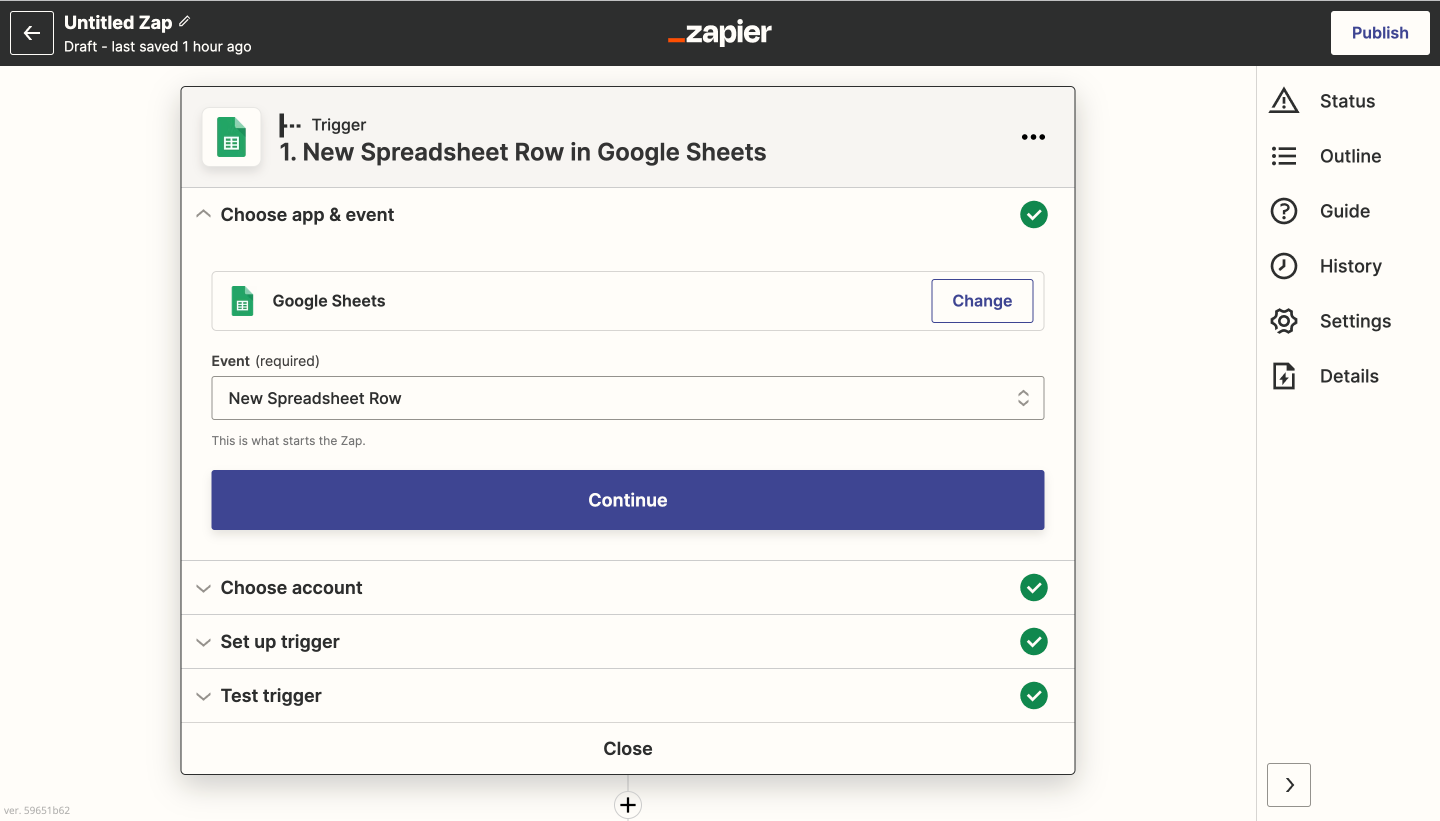
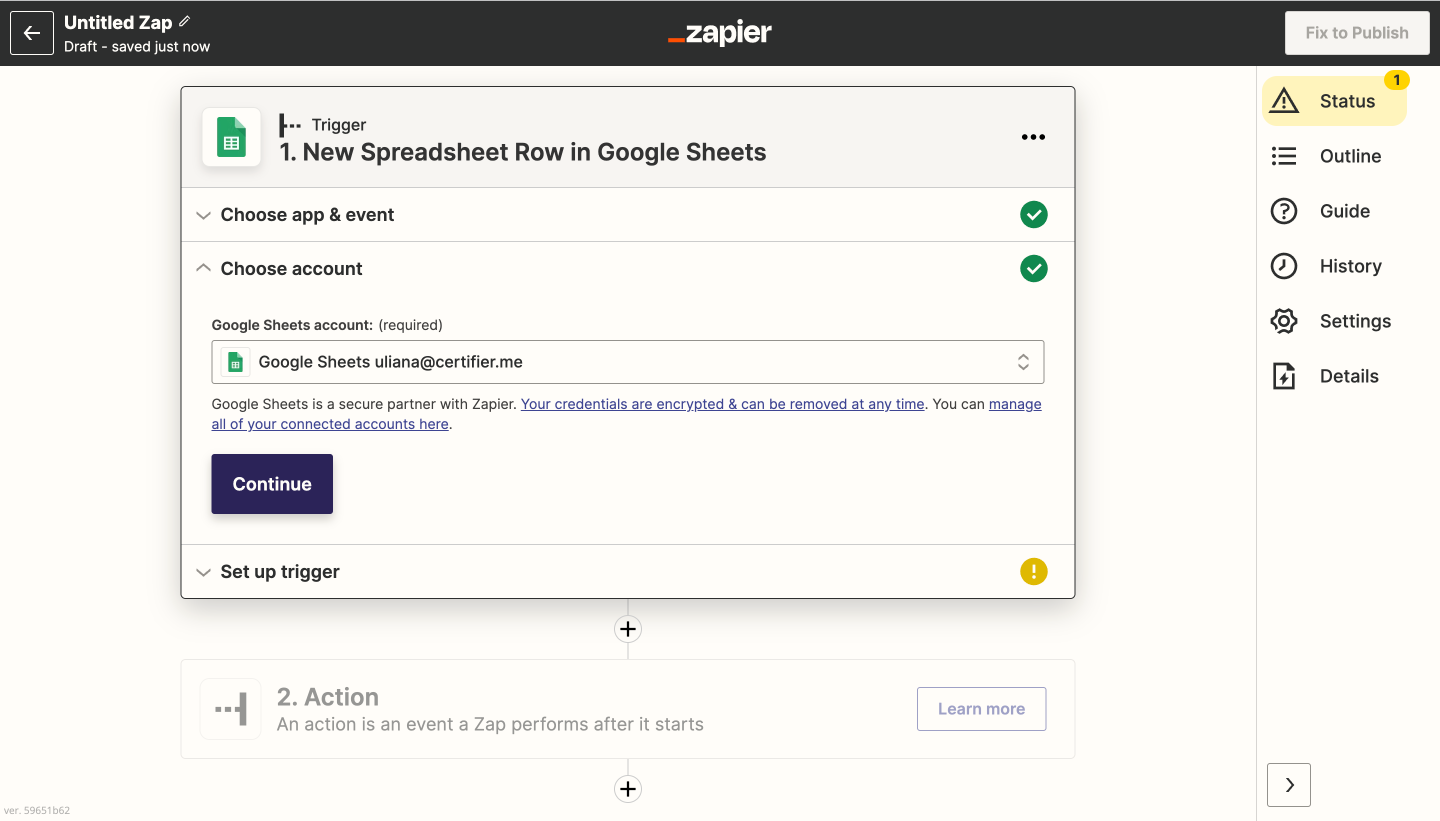
3. Choose the account you want to use for this automation and press “Continue”
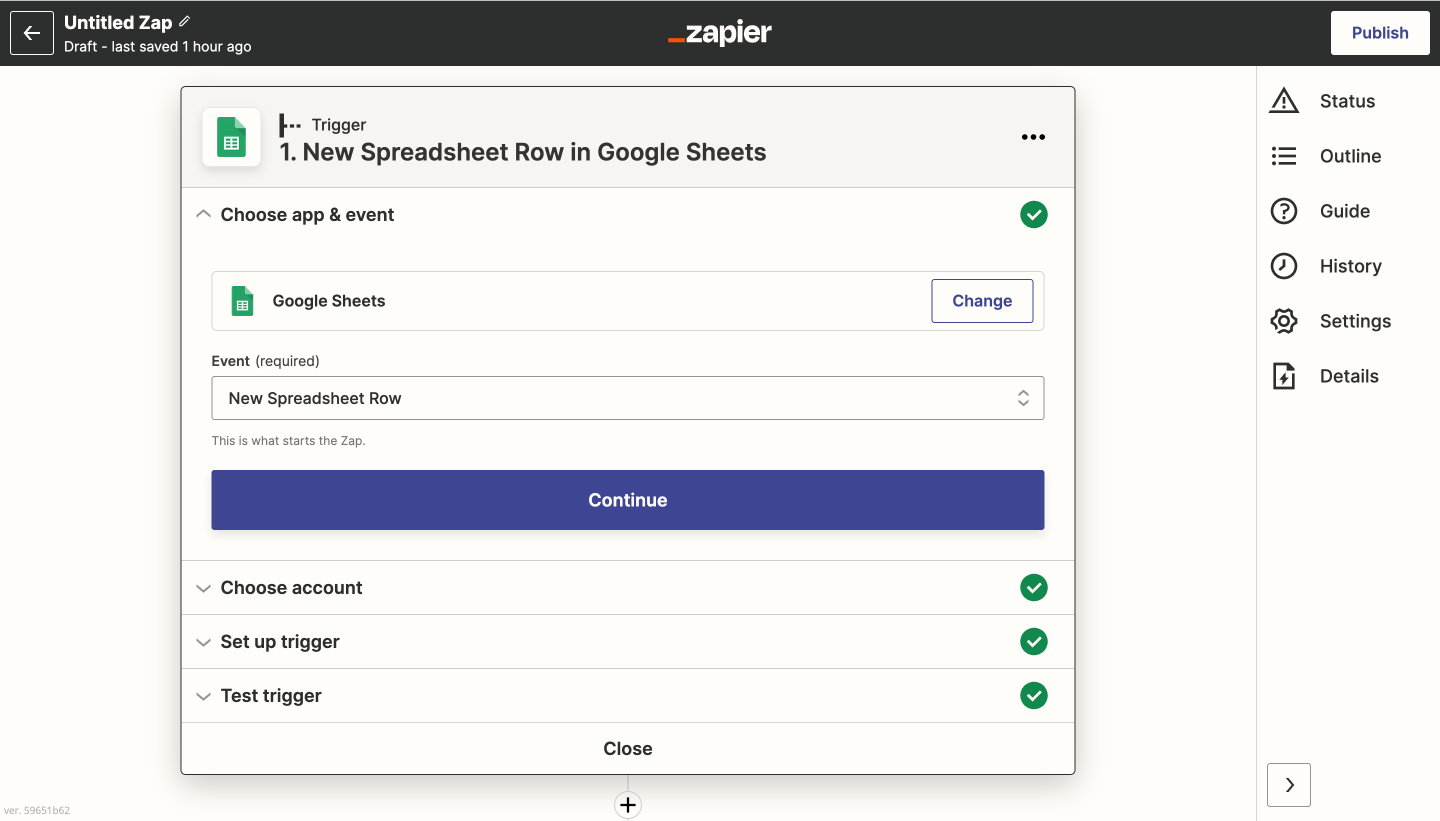
4. Follow this step by choosing a spreadsheet and worksheet you would like to use for this automation
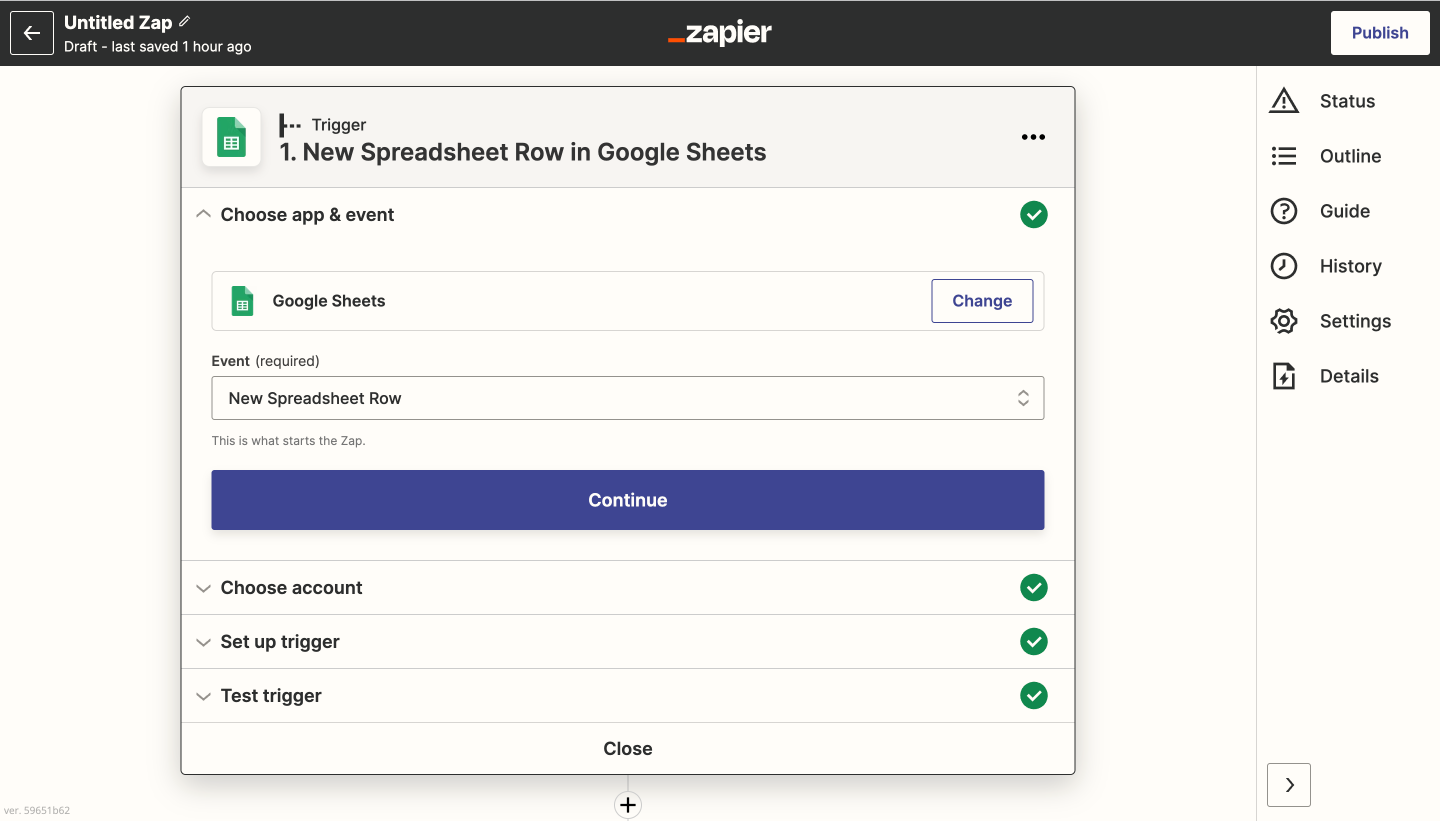
5. Finish the process of setting up a trigger by running a test
Running a test ensures that everything is set up correctly. The result of a successful test should look like this:
6. Move on to setting up the action
Select an app you want to use as an action – Certifier;
Select the event that should perform the trigger – “Issue Credential”;
Press “Continue”.
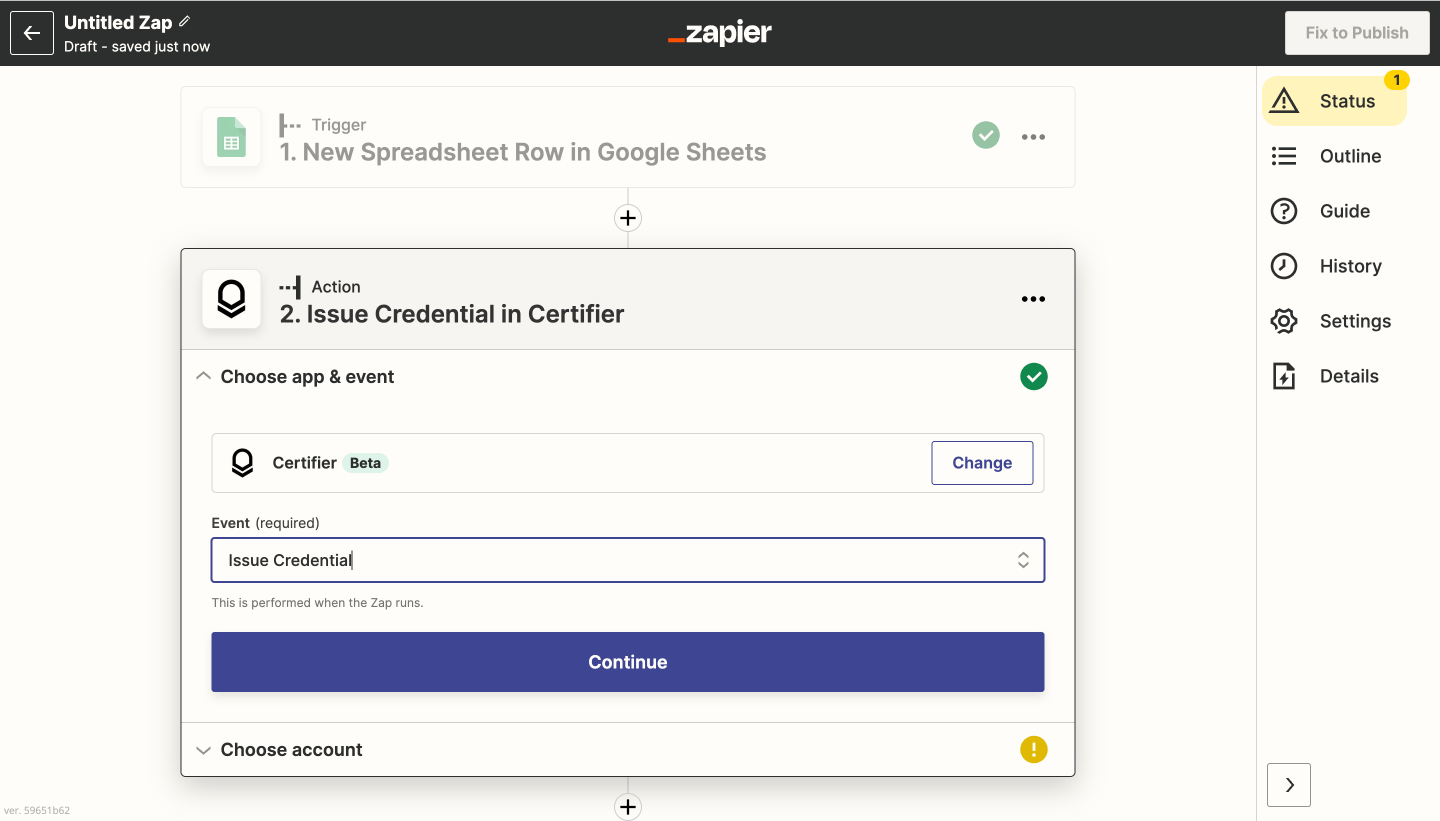
7. Choose your Certifier account and integrate it with Zapier via Access Token
To generate an access token, go to Certifier > Account > Settings > Developers > Access Token and press "Generate Access Token".
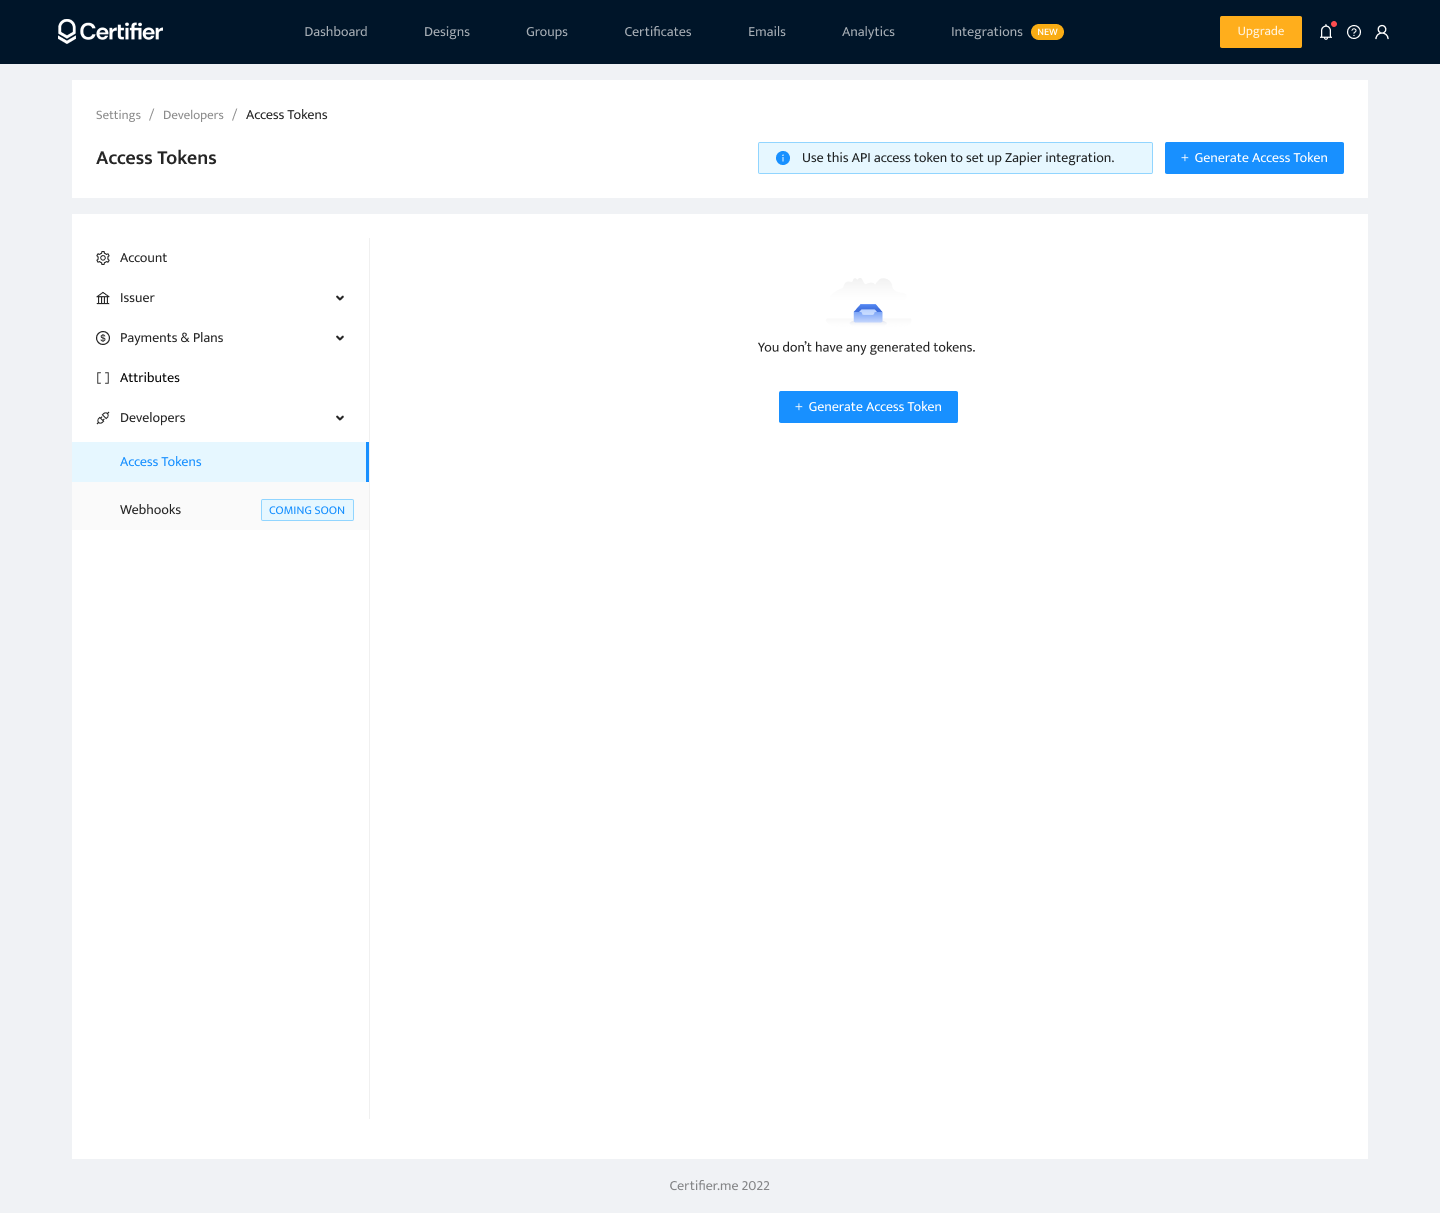
Please, keep in mind that for security reasons, Certifier shows your access token just once. Copy and paste it straight after it is generated. Consider storing your access token in a secure place to set up other integrations.
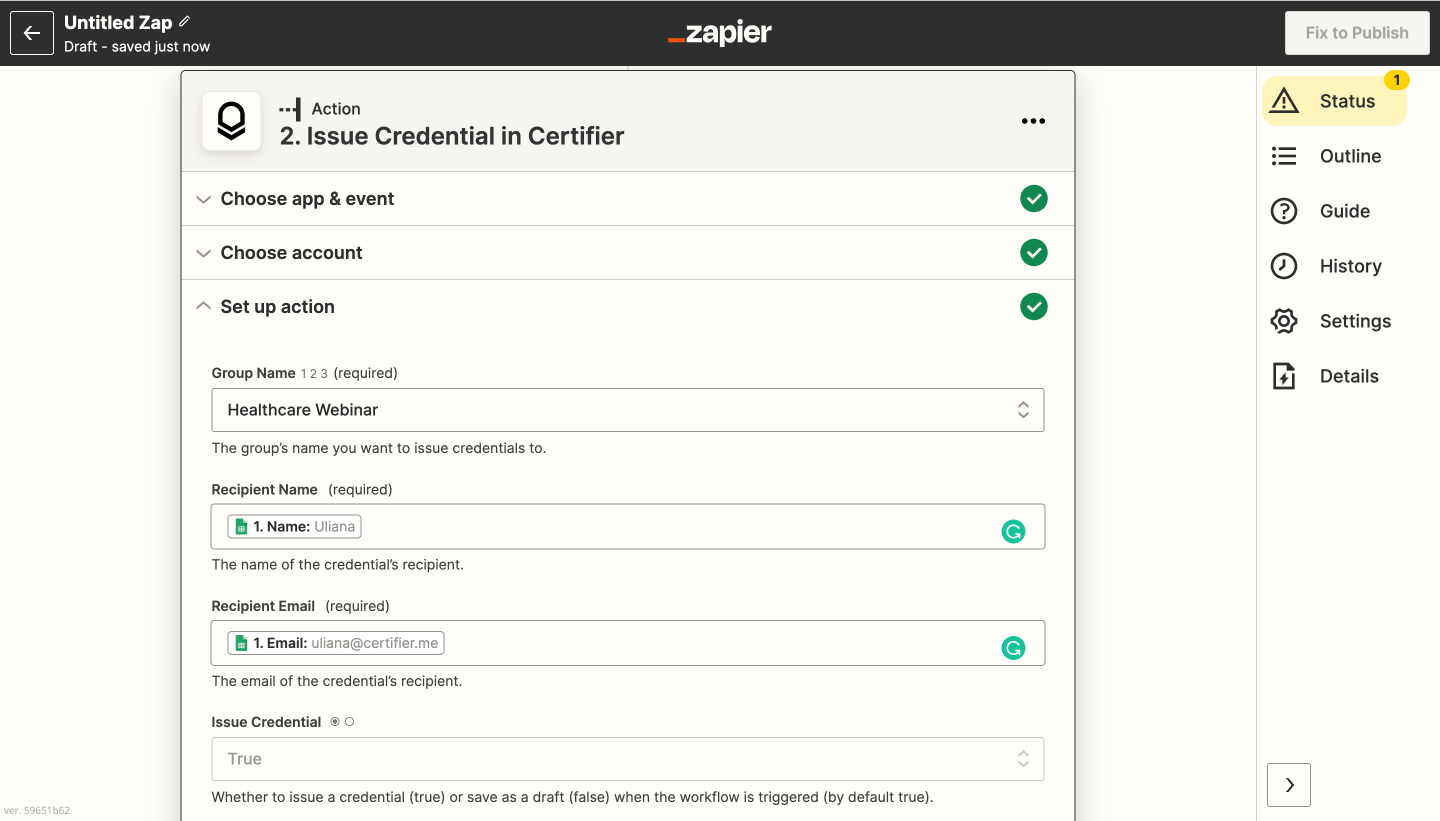
8. Populate the fields in the action section
Group – select a group that will be used to distribute certificates to.
Recipient Name – the name of your recipient. Note: some apps store names and last names separately. Thus, you will have to add these two attributes to the Recipient name field with a spacebar between them.
Recipient Email – the email of your recipient.
Issue Credential – select whether you want your certificate to be automatically issued once your Zap is triggered (the field is set to True) or whether you wish to save credentials as draft and publish them manually from the Certifier dashboard (the field is set to False)
Issued on – the date when your certificate is issued (by default, it is the day when your Zap is triggered)
Expiry Date – the date of your credential’s expiration. By default, there is no expiration date added.
If you see some other inputs, it means that there are custom attributes on your account. If you want to add some specific data from your Google Form, you can create a custom attribute in Certifier and populate that field with the appropriate data.
9. Finish the process of setting up the action by running a test
Running a test ensures that everything is set up correctly.
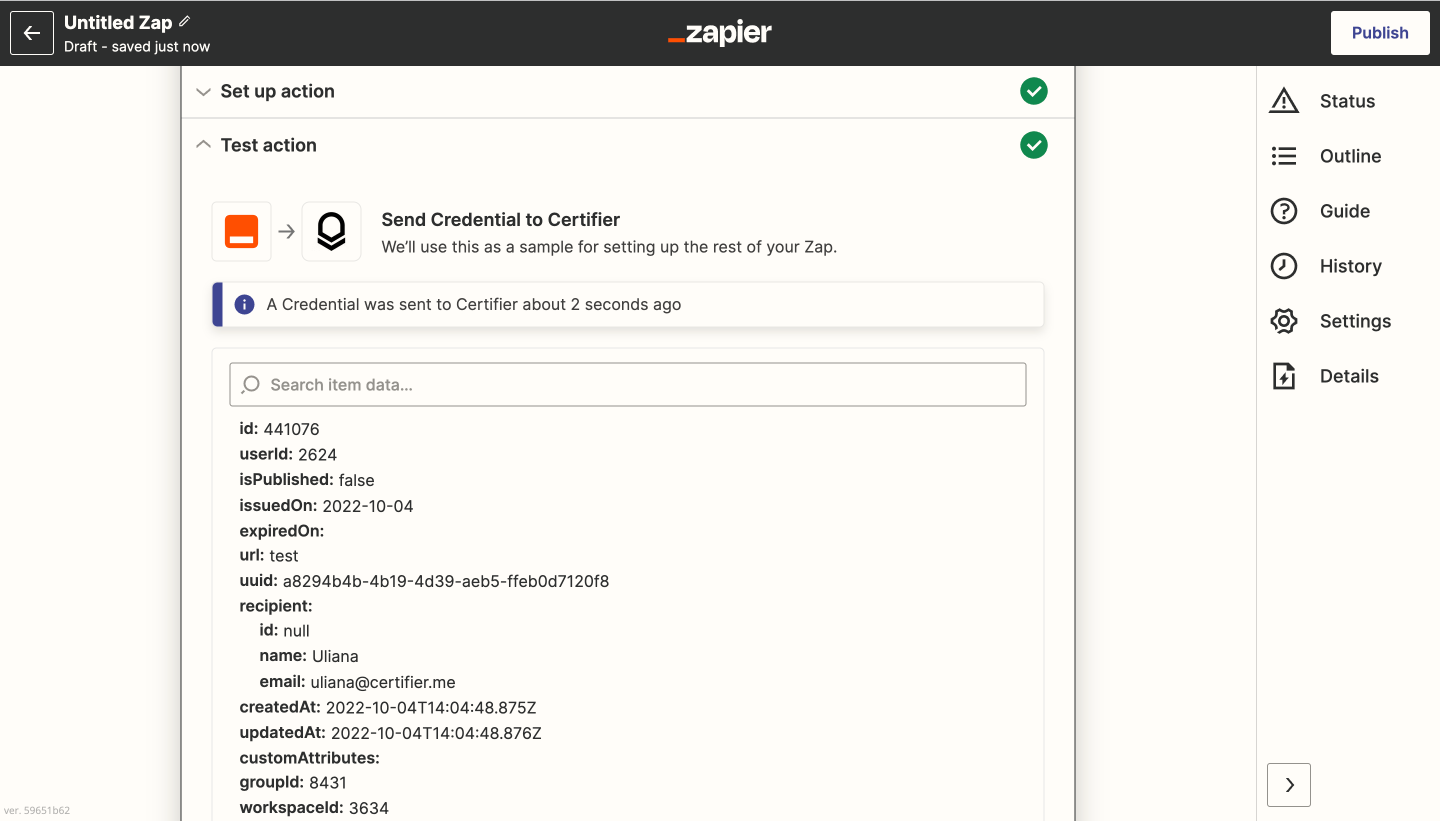
If the test is successful, you will see a newly issued certificate in the Certificate's section of your Certifier account.
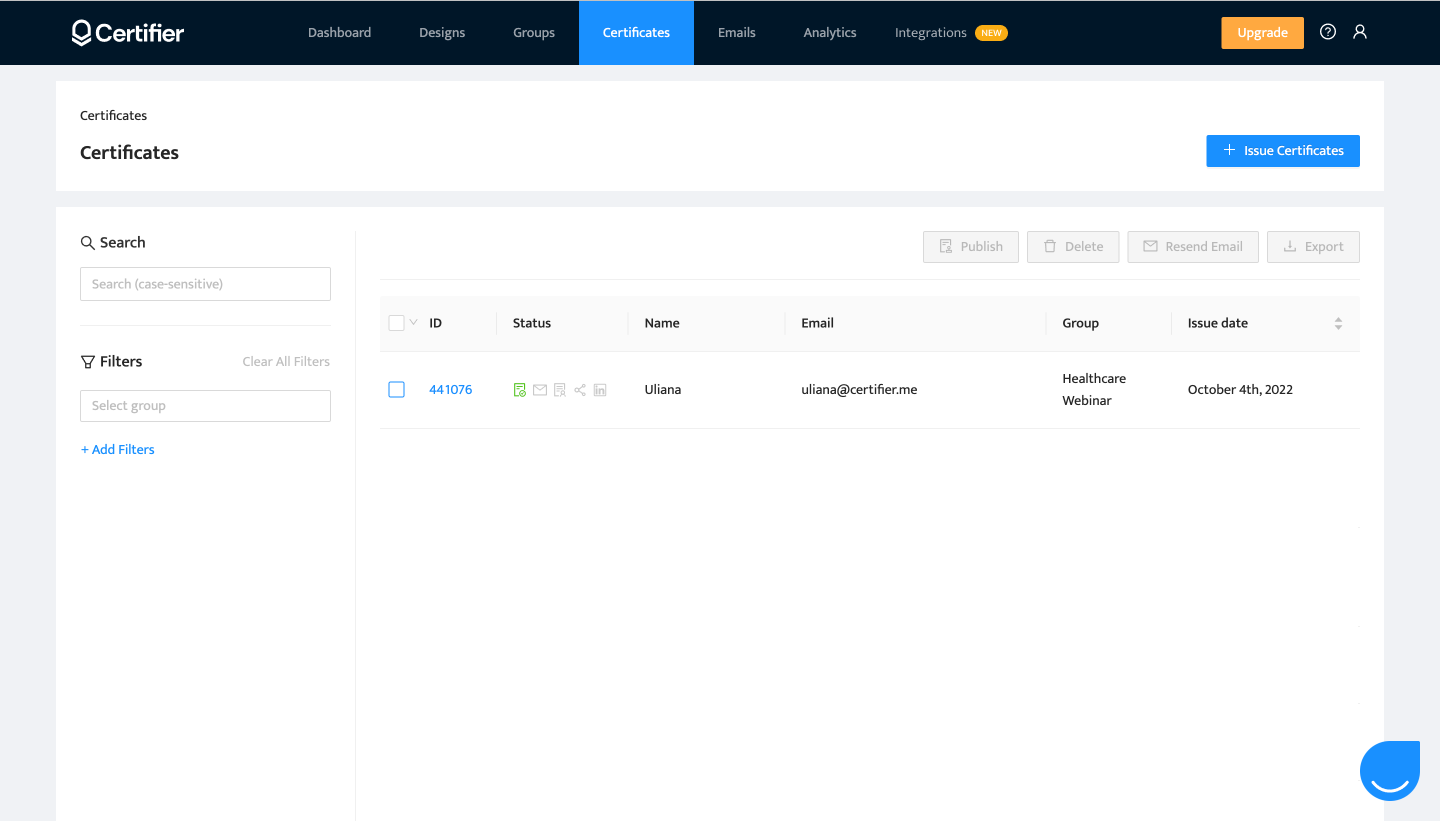
10. Click "Publish Zap" and enjoy the beauty of a fully automated certification process 🥳
Now you know how to issue certificates with Certifier using Zapier and Google Sheets automatically.
You can automate the process of generating certificates, which can save you a lot of time and avoid human mistakes. Streamline your business process and improve your students' experience.
Want a visual walkthrough of connecting Certifier to other tools using Zapier? Watch the tutorial and take your workflow to the next level.
Try it out today and see how easy it is to get started. If you have any questions, feel free to reach out to our support team, who would be happy to help. Start issuing certificates automatically with Certifier and Google Sheets today!
Ready to issue certificates from Google Sheets?
Why complicate things when you don’t have to? You’ve got options and now you know how to use them. If you want the simplest route, go with Certifier’s native Google Sheets integration for instant automation. Need more complex logic? Zapier has you covered. Either way, you’ll save hours and make your recipients’ experience seamless. Ready to see it in action? Sign up for Certifier and see how easy it is to turn spreadsheet data into certificates.
FAQ on generating certificates from Google Sheets
Got questions about automating certificates with Google Sheets? We’ve gathered the most common ones—from setup basics to when to use Zapier––so you can find the right solution and get started quickly.

- Product Management
- Customer Research
- Digital Credentials
- Product Strategy
- Design Systems
Product Manager
Uliana leads product management at Certifier, using her UI/UX background to explain platform features and help organizations maximize their credentialing capabilities.

