Trusted by:
University of Southern California
Warner Bros.
Volvo
Amazon
Stanford University
Updated: April 06, 2026
9 min read
Airtable stores participant data perfectly, but it can’t issue or send certificates on its own. Learn how to connect Certifier’s native Airtable integration and automatically issue credentials.
Research with AI:
You’ve already got everything organized in Airtable: participant names, email addresses, course completions and event attendance records.
The data is clean. The records are ready. But when it’s time to actually generate certificates from Airtable data, you hit a wall.
Airtable is great at organizing your participant data, but it can't generate and deliver certificates on its own. So most people end up manually creating and emailing each one—which works fine for 10 recipients, but not for 500.
That’s where Certifier comes in. With native Airtable integration, Certifier automatically generates and delivers certificates whenever a new record appears in your table.
No Zapier required, no manual exports. Just connect, map your fields and activate. In this guide, you’ll learn exactly how to set it up, step by step.
TL;DR
Airtable lacks native credential automation. You can create basic certificate layouts in its Page Designer extension, but exporting, emailing and verifying remain fully manual.
Certifier is the easiest way to automate certificates from Airtable. Tools like BannerBear and Typeflow generate a static PDF. Certifier goes further by turning an Airtable record into a branded certificate, delivered by email and shareable on LinkedIn.
Every credential issued with Certifier includes a unique ID, QR code and verification page, so employers or regulators can confirm authenticity in one click.
Setup takes minutes. Connect your Airtable account, map columns to certificate fields, pick a template and activate.
Airtable was never designed to be a credentialing platform–and the gaps become obvious the moment you try to issue an Airtable certificate at any real scale.
Here’s what you’re up against.
If you use Airtable’s Page Designer to create a certificate layout, you’ll need to export each record as a PDF individually.
That means clicking “Print,” saving the file, renaming it and repeating the process for every single recipient. A 100-person course means 100 manual exports.
Anyone searching for how to automate PDF generation from Airtable data has already felt this pain.
Long names, extended course titles or multi-line fields can overflow your certificate borders without warning. Page Designer doesn’t handle dynamic text sizing, so you won’t catch layout problems until the certificates are already sent.
An Airtable-generated PDF is just a static file. There’s no unique credential ID, no QR code, no verification URL.
If an employer wants to confirm a certificate’s authenticity, you’d need to manually search your Airtable base and reply by email. That’s not a workflow, it’s a liability.
Even though Airtable can send emails through its automations, it can't automatically attach your Page Designer certificates to them. So you're still stuck downloading each PDF and emailing it yourself. No branded templates, no delivery tracking and no way to know if it actually reached your recipient's inbox.
Let’s look at what a purpose-built solution actually delivers. Certifier doesn’t replace Airtable. It enhances it.
Your participant data stays exactly where it is. Certifier simply reads new records and handles everything else: certificate creation, personalization, delivery and verification.
Here’s the full picture of your Airtable automations once the integration is active.
Every time a new record is added to your Airtable table, Certifier automatically generates a certificate. No manual exports, no triggers to configure in a separate tool. The automation is built right into Certifier’s platform.
It’s the simplest way to generate certificates from Airtable data without writing a line of code.
Choose from thousands of editable templates in Certifier’s library or build your own from scratch using the drag-and-drop certificate builder.
Add your logo, brand colors, custom fonts and layout elements. Every certificate looks like it came from your organization–because it did.
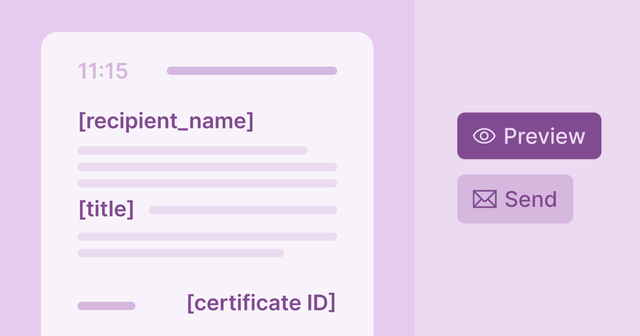
Certificates are delivered directly to recipients’ inboxes using your custom sending domain. No generic Gmail threads, no manual attachments. The certificate emails are branded, professional and far less likely to land in spam.

Branded email with credential link
Recommended to read
Every Airtable certificate issued through Certifier includes a unique credential ID, a certificate validation QR code and a dedicated verification page.
Employers, regulators or anyone else can confirm authenticity in one click. You can also revoke or update credentials at any time from the Certifier’s dashboard.
Recipients get a credential digital wallet where they can download or share certificates.
Certifier’s credential analytics dashboard shows issuers who received, opened and shared their credentials–giving you visibility into how your program performs.
Create and Send Digital CredentialsStart issuing certificates and badges in minutes.
Now for the hands-on part. This Airtable automation tutorial walks you through the entire setup, from preparing your table to sending your first test certificate.
The whole process takes about 10 minutes and you won’t need any coding skills or technical experience.
For a more technical reference, Certifier’s help center guide on connecting Airtable to Certifier covers additional edge cases.
Start with a clean table. You need at minimum two columns: one for the recipient’s name and one for their email address. You can add more columns later (course title, completion date) and map them to dynamic attributes in Certifier.

Important: Delete the three empty default records that Airtable creates in every new table. If you fill in data in those pre-existing rows later, Certifier won’t recognize them and no credentials will be issued.
If you’re working with a table that already has data, be aware that existing records may trigger certificate issuance the moment you activate the automation.
For a clean start, use an empty table and add recipient data only after the automation is live.
Log into your Certifier account (or create one, it takes about a minute).
Then:
Navigate to Automations in the left sidebar
Click + Create Automation
Select the Airtable template

This pre-configures a simple two-step workflow: trigger (new record in Airtable) and action (issue credential in Certifier). It’s the same trigger-action logic you know from Airtable automations, just extended into certificate delivery.
Click on the Trigger step in your new automation. Certifier will prompt you to connect your Airtable account via OAuth – a secure login flow that doesn’t require pasting API keys.
Press Connect Airtable
Log into your Airtable account when prompted
Choose whether to grant access to all bases or only specific ones (you can do both)
Click Submit

Once connected, select the Base and the Table you prepared in Step 1. This tells Certifier exactly where to watch for new records.
Now for the part your recipients will actually see. Head to the Designs tab in Certifier and pick a template that matches your program.
Browse by category: course completion, event attendance, training or compliance or search by keyword.
Customize in the drag-and-drop editor: upload your logo, set brand colors and fonts and arrange layout elements.
Add dynamic attributes: insert placeholders for recipient name, course title, date and unique certificate ID. These fill in automatically from your Airtable data.

If you’ve used Airtable’s Page Designer before, you’ll notice the difference immediately. Certifier’s editor handles dynamic text sizing, so long names or titles won’t break your layout.
You can preview exactly how each certificate will look before activating. And with thousands of templates to start from, you’re never staring at a blank canvas.
Learn more about using dynamic attributes to create and send certificates in bulk.
Back in the automation setup, configure the Action step. This is where you connect your Airtable data to Certifier’s certificate fields.
Recipient Name: map to the Name column in your Airtable table.
Recipient Email: map to the Email column.
Additional attributes: map any extra columns (course title, completion date, score) to the corresponding dynamic attributes in your certificate design.

Select the credential group that matches your certificate design. This links the automation to the specific template you customized in Step 4.
Before going live, run a quick test. Add a single record to your Airtable table with your own name and email. Within moments, you should receive a fully branded, personalized certificate in your inbox.
Check that the dynamic fields are populated correctly, the design looks right and the verification link works. If everything checks out, your automation is ready for production.
Every new record you add from this point forward will trigger an automatic Airtable certificate issuance. No manual steps required.
Did you like the certificate template from our step-by-step tutorial?

With your Airtable-Certifier integration live, the heavy lifting is done. But there are a few Airtable automation best practices to keep in mind so everything runs smoothly at scale.
Every record you add to your connected Airtable table generates a certificate right away. Make sure each row has complete, accurate data before adding it. Partial records (missing name or email) won’t process correctly.
Certifier’s dashboard lets you see every credential issued, track delivery status, resend certificates or revoke them if needed. You don’t have to dig through Airtable to find out who received what.
Every recipient receives their certificate in a personal digital wallet. From there, they can download it as a PDF, add it directly to their LinkedIn profile or contact an issuer in case of a typo.
This turns your certificate into a shareable asset that promotes your program organically.

The integration handles one record or one thousand the same way. If you’re running a large training program, you can issue certificates in bulk using Certifier by pasting data into your Airtable table or syncing it from another source. Certifier processes them all automatically.
Issue first certificate in 10 minTry our digital credentials platform to generate your first batch of certificates.
Your automation is running. Now let’s make sure you’re getting full value from the Airtable integration.
These tips help you go beyond basic issuance and turn your Airtable automations into a polished credentialing system.
Airtable automation best practices in a nutshell:
Organize each program in its own table
Pull in richer learner and course details
Include dates, scores and credential validity
Use expiration rules for recurring certifications
Automate reminder emails before credentials expire
Monitor recipient engagement after issuing
Check records for accuracy before sending
Airtable views let you filter records by criteria like course name, completion status or event date. While the automation triggers on any new record in the connected table, you can keep things organized by using separate tables for different programs or cohorts.
Each table can connect to a different Certifier automation with its own certificate design.
Certifier’s dynamic attributes for bulk certificate personalization go far beyond basic fields.
Map columns for course title, completion date, instructor name, score or credential expiry. The more data you feed from Airtable, the richer each certificate becomes. Don't make it too crowded, though.
For compliance-driven programs or certifications that require periodic renewal, Certifier lets you set expiration dates on credentials.
Recipients receive automatic reminders before their certificates expire, so they can re-certify without you having to chase them.

You can activate the expiration date in the Group tab
Keep an eye on who’s opening, downloading and sharing their certificates. Certifier’s credential analytics gives you visibility into how your credentials perform and which programs drive the most engagement.
If you’re wondering whether you need middleware on top of this, the short answer is no, not for Airtable.
Certifier’s native Airtable connection handles the trigger and action directly. No extra subscription or configuration.
That said, if you use other tools alongside Airtable (like an LMS, CRM or form builder), Certifier integrates them via Zapier, Make and API. The native integration simply gives you the fastest, most direct path.
Tip: Still keeping some of your participant records in traditional spreadsheets? You don’t have to switch platforms to start automating. Whether you are using a database or a simple table, Certifier works with Google Sheets and Excel to turn your rows into professional credentials instantly.
The workflow is nearly identical: connect, map, automate. Airtable is essentially a more powerful version of a spreadsheet, so users switching between platforms will find the setup familiar.
Your Airtable data is already structured and ready to go. The only missing piece is a credentialing layer that matches your standards: professional design, automated delivery and real verification.
Certifier plugs into Airtable natively and handles everything. Just connect your table, pick a template and let the automation run. Your first 250 credentials are free–create your Certifier account and start issuing certificates from Airtable.
Still have questions? Here are the ones we hear most from teams looking to generate certificates from Airtable data.

- Product Management
- Customer Research
- Digital Credentials
- Product Strategy
- Design Systems
Product Manager
Uliana leads product management at Certifier, using her UI/UX background to explain platform features and help organizations maximize their credentialing capabilities.