Trusted by:
Updated: June 13, 2025
20 min read
How to Make a Certificate in Google Slides in 5 Steps
Google Slides Certificates are popular among online awards, but do you know how to build one? Read this article, and we will dispel all your doubts.
Looking for an easy way to build a certificate, but nothing comes to mind? Or maybe you are not satisfied with the search results and would like to find other certificate programs to create customizable certificates in minutes? No worries! Today we're going to show you some easy steps to help you make certificates in Google Slides!
And at the end of this article, we have a surprise that your beautiful certificates might really like.
Here we go!
But first, what if there is a faster way to create certificates?
Forget about time-consuming tasks, creating each certificate manually, or sending them one-by-one – Certifier has it all in one place.
You can automate the process of sending certificates and handle certificate creation as a pro! Unlock your business potential.
Create and Send Digital Credentials

Take advantage of online certificates
There are many pros of using online certificates. For example, they're easy to create. Often, certificate programs give you a ready-made free certificate template so that you can design your project even faster.
What's more, online certificates are easy to share on the Internet. You can brag about it on the LinkedIn social media channel. It's a good idea to keep your certificates there, as they are highly valued in business communities and are ideal proof that you are growing in your field. Whether it's a certificate from completing college-level courses, attending a webinar, or graduating – any of them matters.
Remember that Google Slides is not the best for certificate creation. It can help you create nice certificates, but you need to know how to do it. Read on!
Create a certificate with Google Slides in 5 steps
We're not holding you up any longer, so here are steps you should take to generate a Google Slides certificate.
Follow along with this video:
Step 1: Sign in to Google and Open Google Slides
With Google Slides, you can build creative presentations as well as custom certificates. To begin with, you need to sign in to your Google account to use Google Slides. To do so, type Google Slides: Sign in to your browser. You will be redirected and asked to sign in or create an account.
If you are already signed in and using Google's browser, simply go to Google Slides.
Step 2: Create a new project
If you have already logged in, your goal is to create a new project. To do so, click on the button located in the lower right corner.
 After clicking on it, you will finally be taken to the creation page, where you will build your certificate. Here's how it looks:
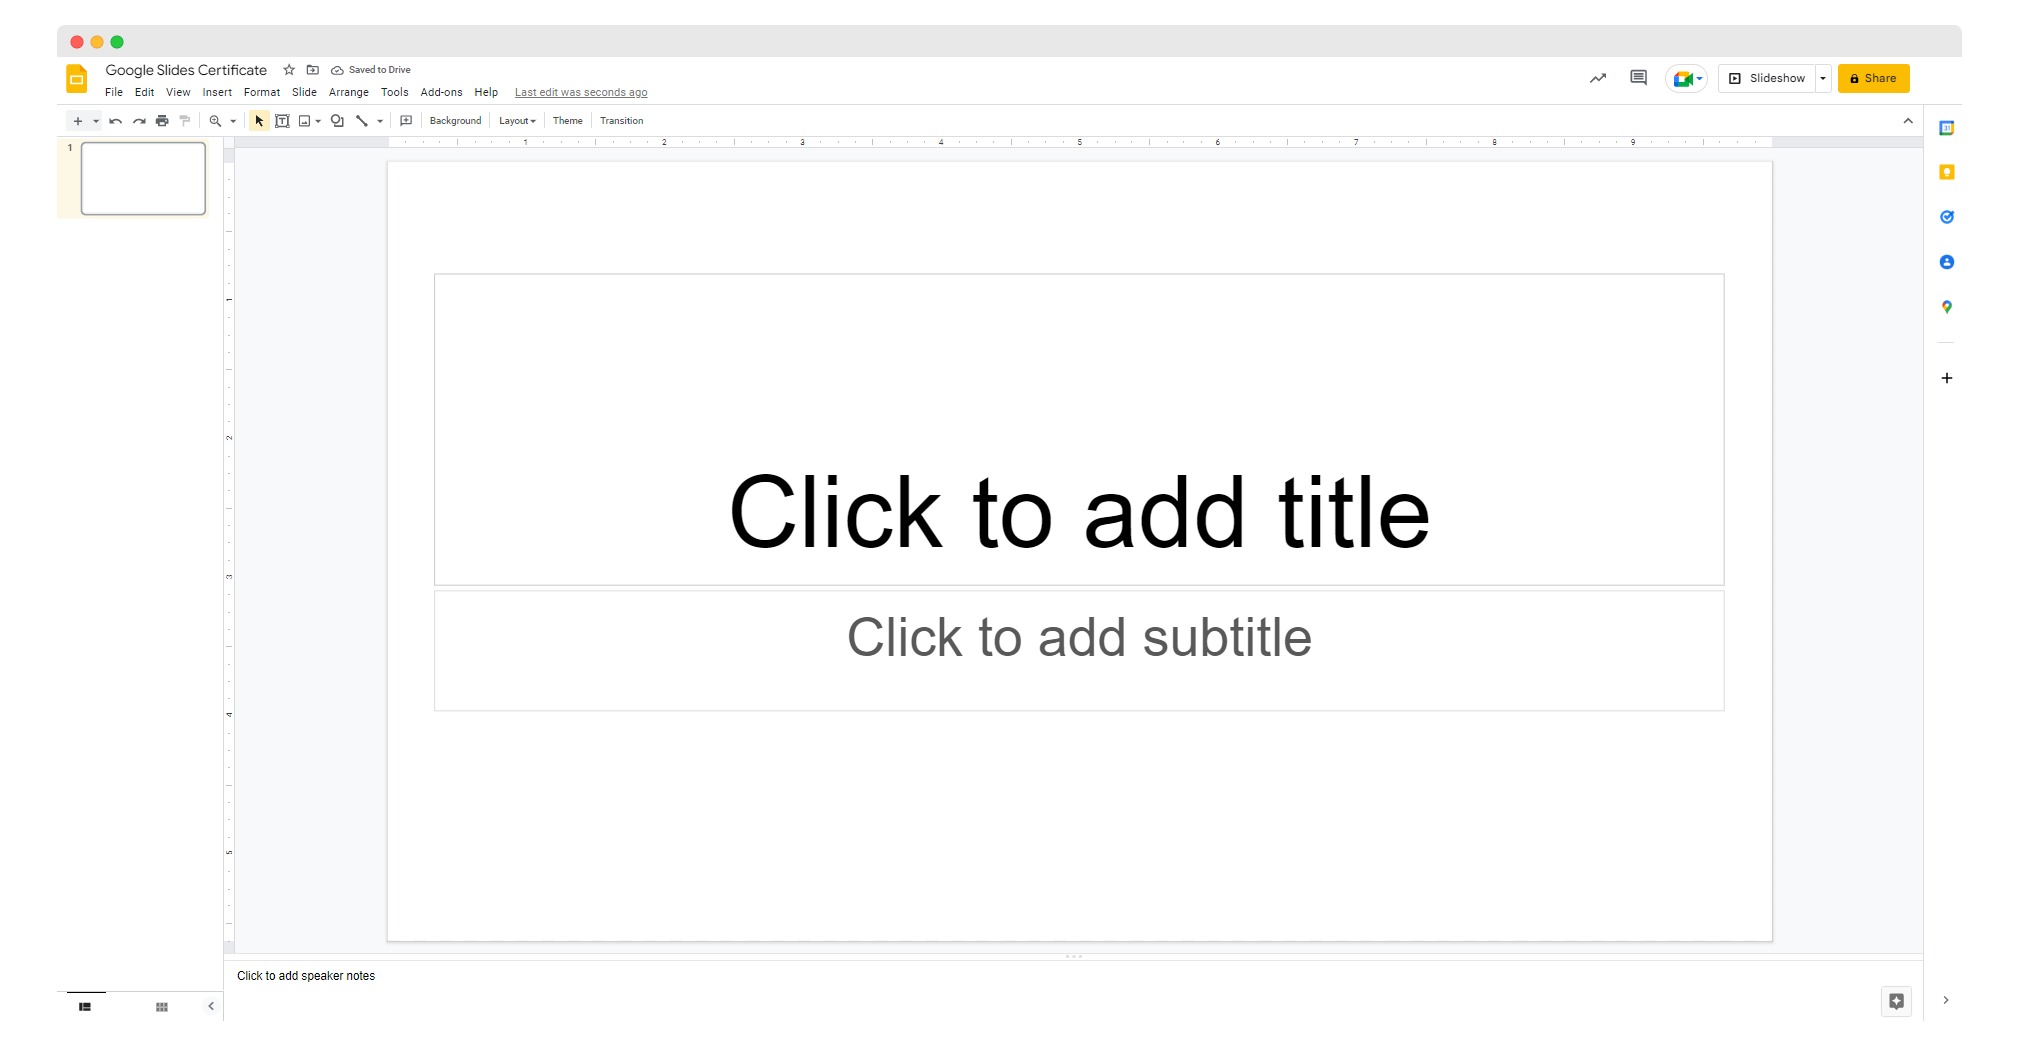
Name your file in the upper left corner. e.g., Google Slides Certificate.
Step 3: Design a certificate background
And now, the fun of designing begins as you can design personalized certificates. Although it takes quite a bit of time compared to professional tools, it can also be rewarding.
You can change the certificate background in two ways. The first way assumes you should go to Menu > Slide > Change background.
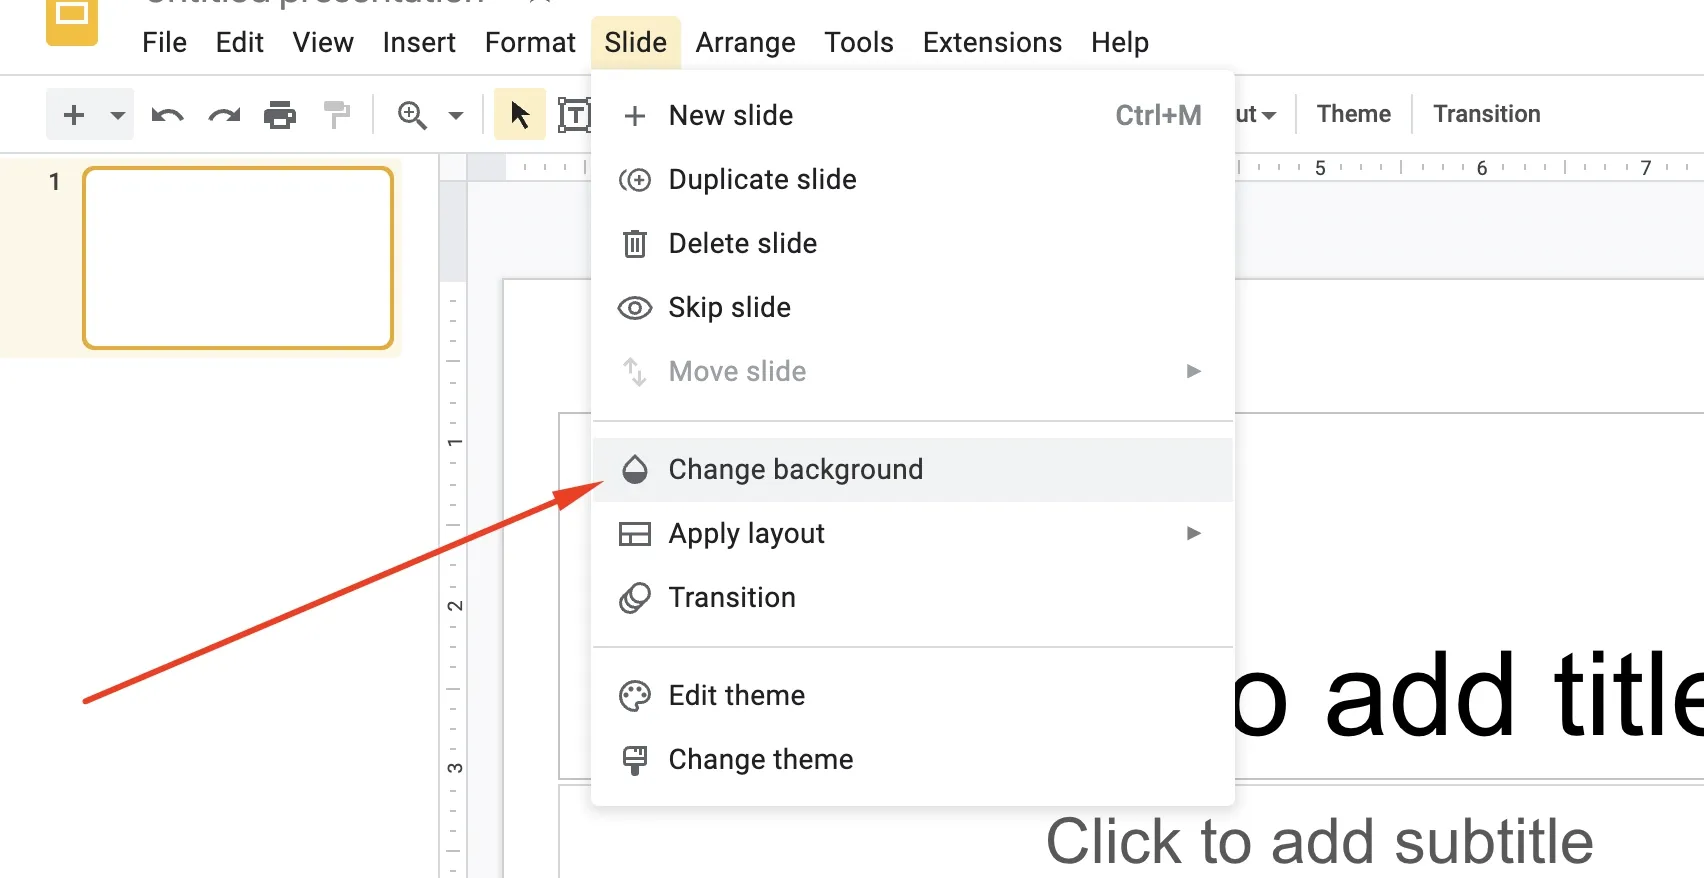
Then a window will appear. You will be able to set the background of your document here. You can choose beautiful colors, previously downloaded images, and reset the theme. Then you can add the theme to your collection or just save your work.
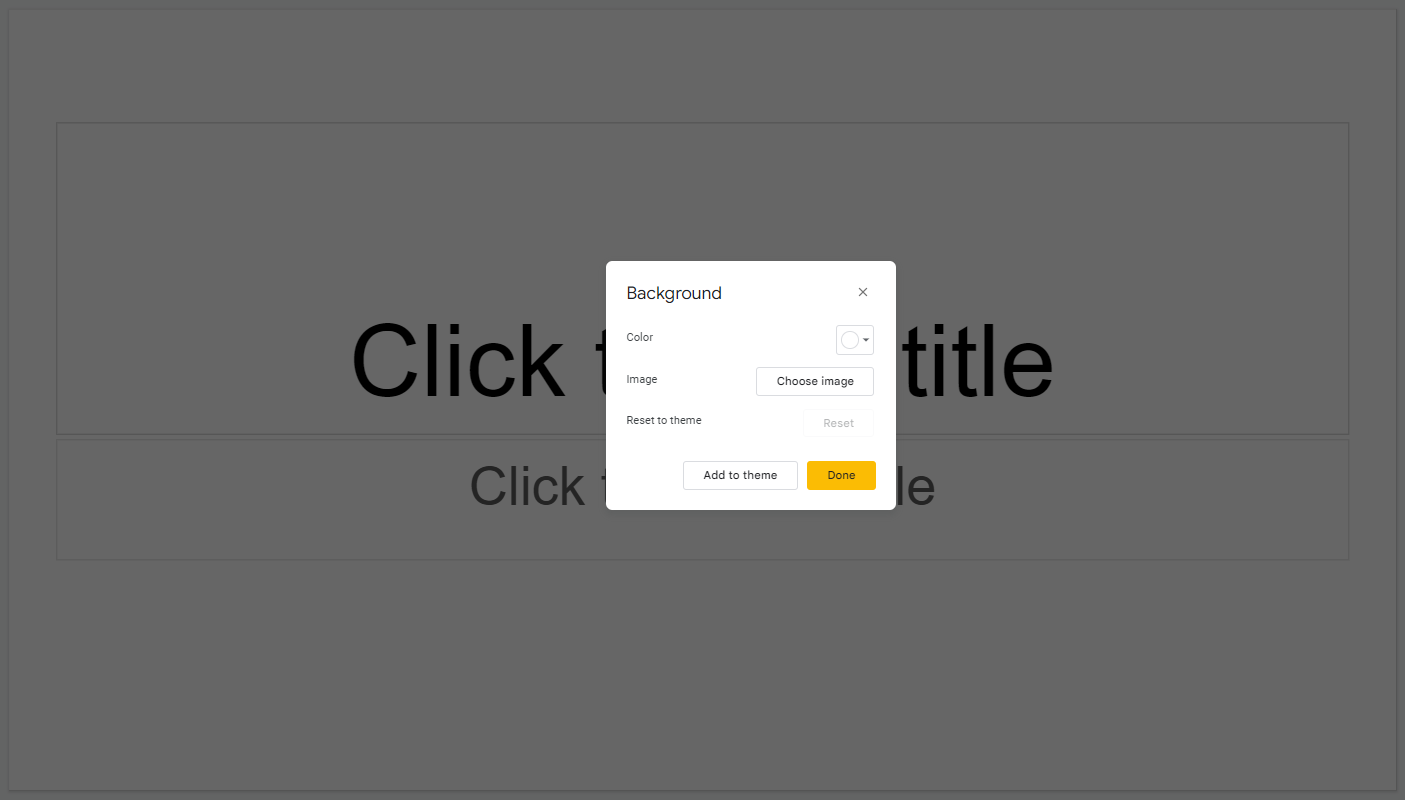
We will use the color selection option and set it to green.
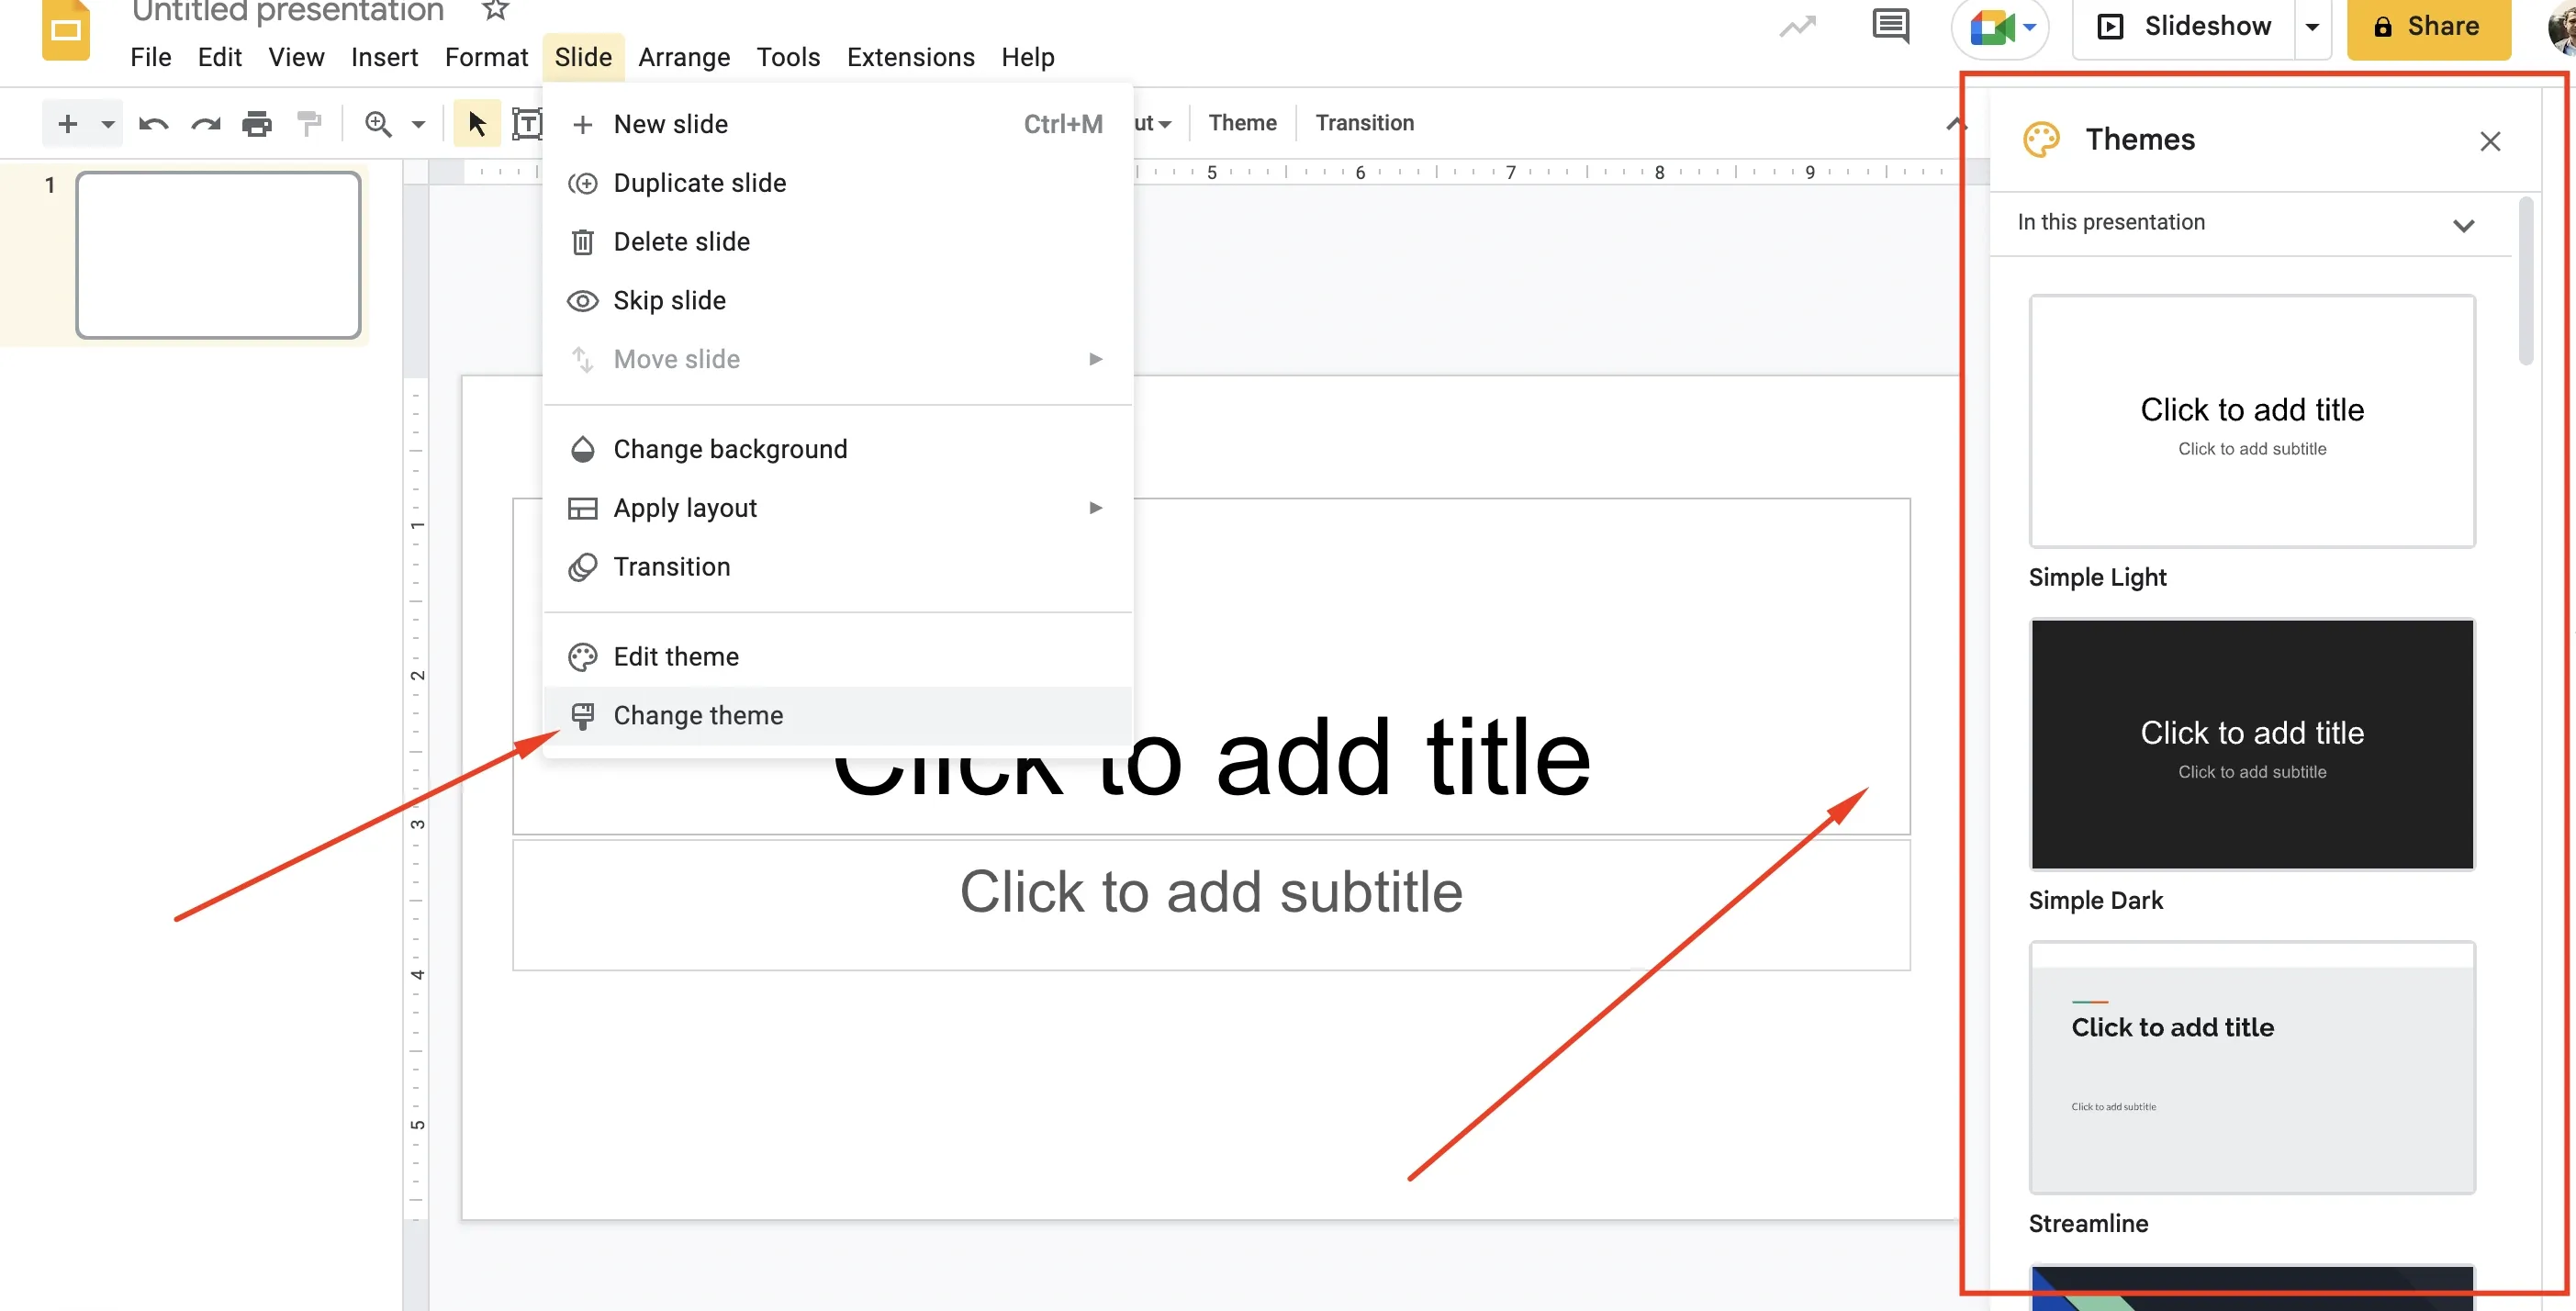
The second way to set up your certificate background is to go to Menu > Slide > Change theme. You will then immediately see some Google Slides presentation templates on the right side. In addition to the theme you are using, 22 others will appear there, which differ from each other in colors, arrangement of elements, type of elements, etc. You can choose one of them.
Find out why choosing a proper certificate background is so essential: Certificate Background - All You Need To Know
Step 4 (optional): Choose add-ons
If you want to leave your background as you set it in the previous step, that's great! On the other hand, we want to spice it up more, so we'll add some non-text elements from online resources.
We go to Google Search and look for elements we are interested in there. Of course, there are a lot of possibilities, so that it might take us a while. But what is not done for a beautiful certificate?
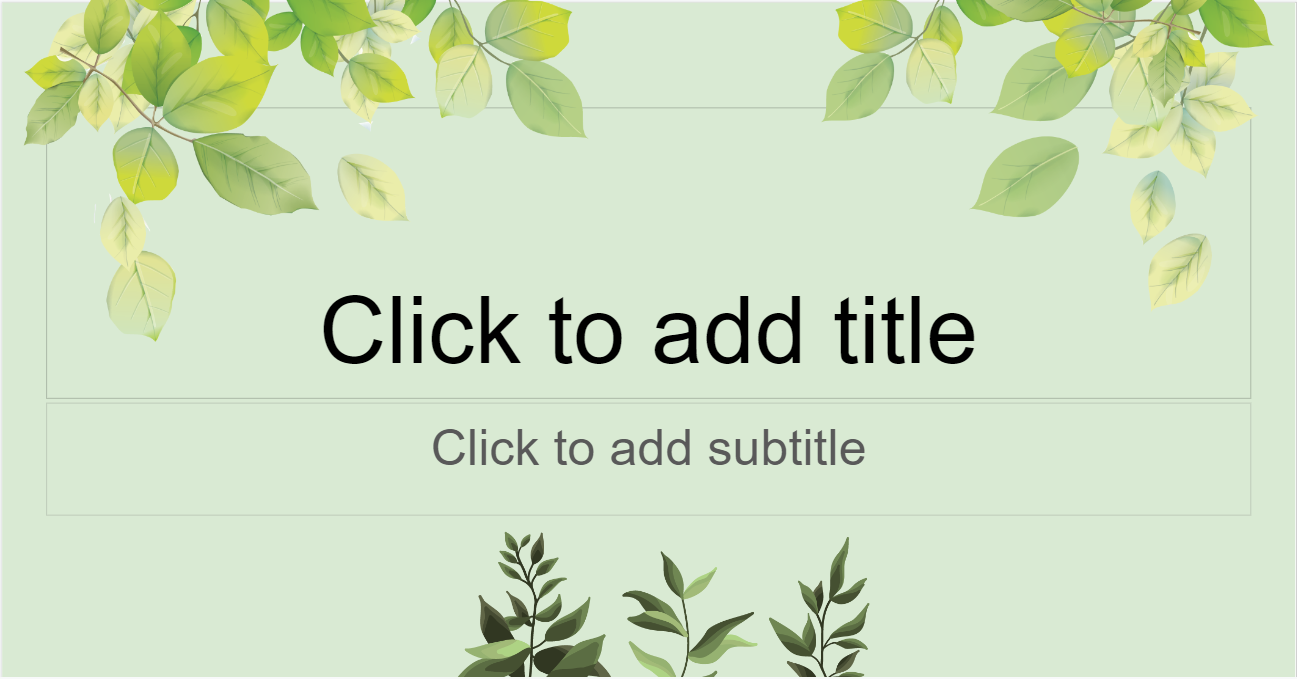
As you can see, we added some transparent graphics with leaves to create the following effect:
Step 5: Time for text
And now is the moment to complete the places that should contain the text. Here, too, you have free rein.
Although there are some elements you should include, for example:
the title of the certificate
individualized certificate names
date
the validity period of the certificate, if required
the person/authority issuing the certificate
your signature/logo
personal info, thanks, or other important information
We, this time designed a Google Slides certificate for participation in The National Plant Workshops, so in our case, it looks like this:

Step 6: Download the Certificate File
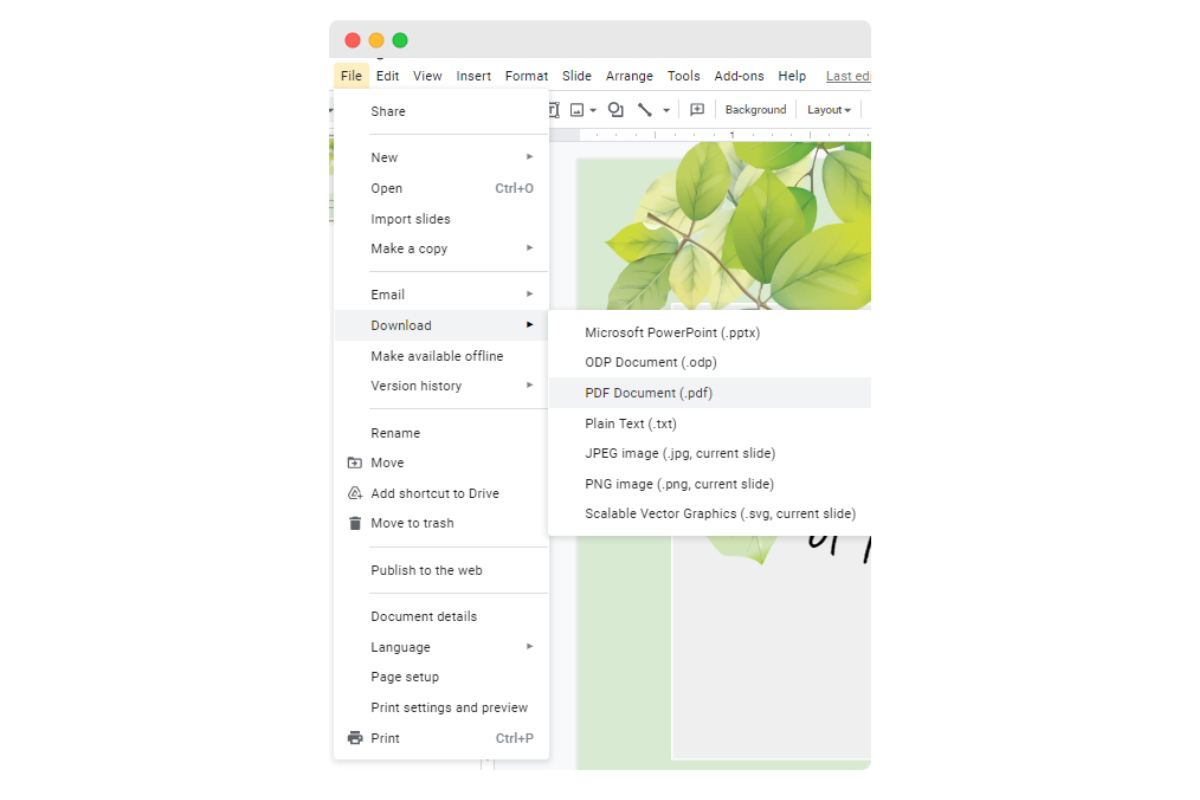
And that's the end. Now you can download your project. To do so, go to Menu > File > Download and choose the form you like. We recommend downloading in PDF version, this will certainly not destroy the quality of your file.
If you have already downloaded your project, you can finally send it. You will most likely do this via an e-mail address.
Learn how to quickly send emails to certificate recipients: How to send emails with certificates to multiple recipients?
Now you know what the process of creating Google Slides Certificates looks like.
However, if you're not quite satisfied with this certificate design solution (which, let's face it, isn't really meant for creating certificates), we have our surprise for you. Meet Certifier amazing tool!
Alternative for Google Slides certificates? Here's Certifier!
Certifier, unlike Google Slides, is a dedicated online tool for creating personalized certificates. And yes, it has many more advanced features! Our system has an infrastructure built especially with the creation of digital credentials and certificates in mind.
With such a platform, you can:
create
issue
manage
verify
share PDF certificates
No matter if you run webinars, courses, symposia, workshops, product companies, or other events, Certifier is an excellent option for your business. With this tool, you can manage large-scale certification programs with millions of recipients, as well as small organizations with a few hundred certificates.
So it's really possible to design awesome certificates for free and do it very well and, most importantly, more efficiently. For example, you can build such documents as personalized student certificates, certificate of training completion, an elementary school certificate, volunteer certificate, and many more!
As for design, you can use, among others, a certificate builder, many pre-made certificate templates (so you won't have to create certificates from a blank document), or custom designs.
In addition, you will have access to mass certificate emailing, bulk certificate generation, recipient spreadsheet upload, and the ability to generate PDF Certificates or branded certificates. But that's not all, as there's also secure data storage, knowledgebase access, live chat & email support.
The features mentioned above are only in the free plan, so imagine what awaits you in the paid pricing plans. We'll just reveal that there are custom attributes, an email template builder, and social media sharing, among others.
3 Steps to create certificates with Certifier
Let's check out the quickest way to create certificates.
#1 Create an account in Certifier
To begin, you must log in or create an account with Certifier. You don't have to pay for anything because you can use Certifier totally free. However, if you want to use any of the paid plans, way to go – you won't be disappointed! Next, you will see the Certifier Dashboard.
#2 Design simple certificates
After logging in, create a design. Here at Certifier, you have plenty of ready-made templates to choose from. In addition, you can select different fonts, abstract elements, decorative elements, and color schemes and literally customize the appearance of certificates however you want to, without the need to create them from scratch.
Therefore, you can create your own document templates, for example:
cute award certificate templates
achievement certificate templates
appreciation certificate templates
college achievement certificate templates
certificate of origin template
adoption certificate template
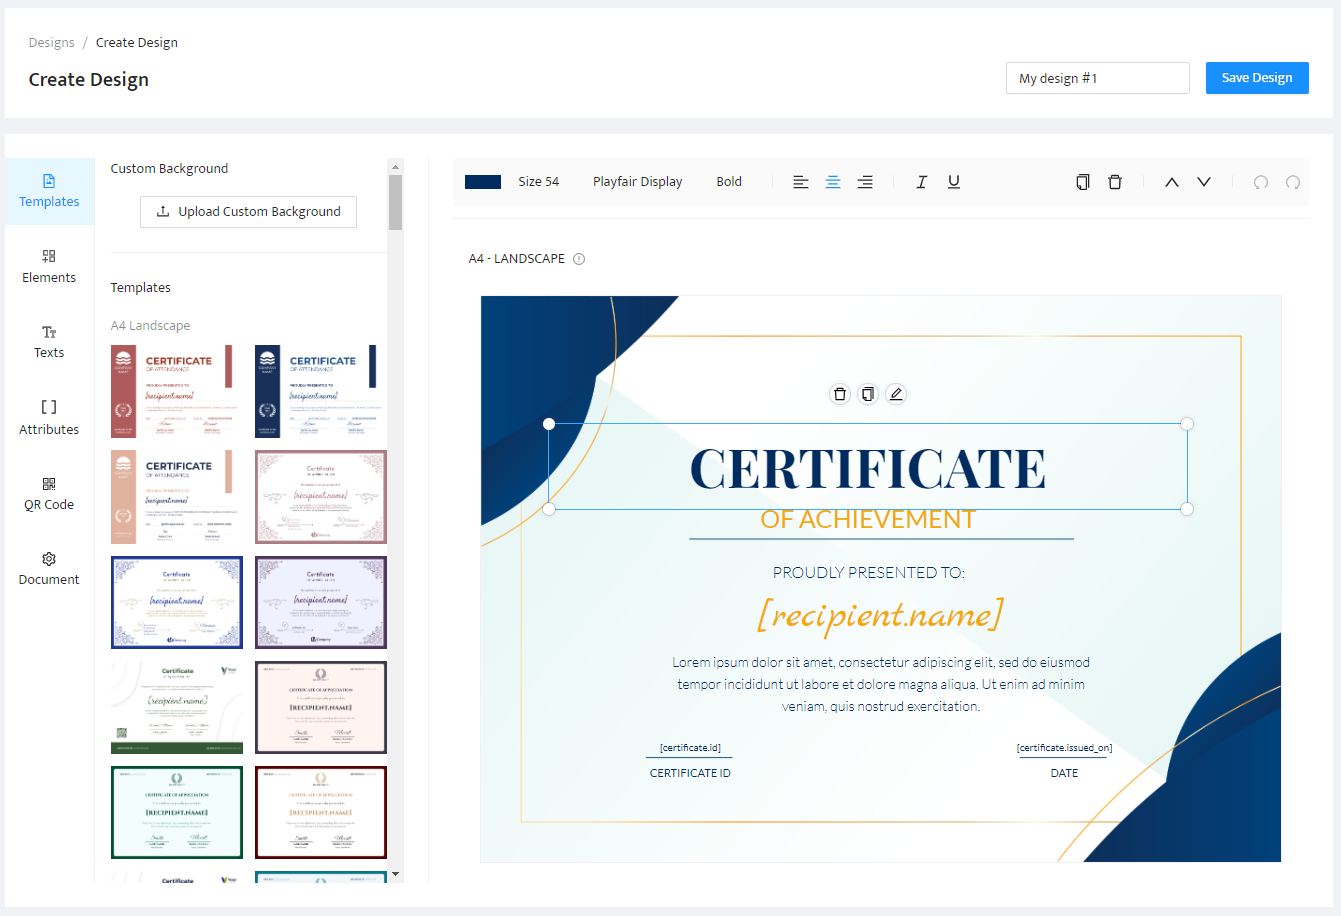
You can also save this certificate template for later and use it when you want. Then, once the design is ready, you can send it in bulk.
#3 Send in bulk
Certifier works intuitively and tells you the next steps. For example, if you have finished the creation process, you should then create a group. After that, it's high time to add awarded person data.
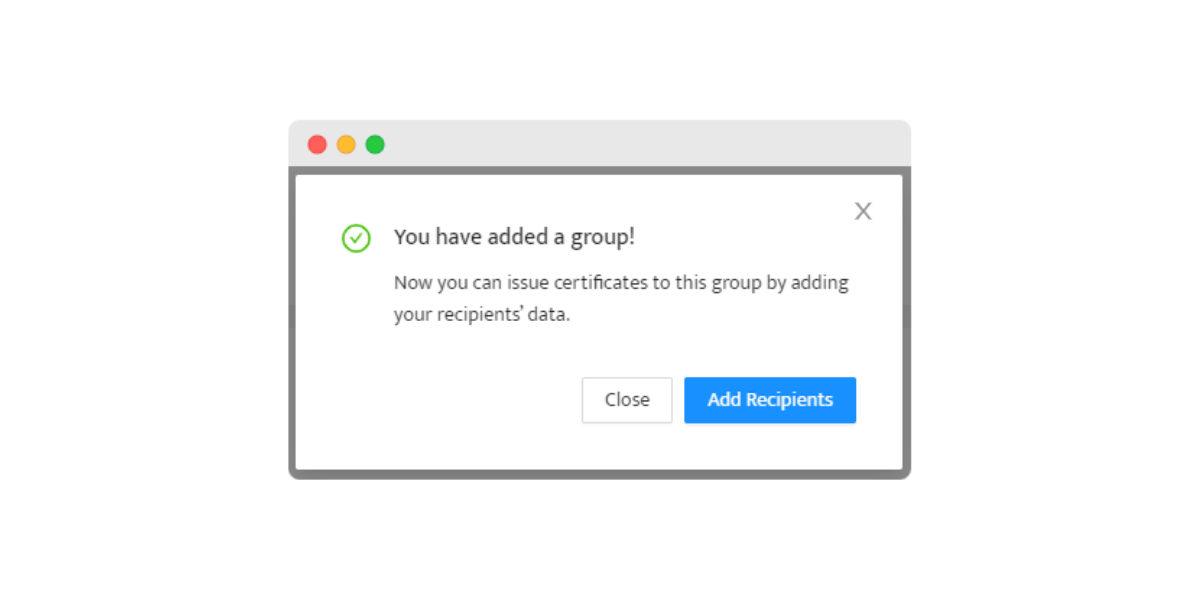
You can add them in two ways, either manually or by uploading a spreadsheet with a list of their data. Let's choose the second option.
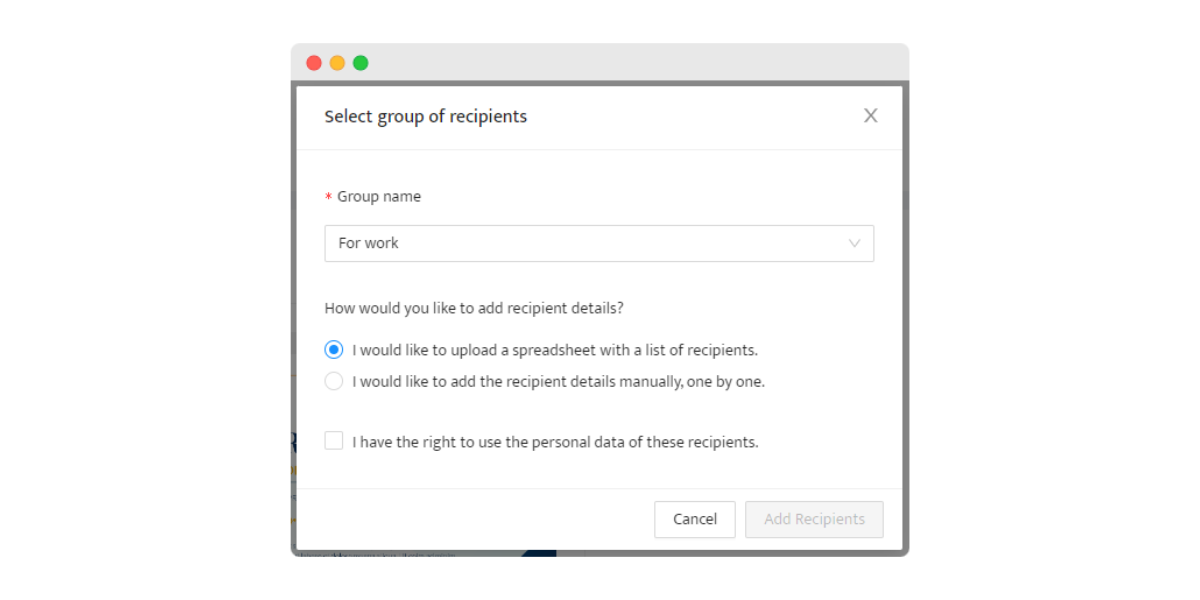
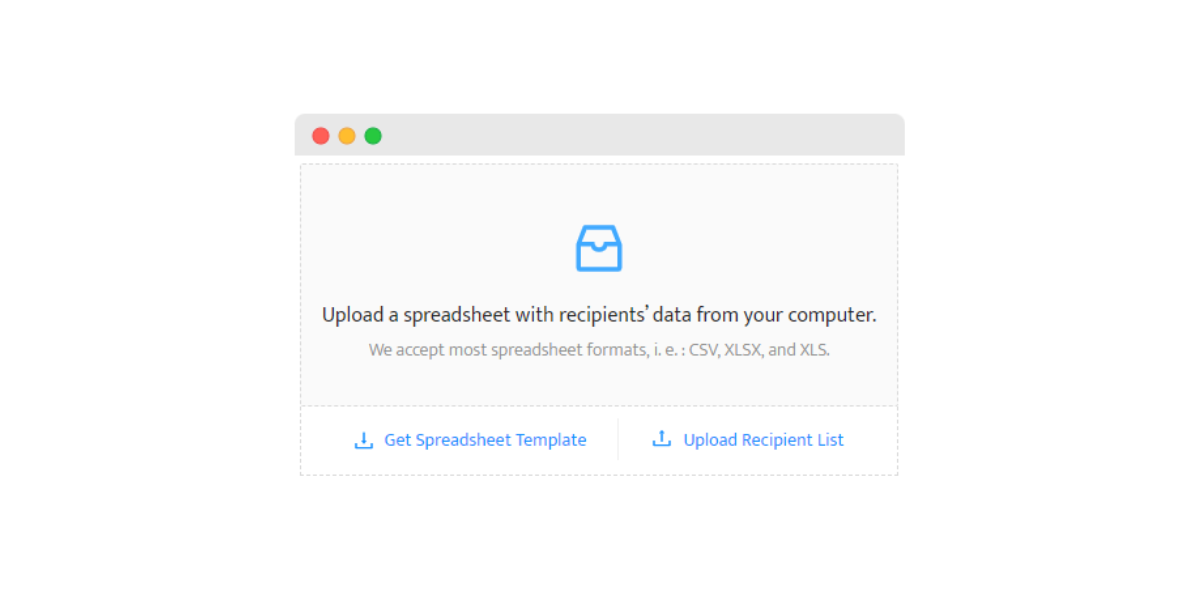
That’s why, now, we will focus on creating your list of participants in CSV, XLSX, or XLS file format.
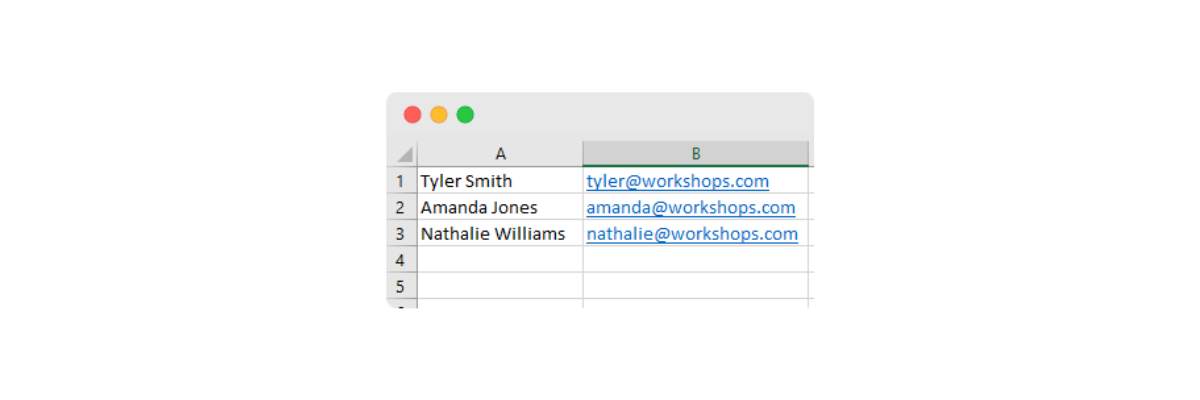
The first column should contain the recipients' names, while the second column should contain their email addresses. It should look, for example, like this:
This will allow you to send certificates quickly because by using dynamic attributes, you can send them with just a few clicks. For example, after uploading a list, it should look like this:
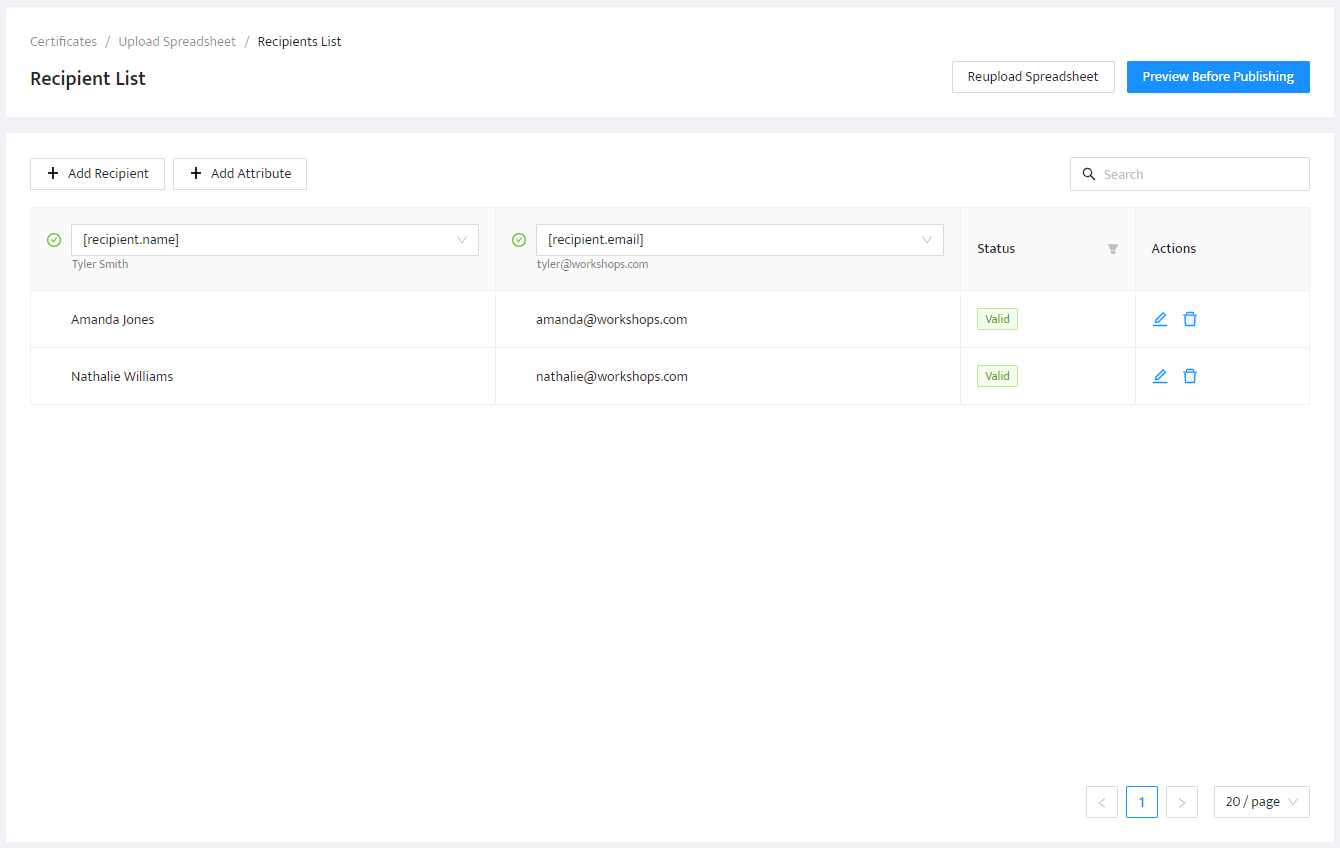
Next, you can preview before publishing, save and publish! And that's it - no manual entry of recipients, intuitive work itself.
Bonus: Free Google Slides certificate templates to download
Still, want to use Google Slides? Here are some Certifier certificate templates that you can easily use with this tool.
Simple and modern course certificate template
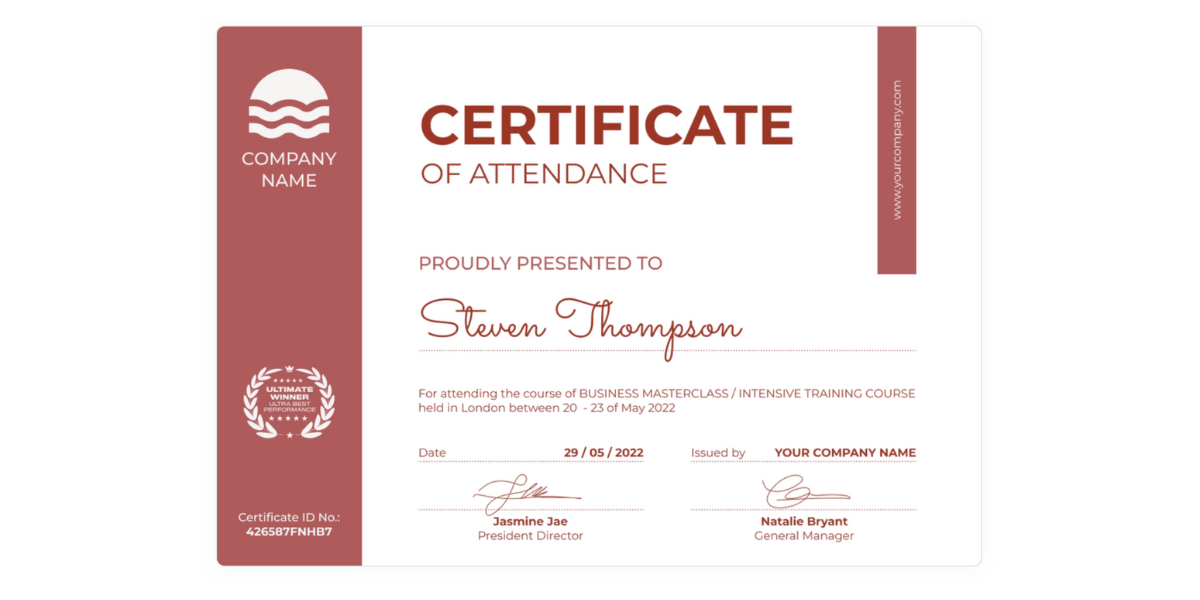
Whether you’re awarding certificates to students or recognizing team members for a job well done, this certificate can set your awards apart. It will show how much you appreciate the people receiving it.
Outstanding and inspiring achievement certificate template
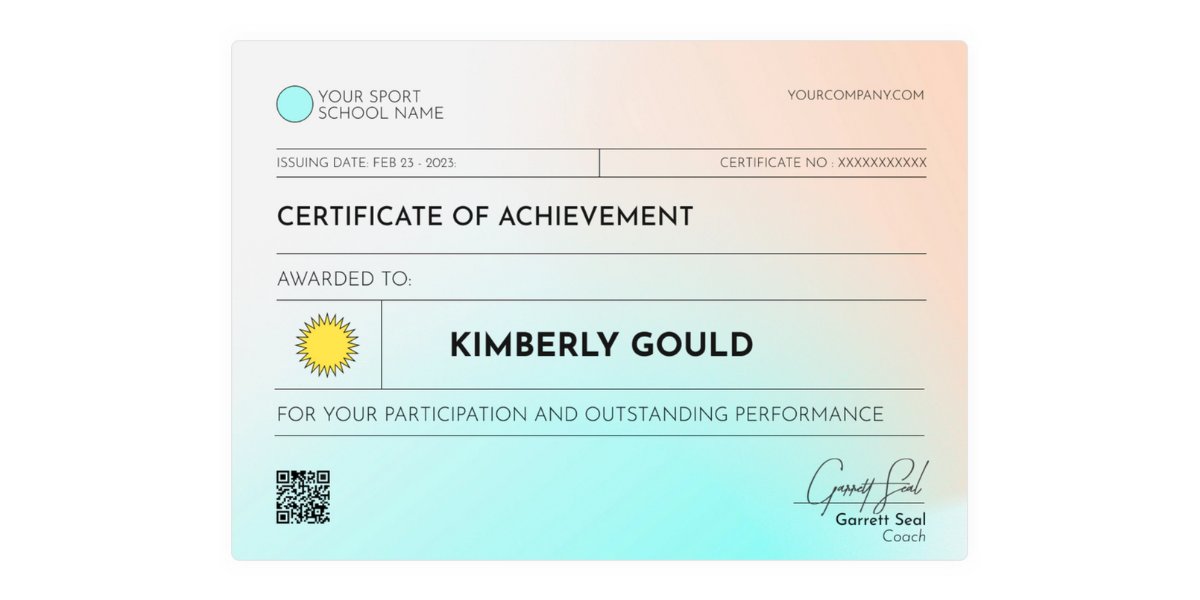
Such a certificate template can be used as corporate awards to recognize hard workers or personalized gifts to celebrate milestones. They are also great for showing your creativity and honor those who have gone above and beyond with their contributions. A real eye-catcher!
Simple and bold Google Slides certificate of achievement template
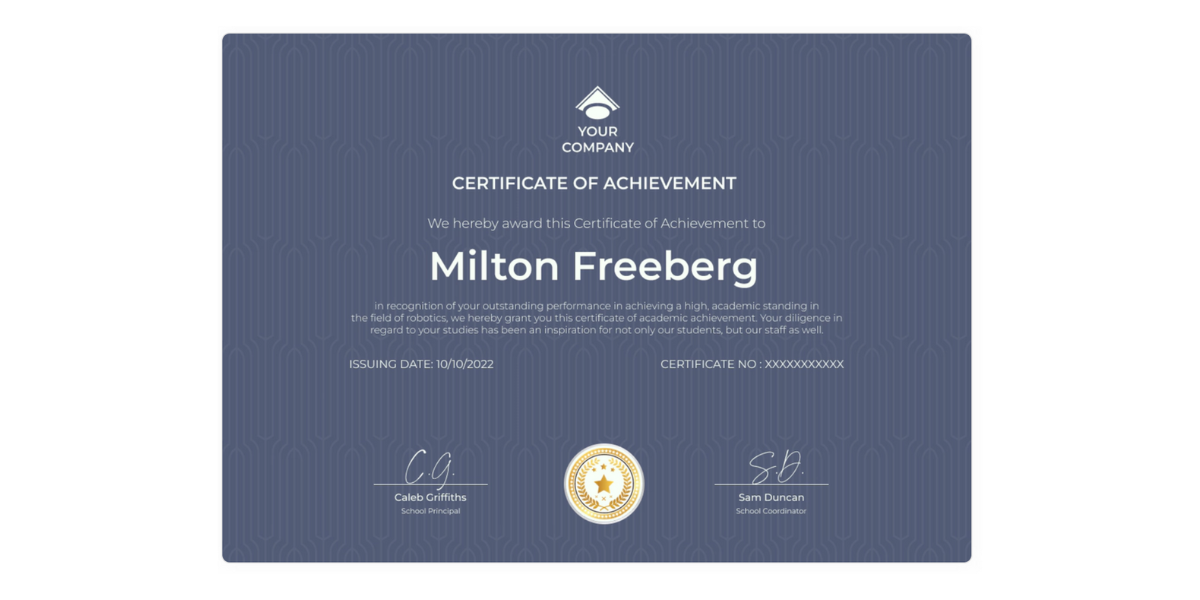
Reward hard-working individuals with this modern and stylish certificate of achievement. This simple yet bold template makes it a breeze to acknowledge great accomplishments – no fuss, completely customizable, and totally free.
Need more Google Slides templates? Check this out: 17 Free Google Slides Certificate Templates.
Over to you
So as you can see – creating certificates can be a piece of cake! Both Google Slides and Certifier make designing certificates easy and will make your customers remember such an award for a long time.
However, if you are looking for a professional tool that will get you not only the basic certificate options but also a lot of advanced ones, Certifier will definitely be a better choice. It surpasses the Google Slides certificates in many aspects, and best of all – you don't have to own a fortune to create a printable certificate because it has a forever-free plan.
FAQ: Google Slides certificate
Here are some of the most common questions that may arise during creating Google Slides certificates.

- SaaS Growth
- Digital Credentials
- APIs
- Product Marketing
- Company Operations
CEO and Co-Founder
Sergey is CEO and Co-Founder of Certifier, a Forbes 30 Under 30 honoree building digital credential infrastructure for 2,000+ organizations worldwide and shaping the future of credentialing.
