Trusted by:
Updated: July 31, 2025
13 min read
The Quickest Way to Issue a Certificate for Completing a Course
Create and deliver a certificate for completing a course in under 15 minutes. Connect Certifier with your course platform, create the workflow once and let automation handle the credential issuance and distribution process. Personalized, professional and branded certificates—ready to go every time someone finishes your course.
The quickest way to create and send a certificate for completing a course is to use a reliable platform that supports doing so.
Today, we will show that it is possible to deliver well-designed, personalized credentials in less than 15 minutes with Certifier—an all-in-one certificate management system.
And by credentials, we mean hundreds or even thousands of such documents. Sounds impossible? Watch us.
Without further ado, let's get started.
TL;DR
Certifier is a certificate management platform that helps you create, send and manage digital course completion certificates at scale.
You can create professional course completed certificates in minutes using ready-made templates.
Integrate Certifier with course tools. Certificates are issued automatically the moment a learner finishes your course.
Branded certificates created with Certifier elevate the post-course experience—they're personalized, professionally designed and easy to share on social media.
The very first step is to sign up or log in to Certifier. It takes just a minute. Choose the appropriate plan depending on your needs—there are free and paid options.
How to create and send a certificate for completing a course?
If you have your account ready, there will be 4 steps that you need to complete:
01 Prepare recipients data
02 Design a certificate of course completion
03 Customize email template
04 Distribute course completion certificates
Let’s get into details.
Step 1: Prepare recipient data
It’s the magic trick for your fast and successful certificate delivery. Create a spreadsheet (CSV, XLSX or XLS) with your participants' information:
Required columns: recipient name and email address
You can add extra columns like grades, achievements, instructor’s name or customized congratulatory notes
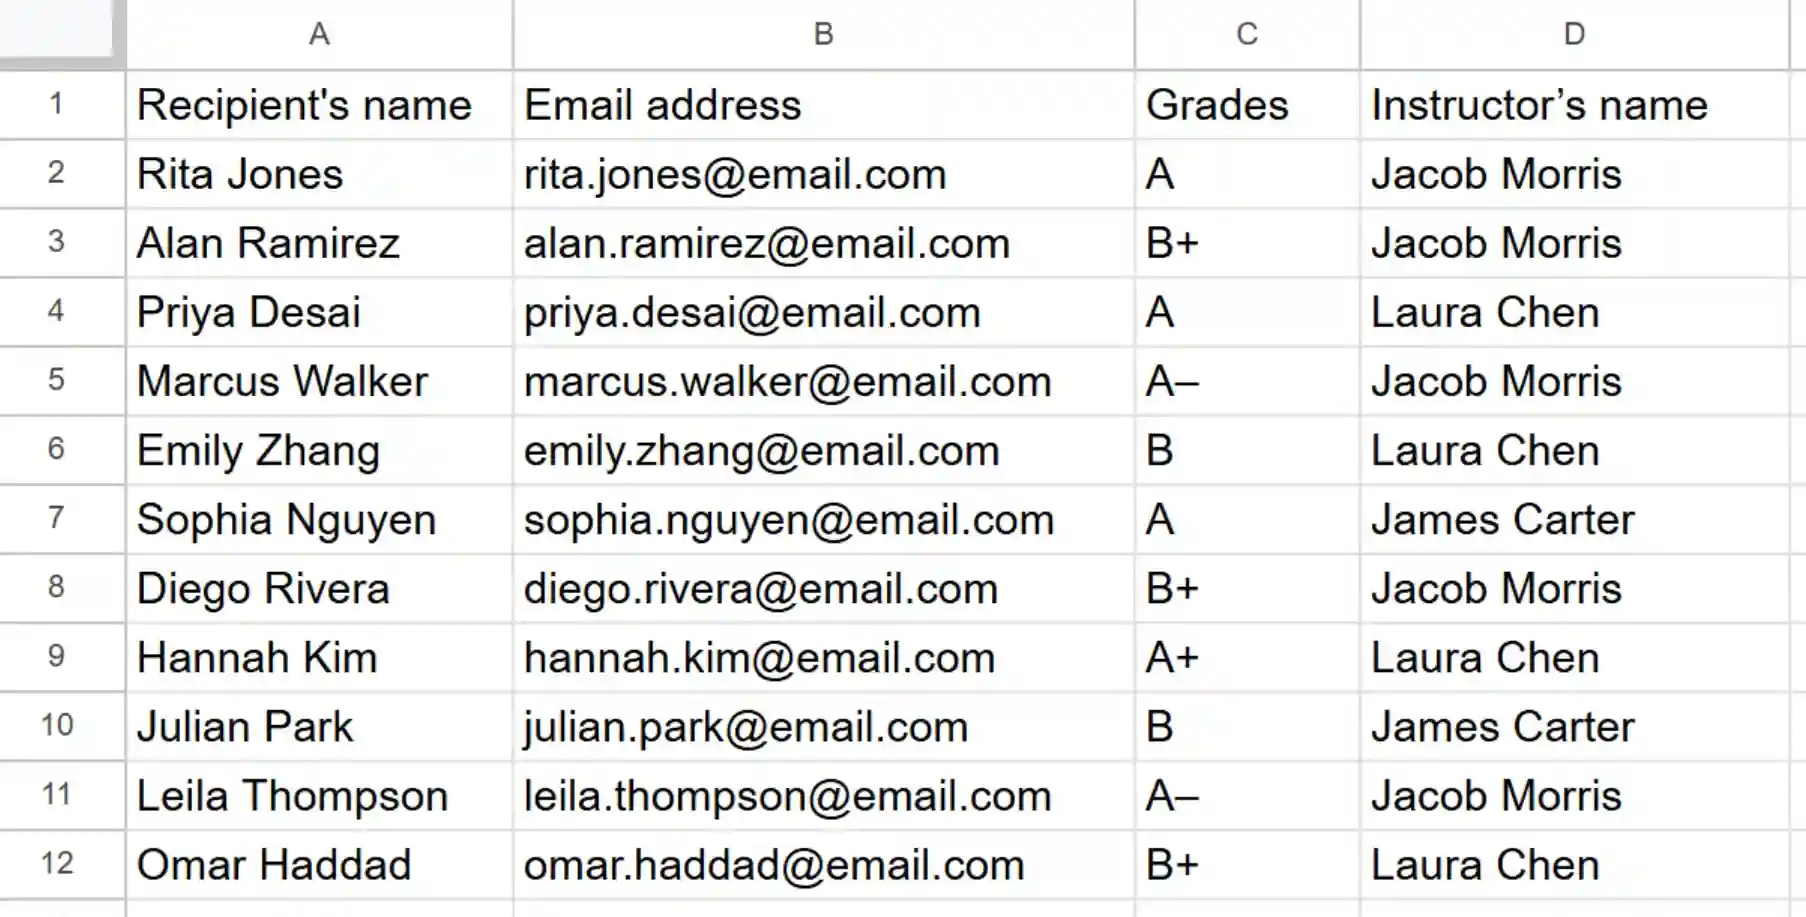
They will appear on the course completion certificate documents. Each participant will get personalized data like their grade, course name, etc., all filled in automatically.
To save time, export participant lists directly from your LMS or course platform.. Double-check all emails for typos to ensure successful delivery. If you have it ready, make sure you put the data in the right column.
But… there’s another shortcut.
Tip on speeding up: Connect seamlessly with platforms like Kajabi, Teachable and more using Certifier Zapier integration. You can automate the issuance process even more—once a learner completes your course, Certifier sends out a branded, personalized certificate instantly.
Set it up once and let it run in the background. Just one workflow that delivers certificates right when they’re earned. Follow the video guide.
You don’t use Zapier? Connect Certifier with other connector tools like Make, Pipedream or use API.
Step 2: Design your certificate
Now, go to Certifier. In your dashboard:
Navigate to the Designs tab
Click Create Design → Certificate Design
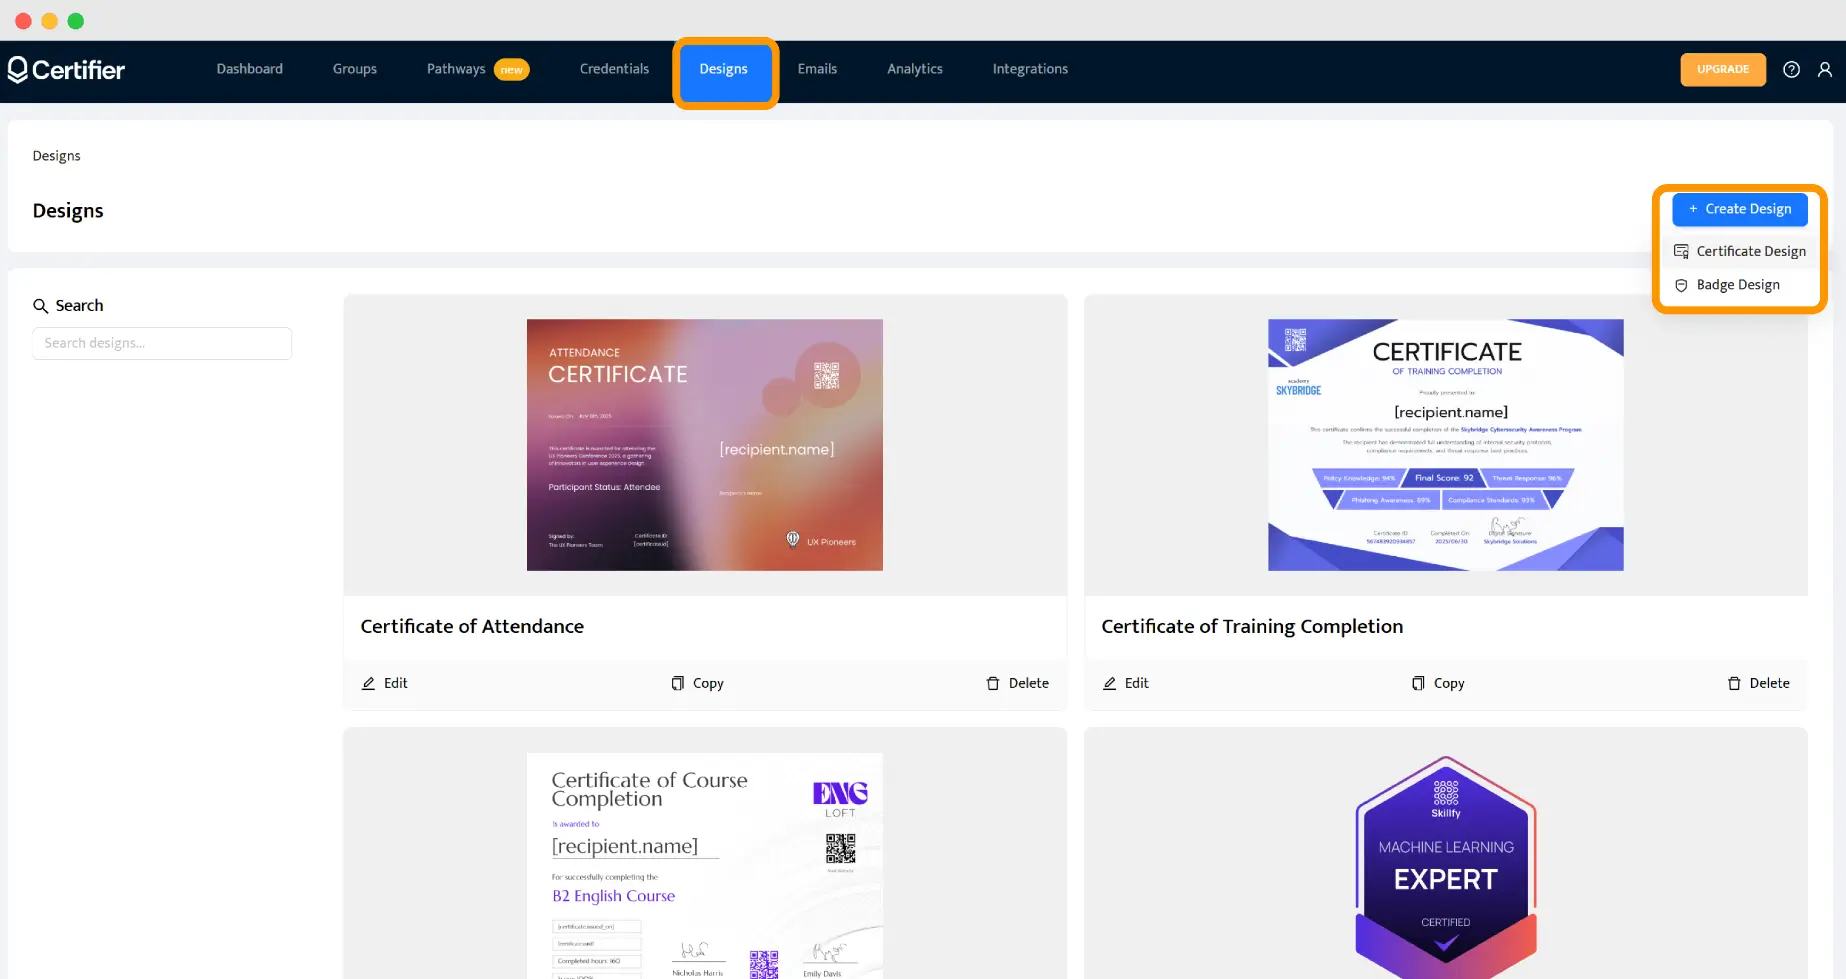
Choose from:
Using the certificate of course completion templates. You can also pick a template that is not connected to the course completion and adjust it easily in Certifier visual builder.
Building a certificate from scratch. It’s more time-consuming, that’s why we recommend using a pre-made certificate of course completion templates.
Personalize:
Add dynamic attributes (they’re placeholders for the details you included in the aforementioned spreadsheet and not only. Add [recipient.name], [issue.date], [expiry.date], [certificate.id] etc.), which will be automatically filled for each recipient.
Customize fonts, colors, wording and layout using the drag-and-drop editor. All our certificates for completing a course template are white-label, which means Certifier’s logo or name won’t appear anywhere on the design. You can fully brand the certificate for completing a course as your own, using your organization’s logo, colors and fonts.
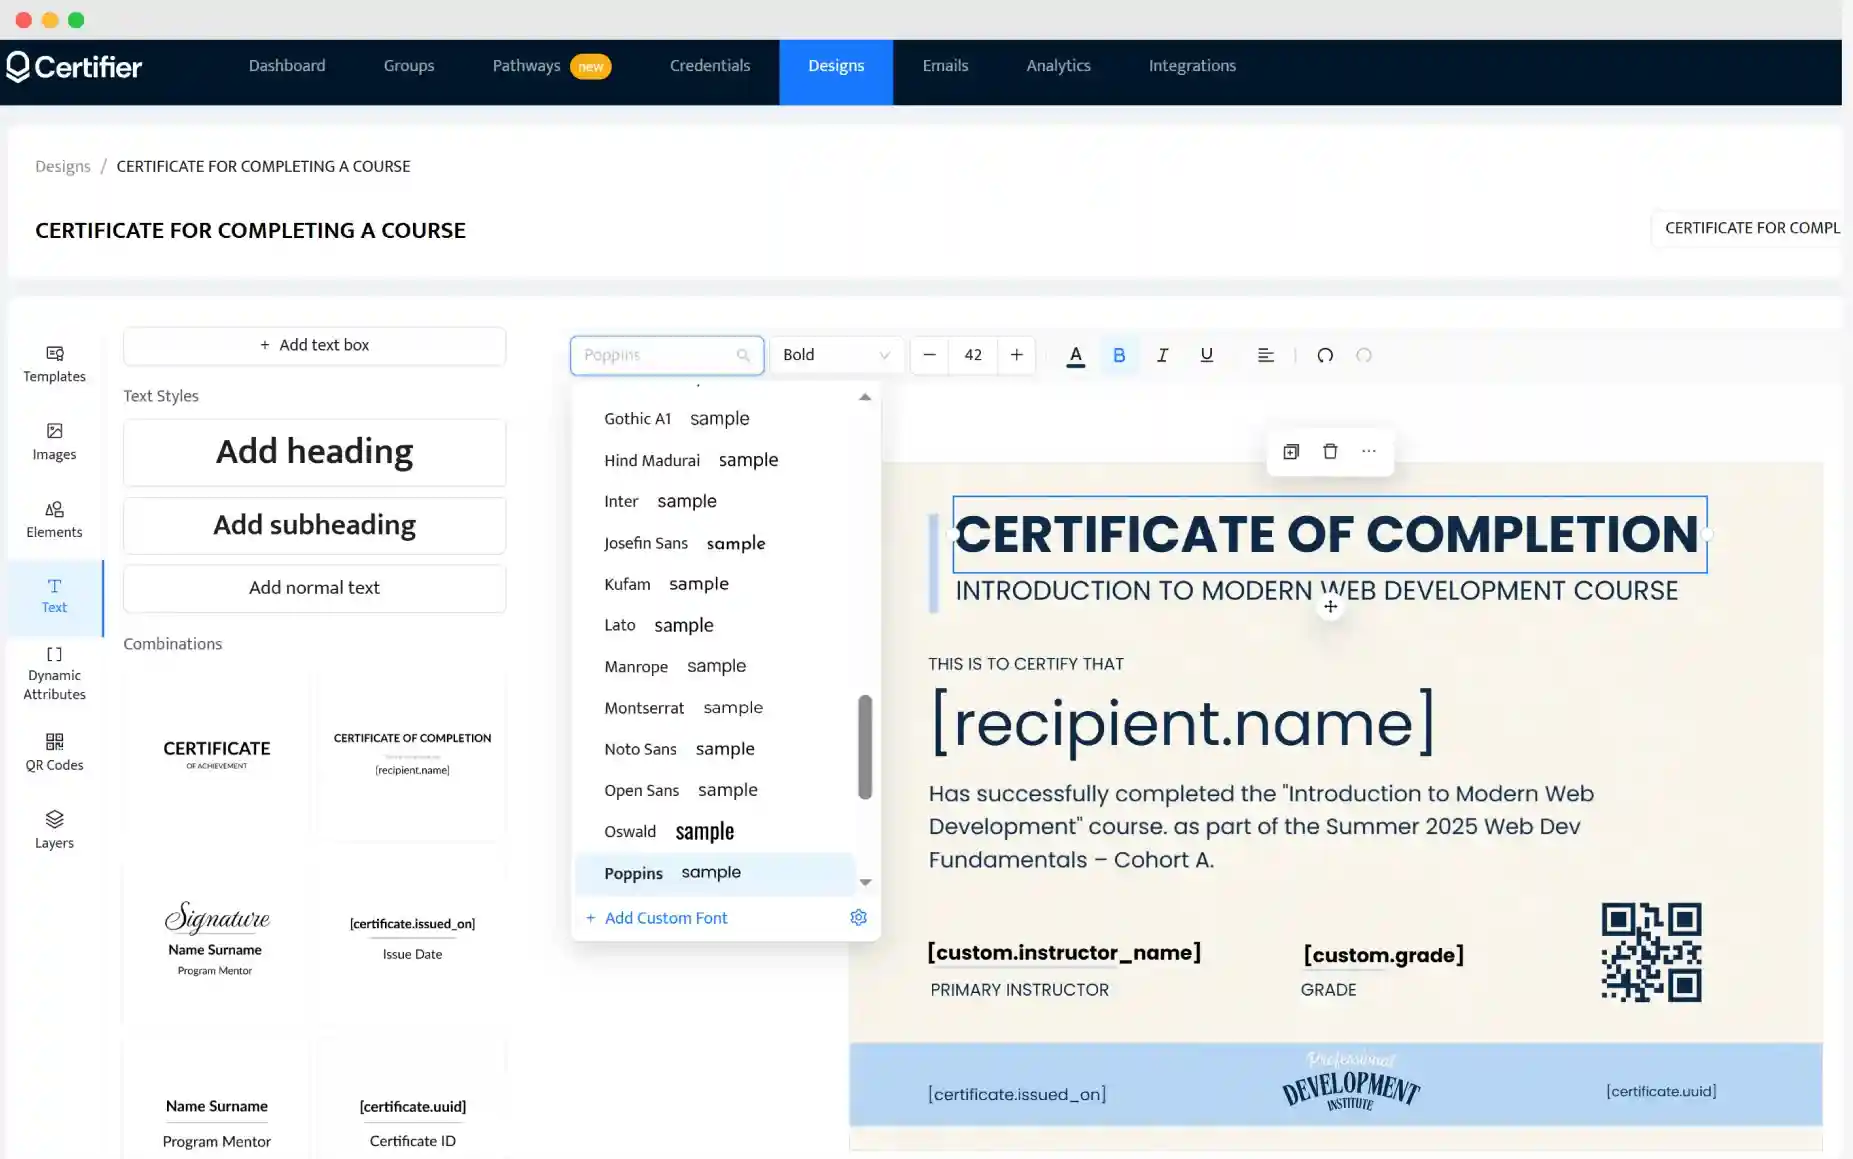
When building your certificate in Certifier visual builder, you’ll work with two kinds of text elements.
01 The fixed text—like the certificate title or message—that stays the same for everyone.
02 Then, you can add dynamic attributes, which are placeholders that change automatically based on your spreadsheet data (such as recipient name, course title or grade). This is what allows each certificate to feel personalized without extra manual work.
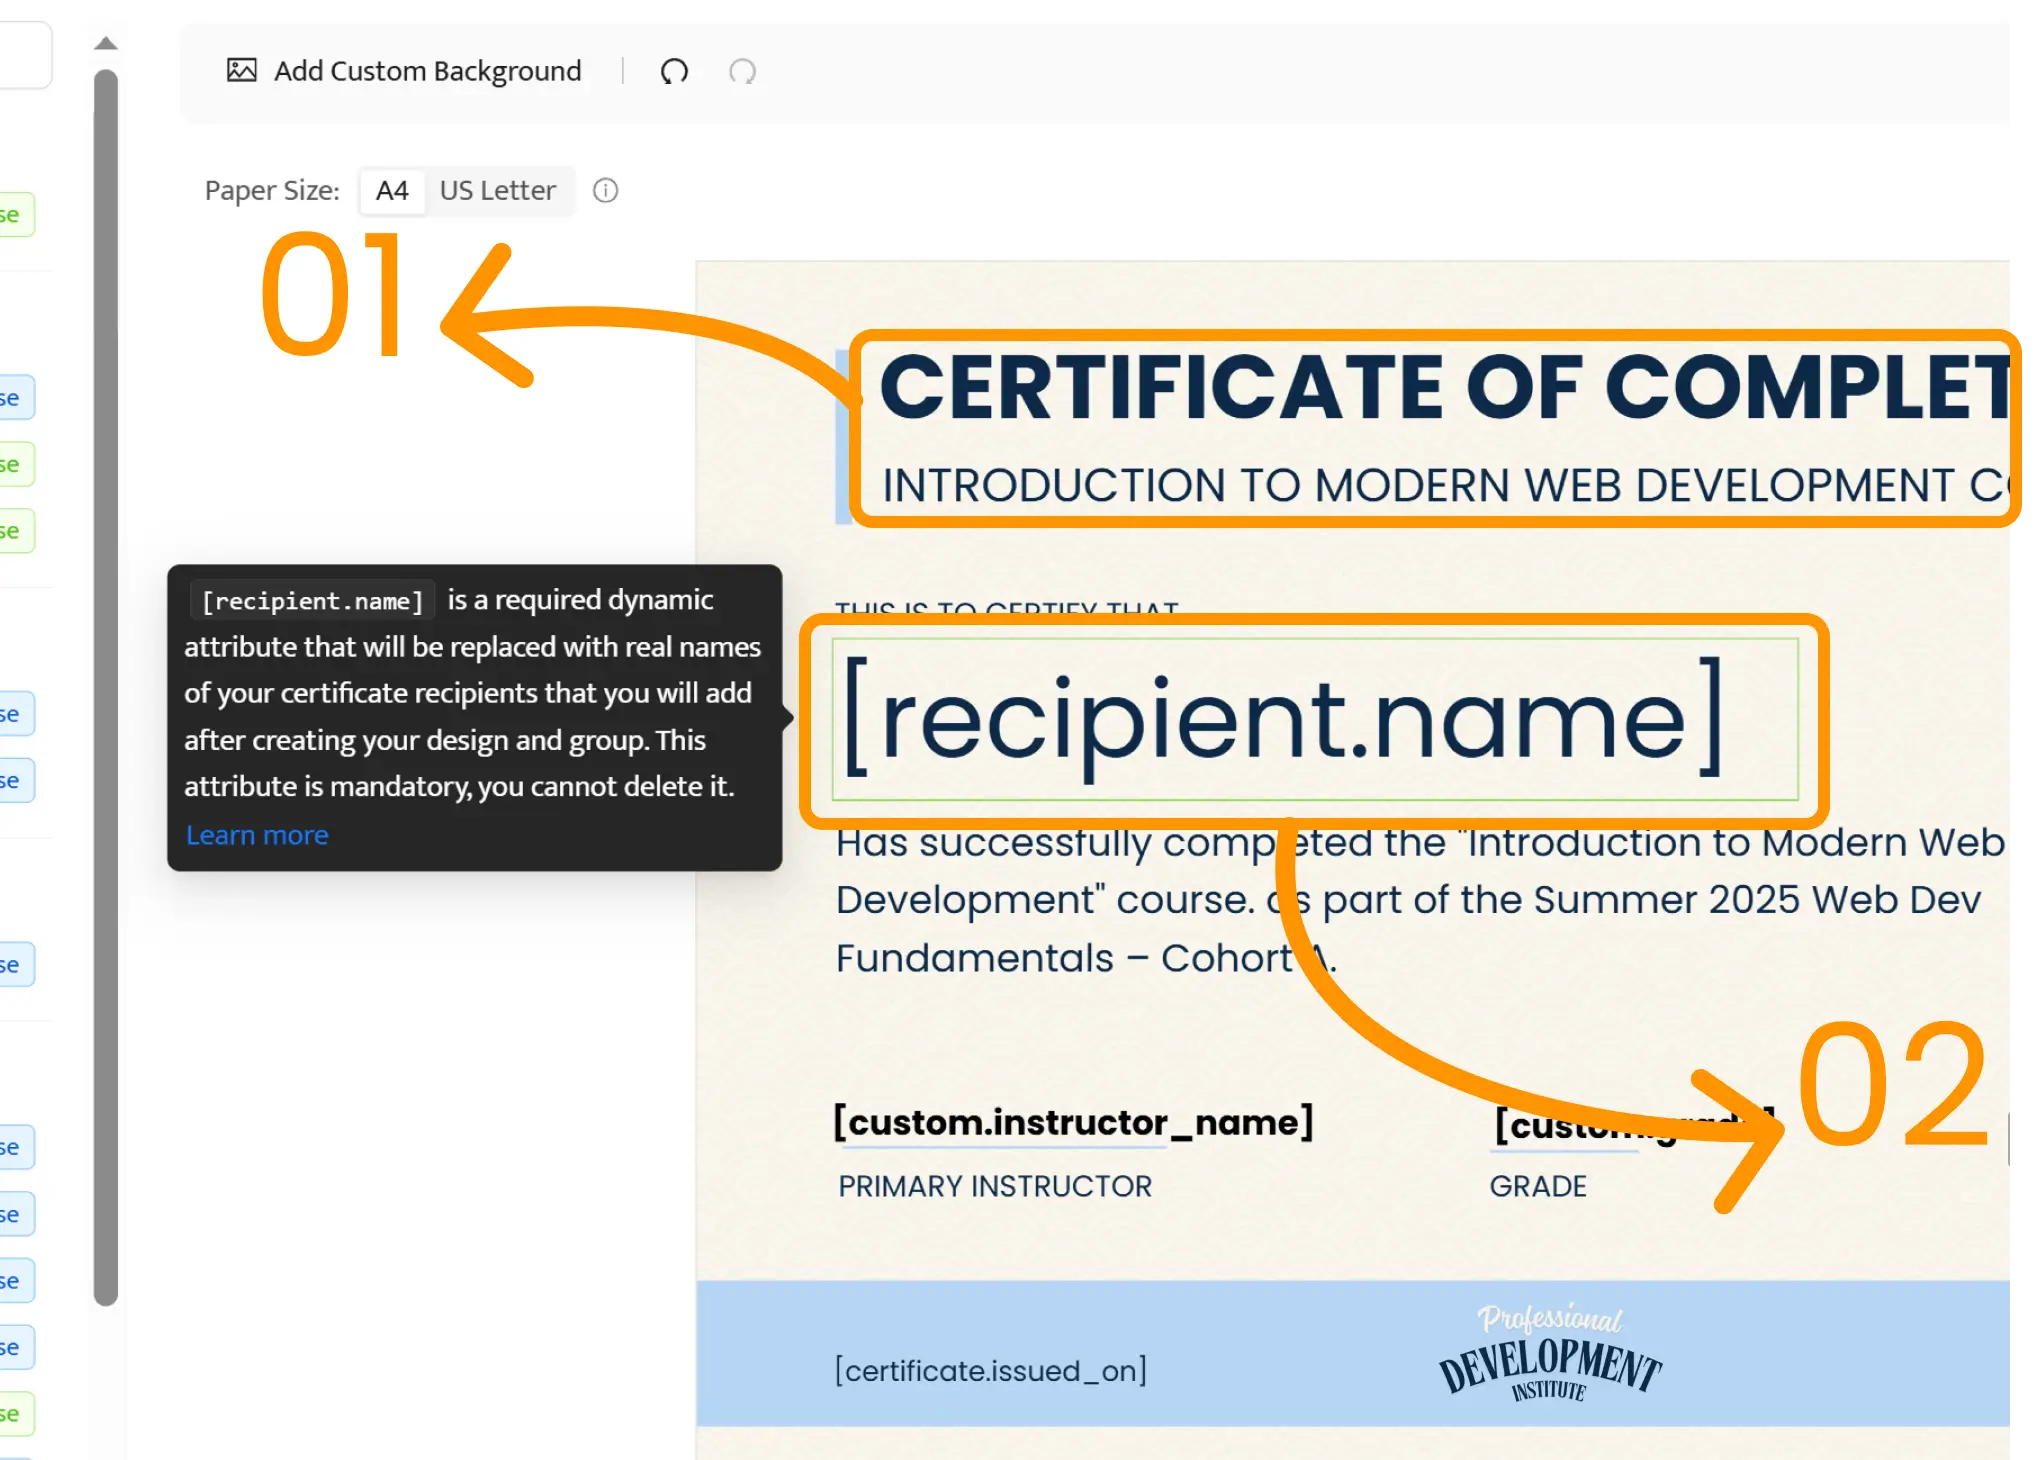
Proofread texts multiple times to avoid any typos—you can fix minor details even after sending. If the design is ready, click Save.
Then, create groups and assign the design you’ve just created. In the Groups tab, click + Create Group.

Next, add descriptive info for context (event name, date, details) and assign your designed certificate to this group.
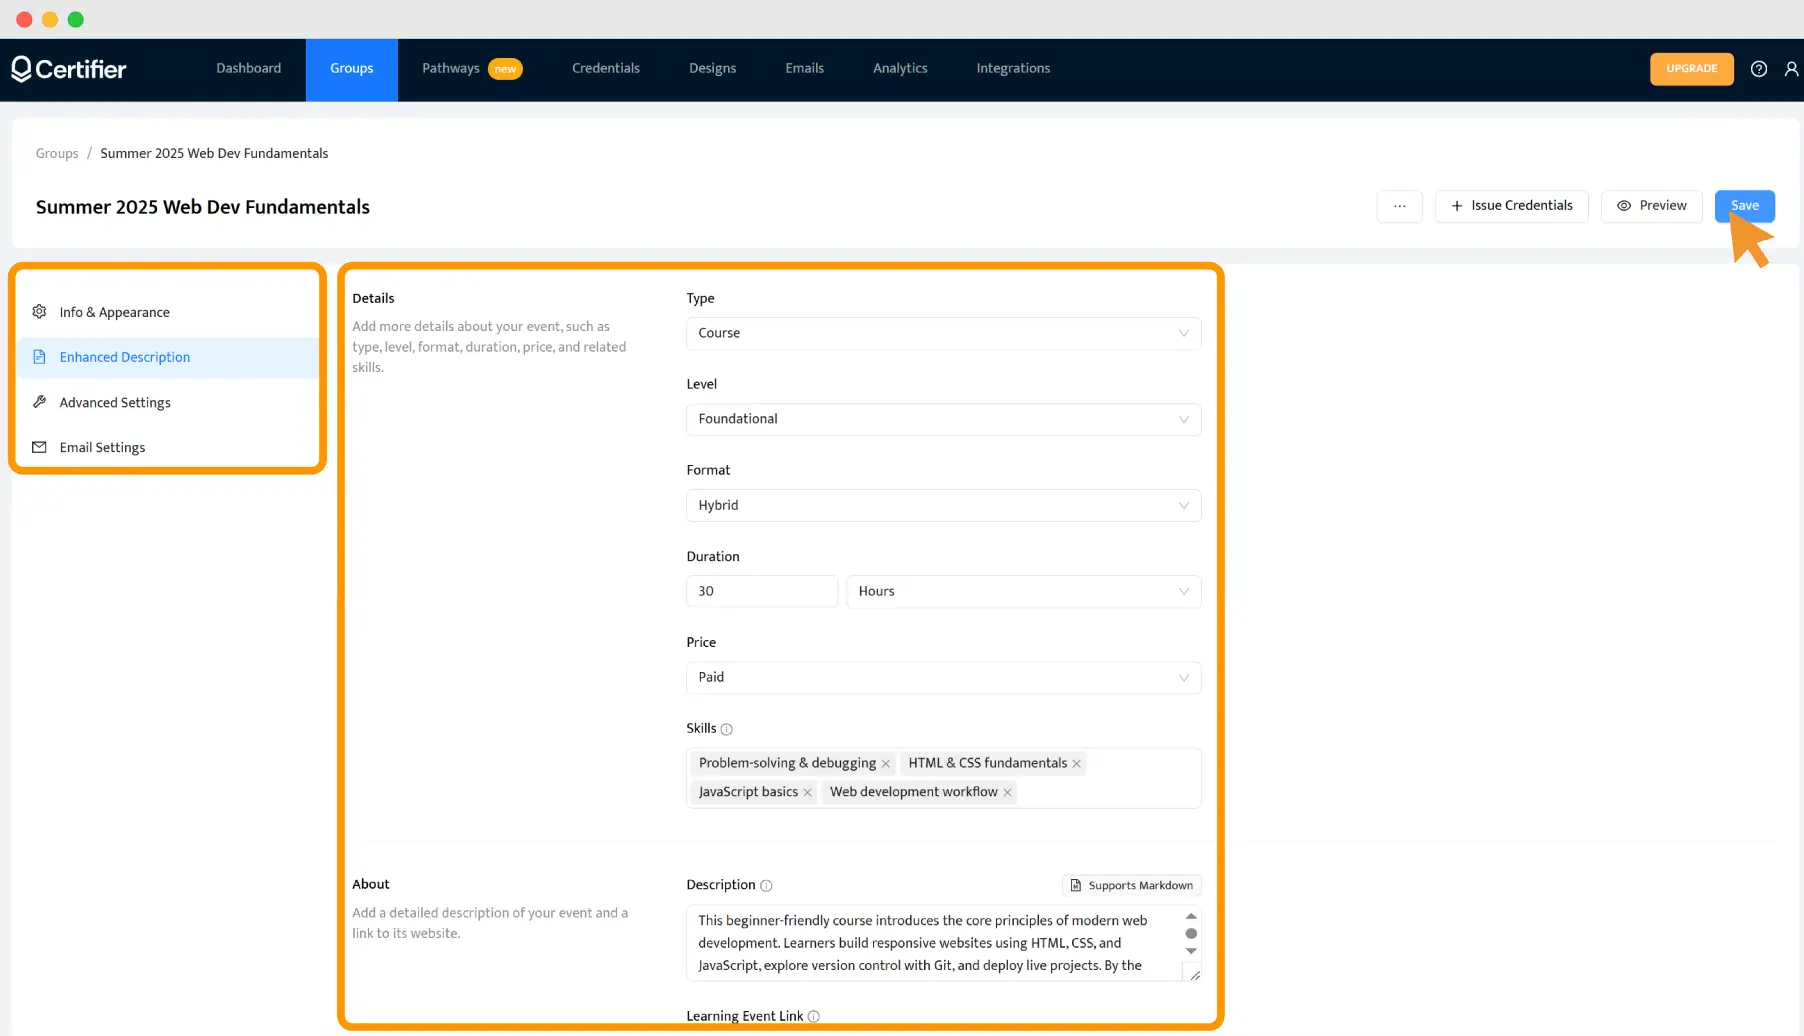
Click Save. Use the Preview Before Publishing feature to see how actual certificates look for each recipients.
It’s almost ready to go. Now let’s move on to the sending part.
Step 3: Customize email template
It is possible to send out course complete certificates via email inside Certifier. The email message can be branded with your brand colors and logo. Moreover, you can send it via a custom domain. You don’t have to use any other tools for that. Tailor the email template without leaving Certifier.
Go to the Emails tab and adjust subject, message and set up branding elements.
Include personal touches using dynamic attributes in the email body to individualize each message further. The attributes work exactly like in the course complete certificate template.
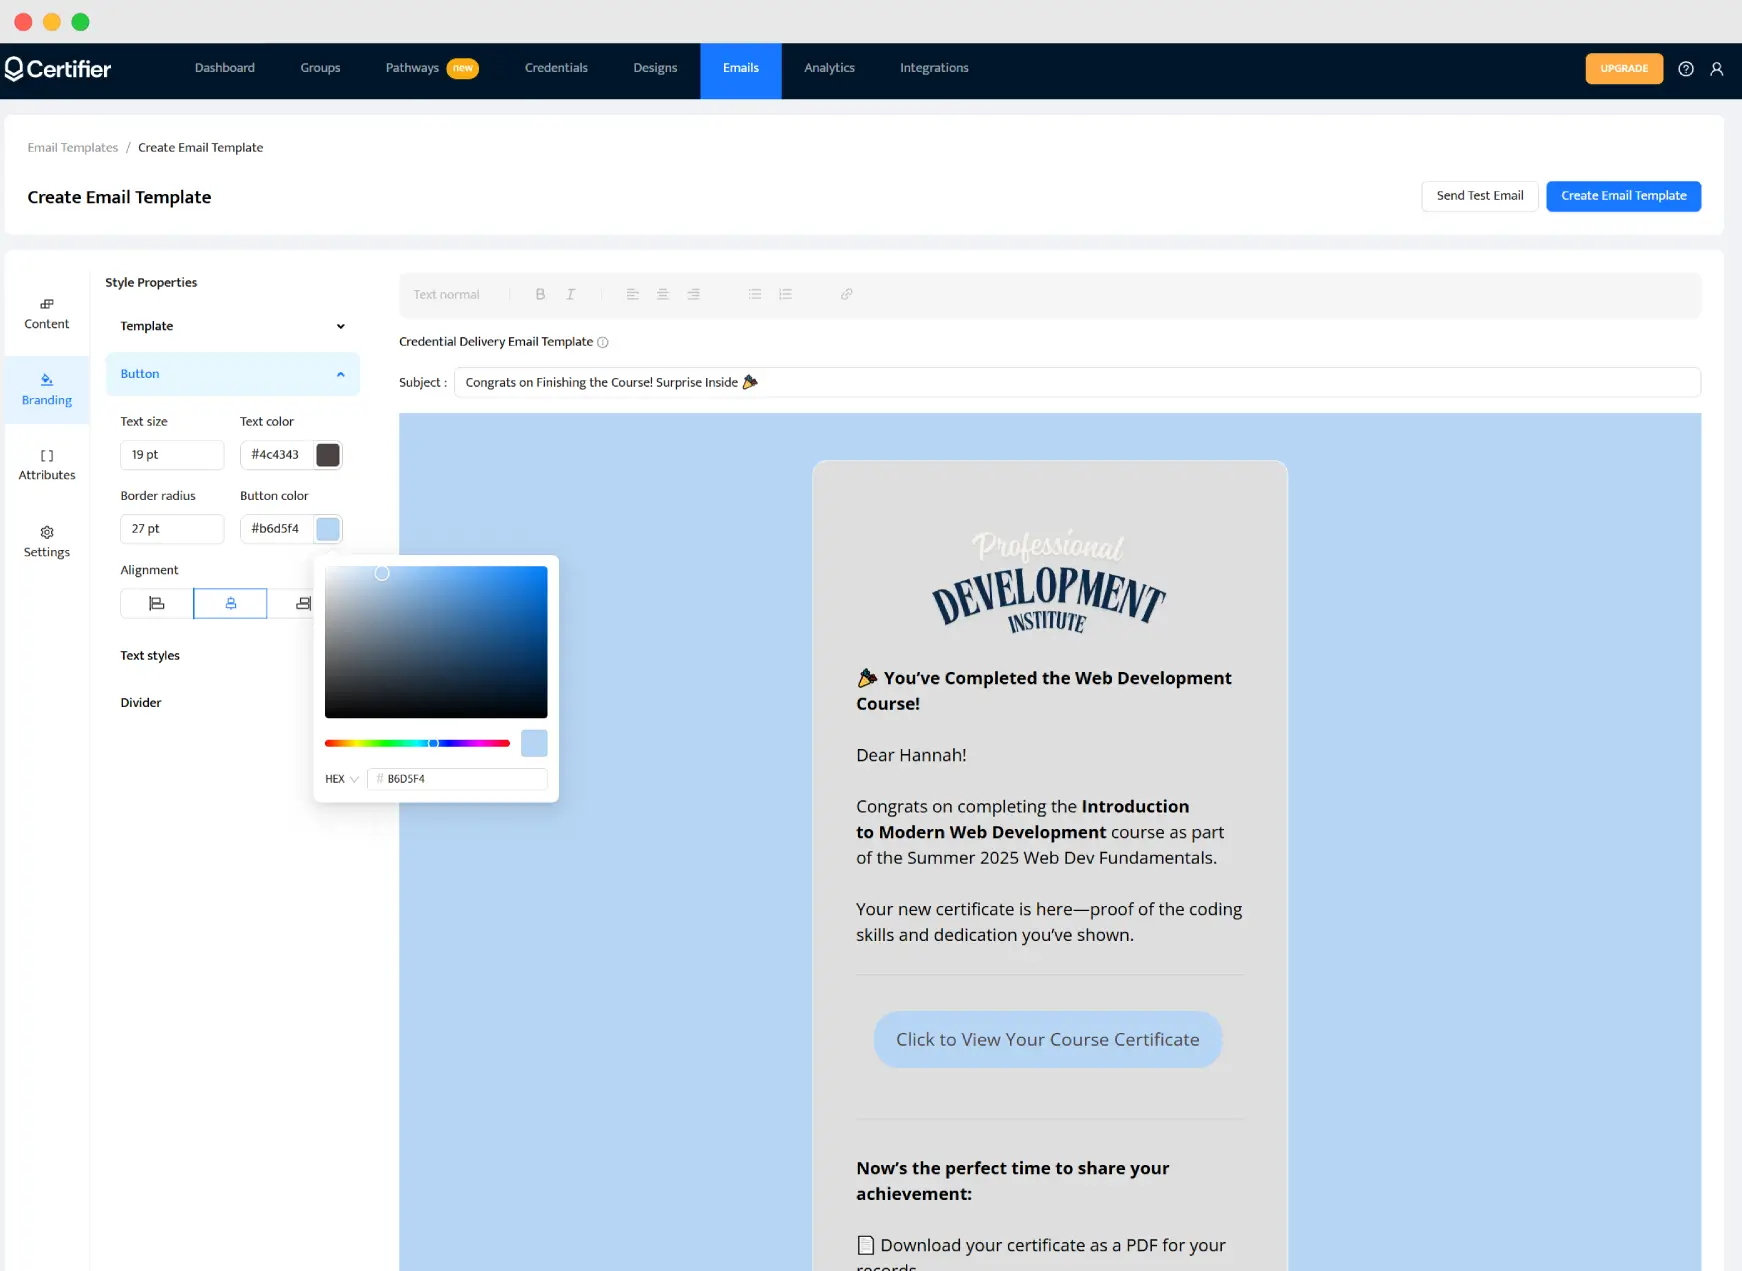
In your email message, include short but actionable instructions on what to do with certificate of course completion: view in a certificate digital wallet, share on social media or download.
Step 4: Send course completion certificates
If you decide to integrate Certifier with your course platform, it’s a step that will happen automatically—the course complete certificates are sent at the moment course takers finish a course.
Go to the Groups tab select + Issue Credentials
Upload the spreadsheet you prepared in Step 1—the system will guide you through mapping columns
Certifier will automatically send personalized emails to each recipient with their individual training course completion certificate.
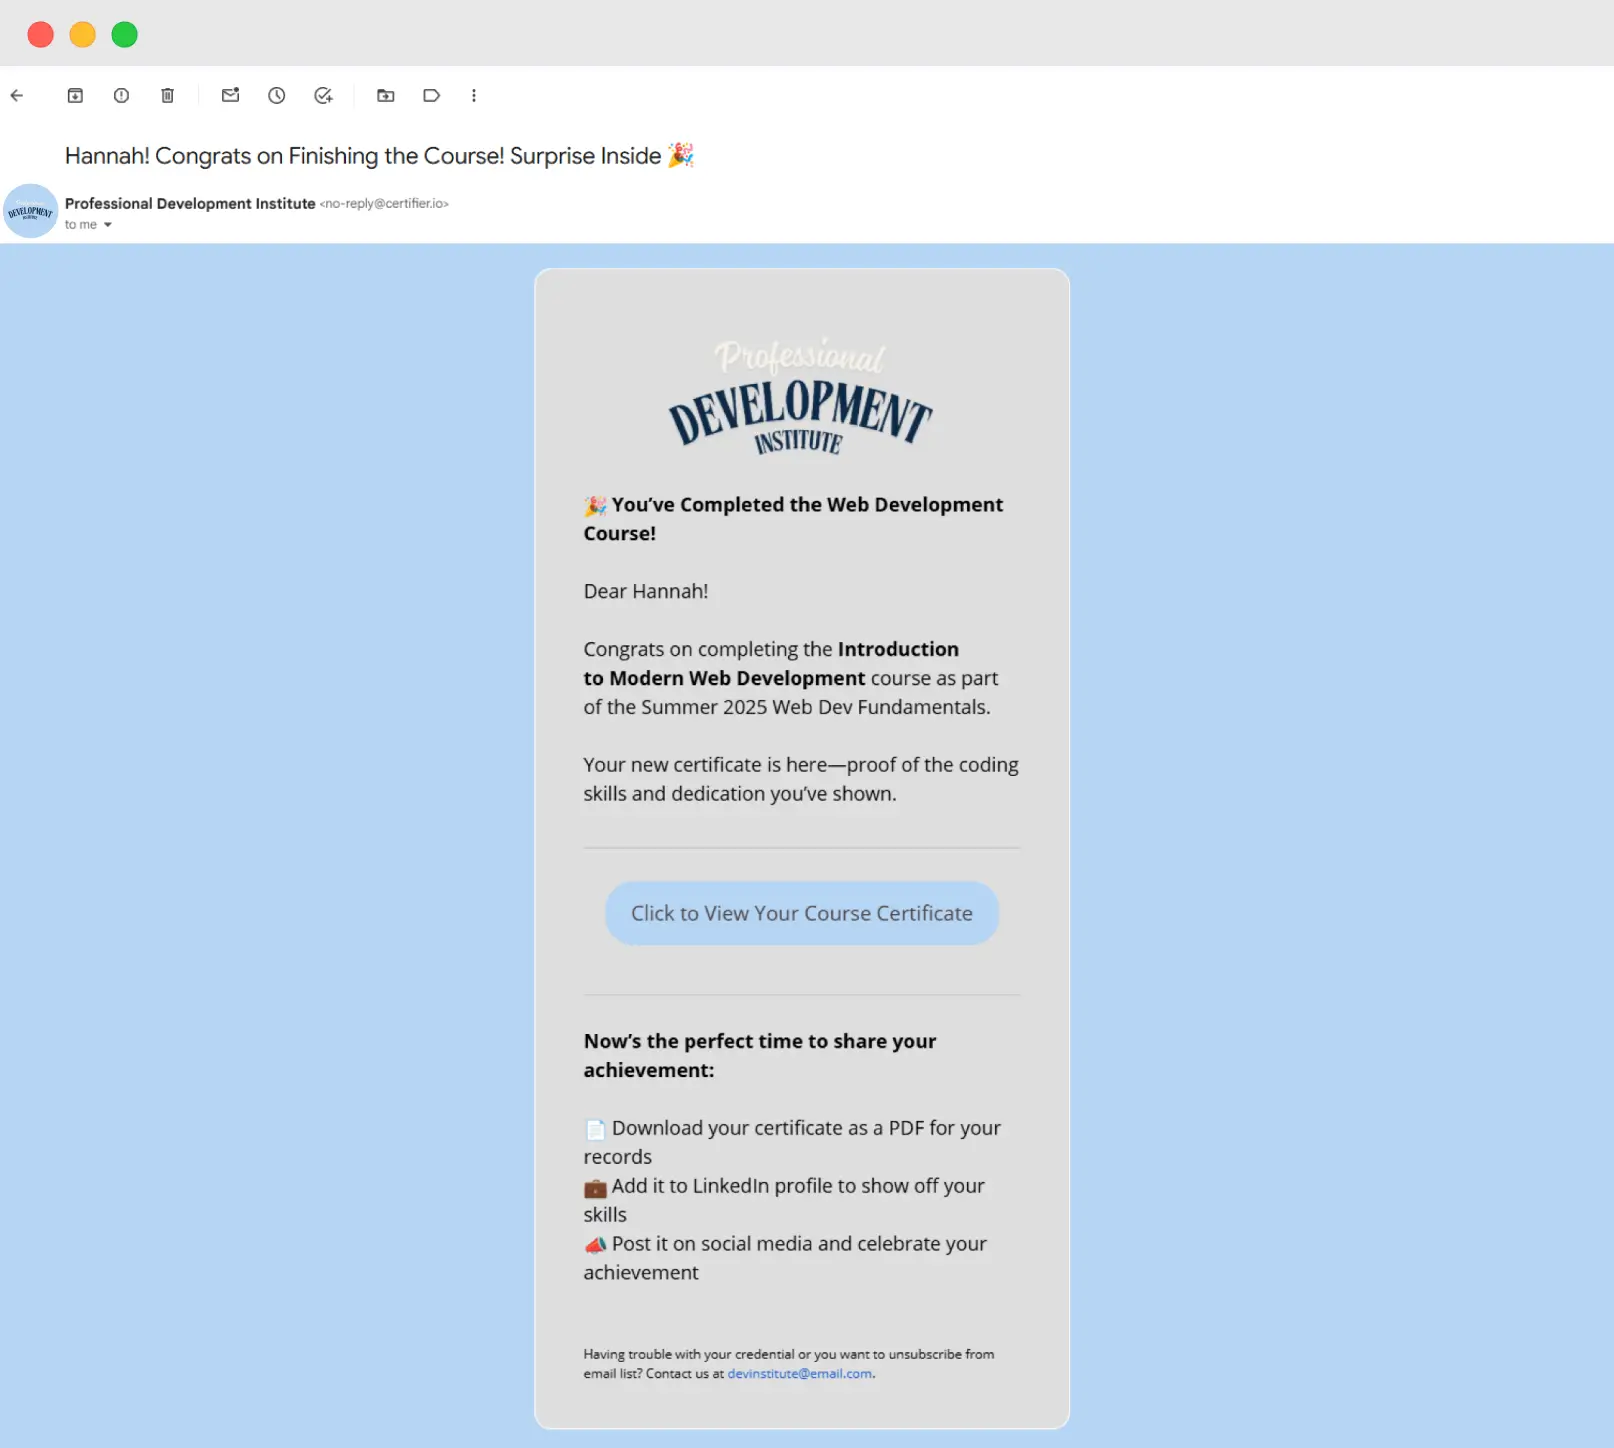
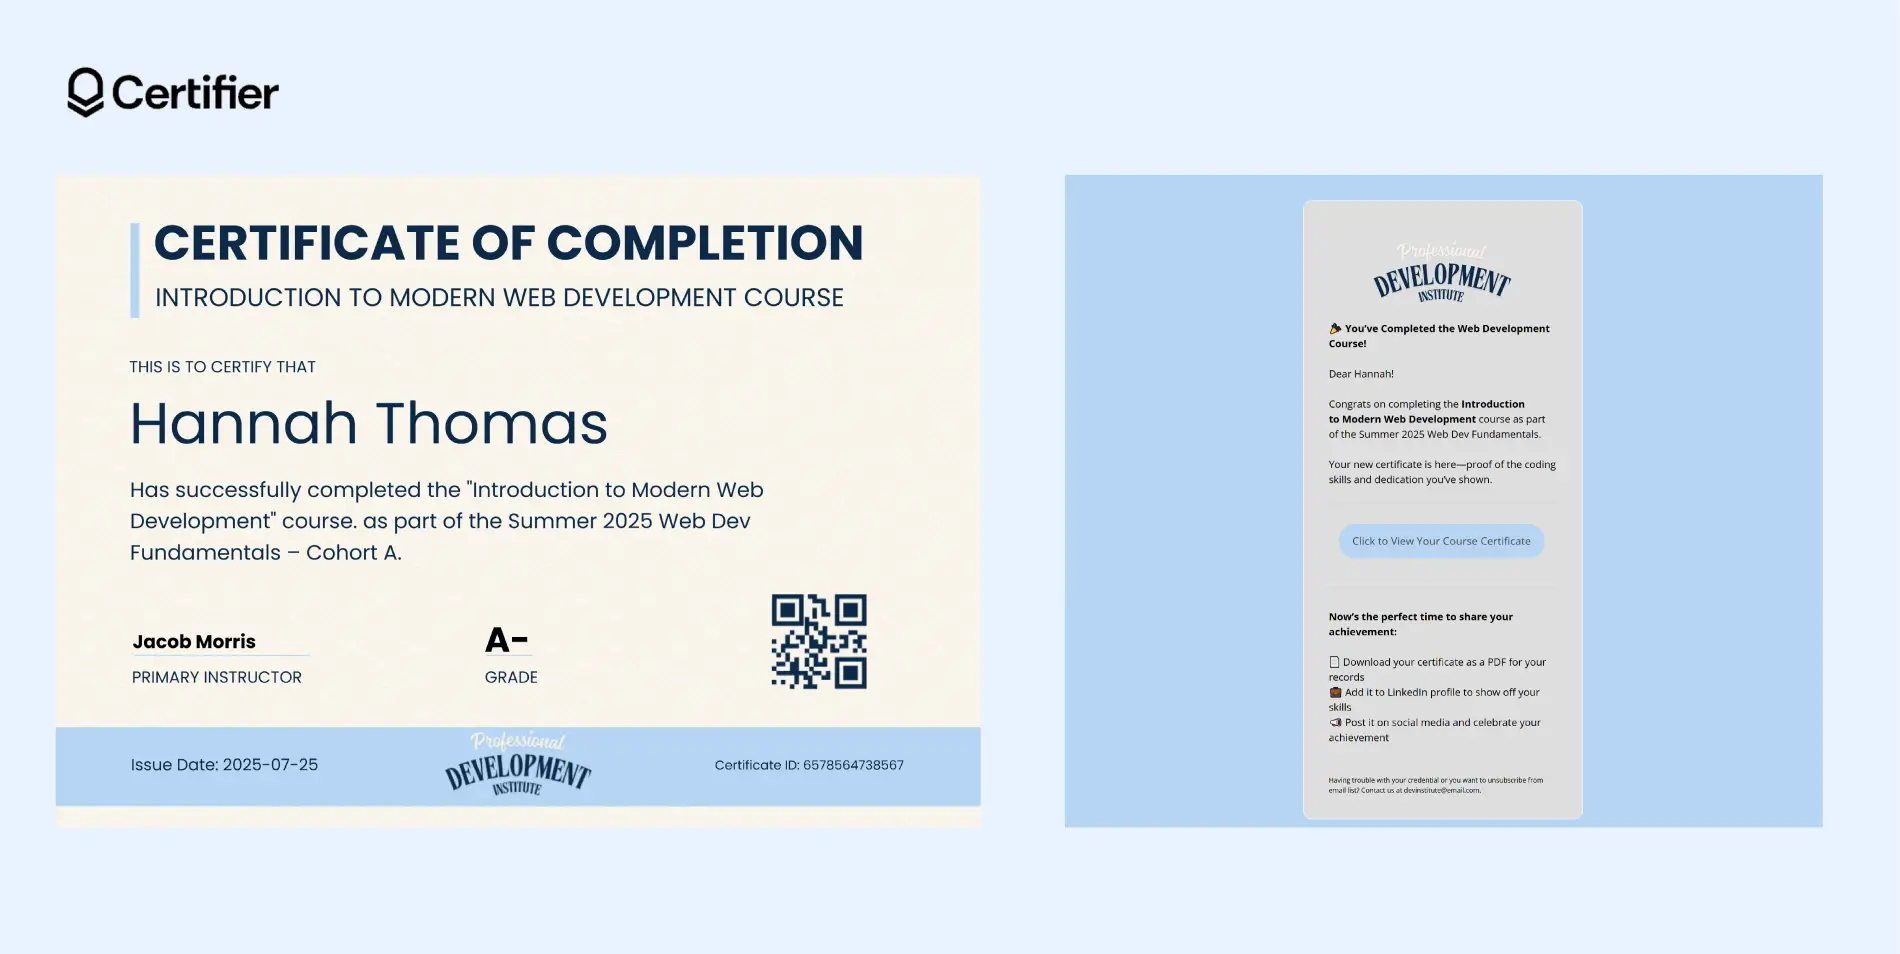
The email and certificate speak the same visual language—same logo, same colors, same voice. It’s a small lift with a big payoff. These seemingly small details build a stronger post-event experience and reinforce your organization’s image.
Bonus: post-delivery management of course completion certificates
Certifier gives you a chance to support your learners even after the course ends.
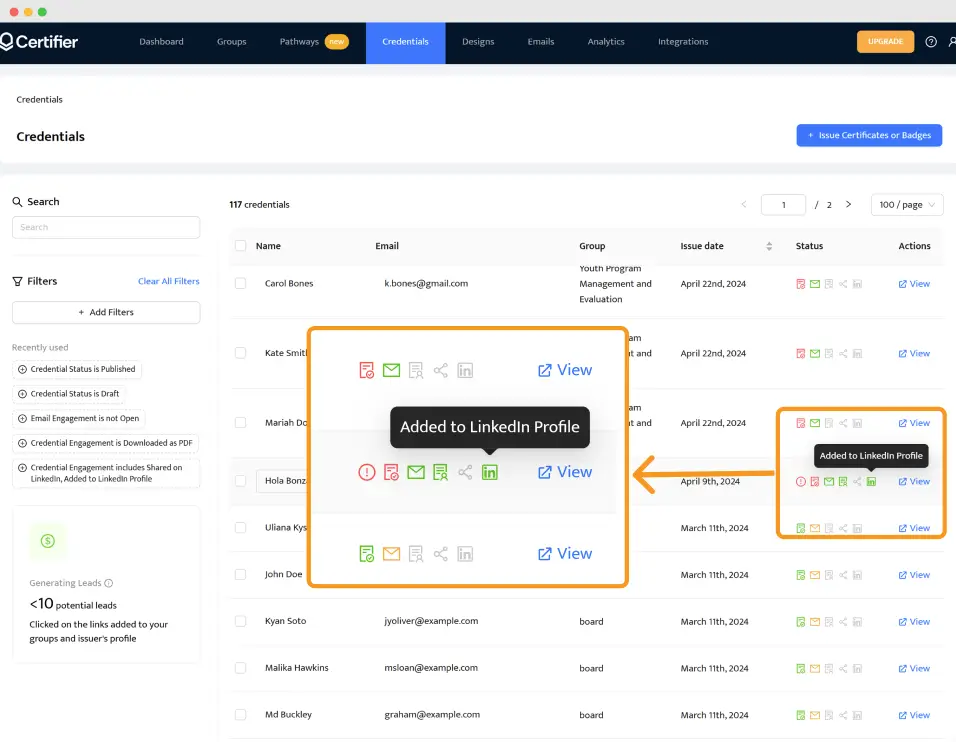
Inside your dashboard, you can manage your certificates: track who opened the certificate email, who viewed their certificates, who shared it on LinkedIn and more. You’ll see real engagement. It’s an easy way to measure the impact of your course and understand how your credentials are performing.
Need to fix a typo in a recipient’s name? Update a grade? You don’t have to reissue the certificate from scratch. Make the edit and Certifier will automatically sync the new version in the learner’s digital wallet.
Certificate tips for course creators
You’ve issued a certificate for completing a course—amazing job! But a few small tweaks can turn that moment into something learners remember and share their certificates for completing a course on social media. Learn how to take it further. A handful of tips:
Integrate Certifier with your course platform
Certifier loves teamwork and it works flawlessly with course platforms. Set it up once and you’re done. Just design your free certificate in Certifier, connect it to your course tool, build a workflow and let the magic run in the background.
Your training course completion certificates get sent automatically when a learner finishes the course. No manual uploads. Just a seamless certificate for course completion delivery.
Use your Issuer’s Portal
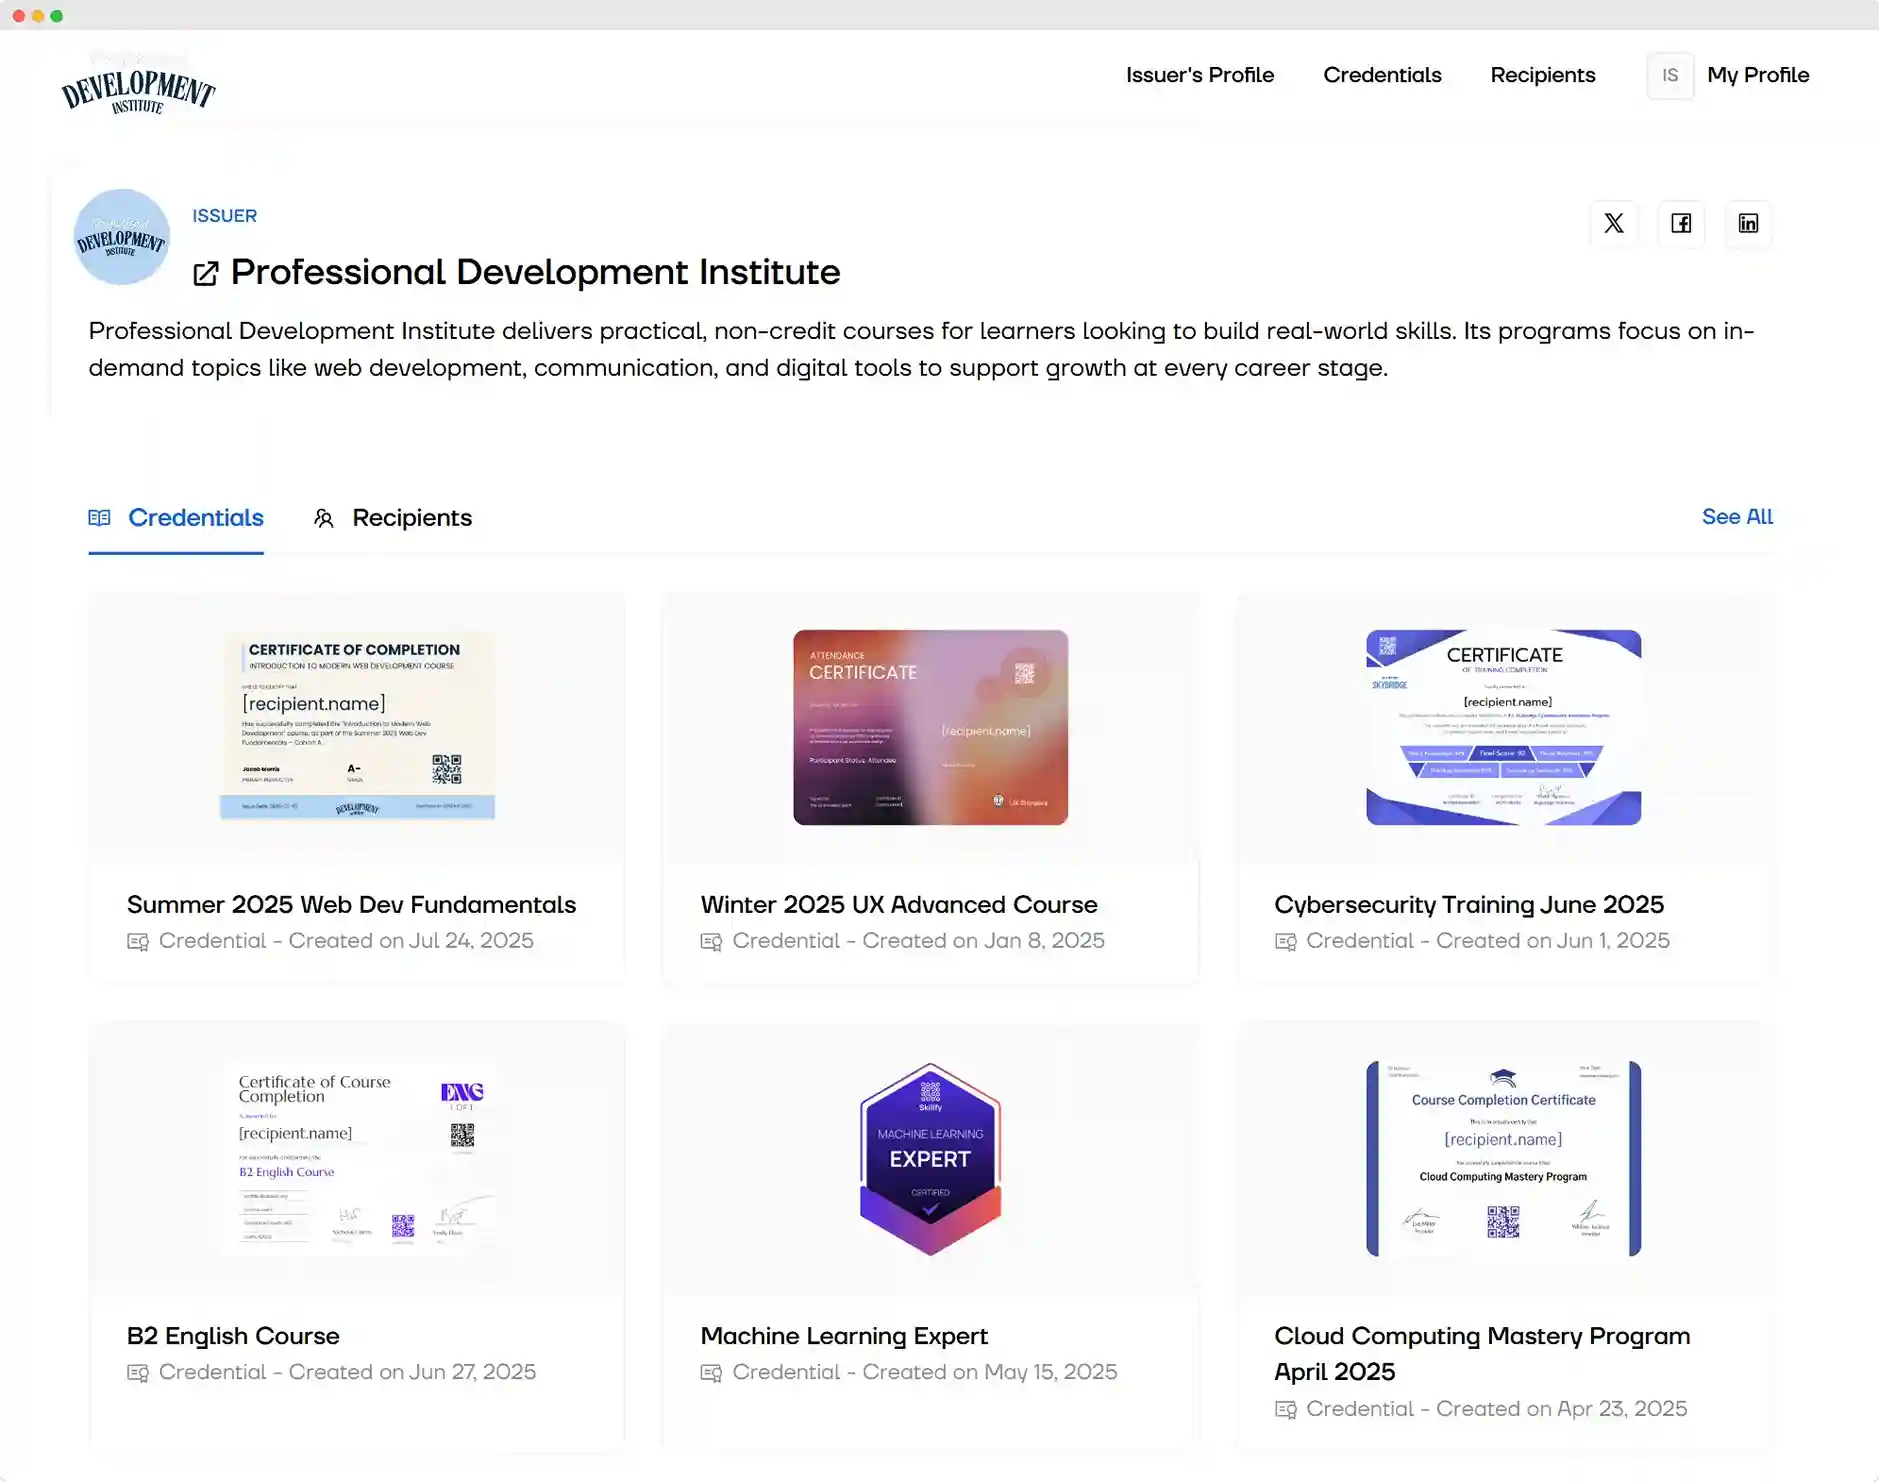
Every certificate of course completion is automatically added to your branded Issuer’s Portal. Add your logo, name and a brief description. Anyone who lands there sees what you've issued—like a portfolio for your online courses.
Keep motivation high with milestone badges
Don’t wait until the end to reward progress. Thanks to the Pathway feature, you can drop digital badges for course achievements like “First Module Completed” or “Top Project.” Certifier lets you issue them instantly. They land in the same digital wallet as your course completion certificate.
Deliver every certificate into a secure digital wallet
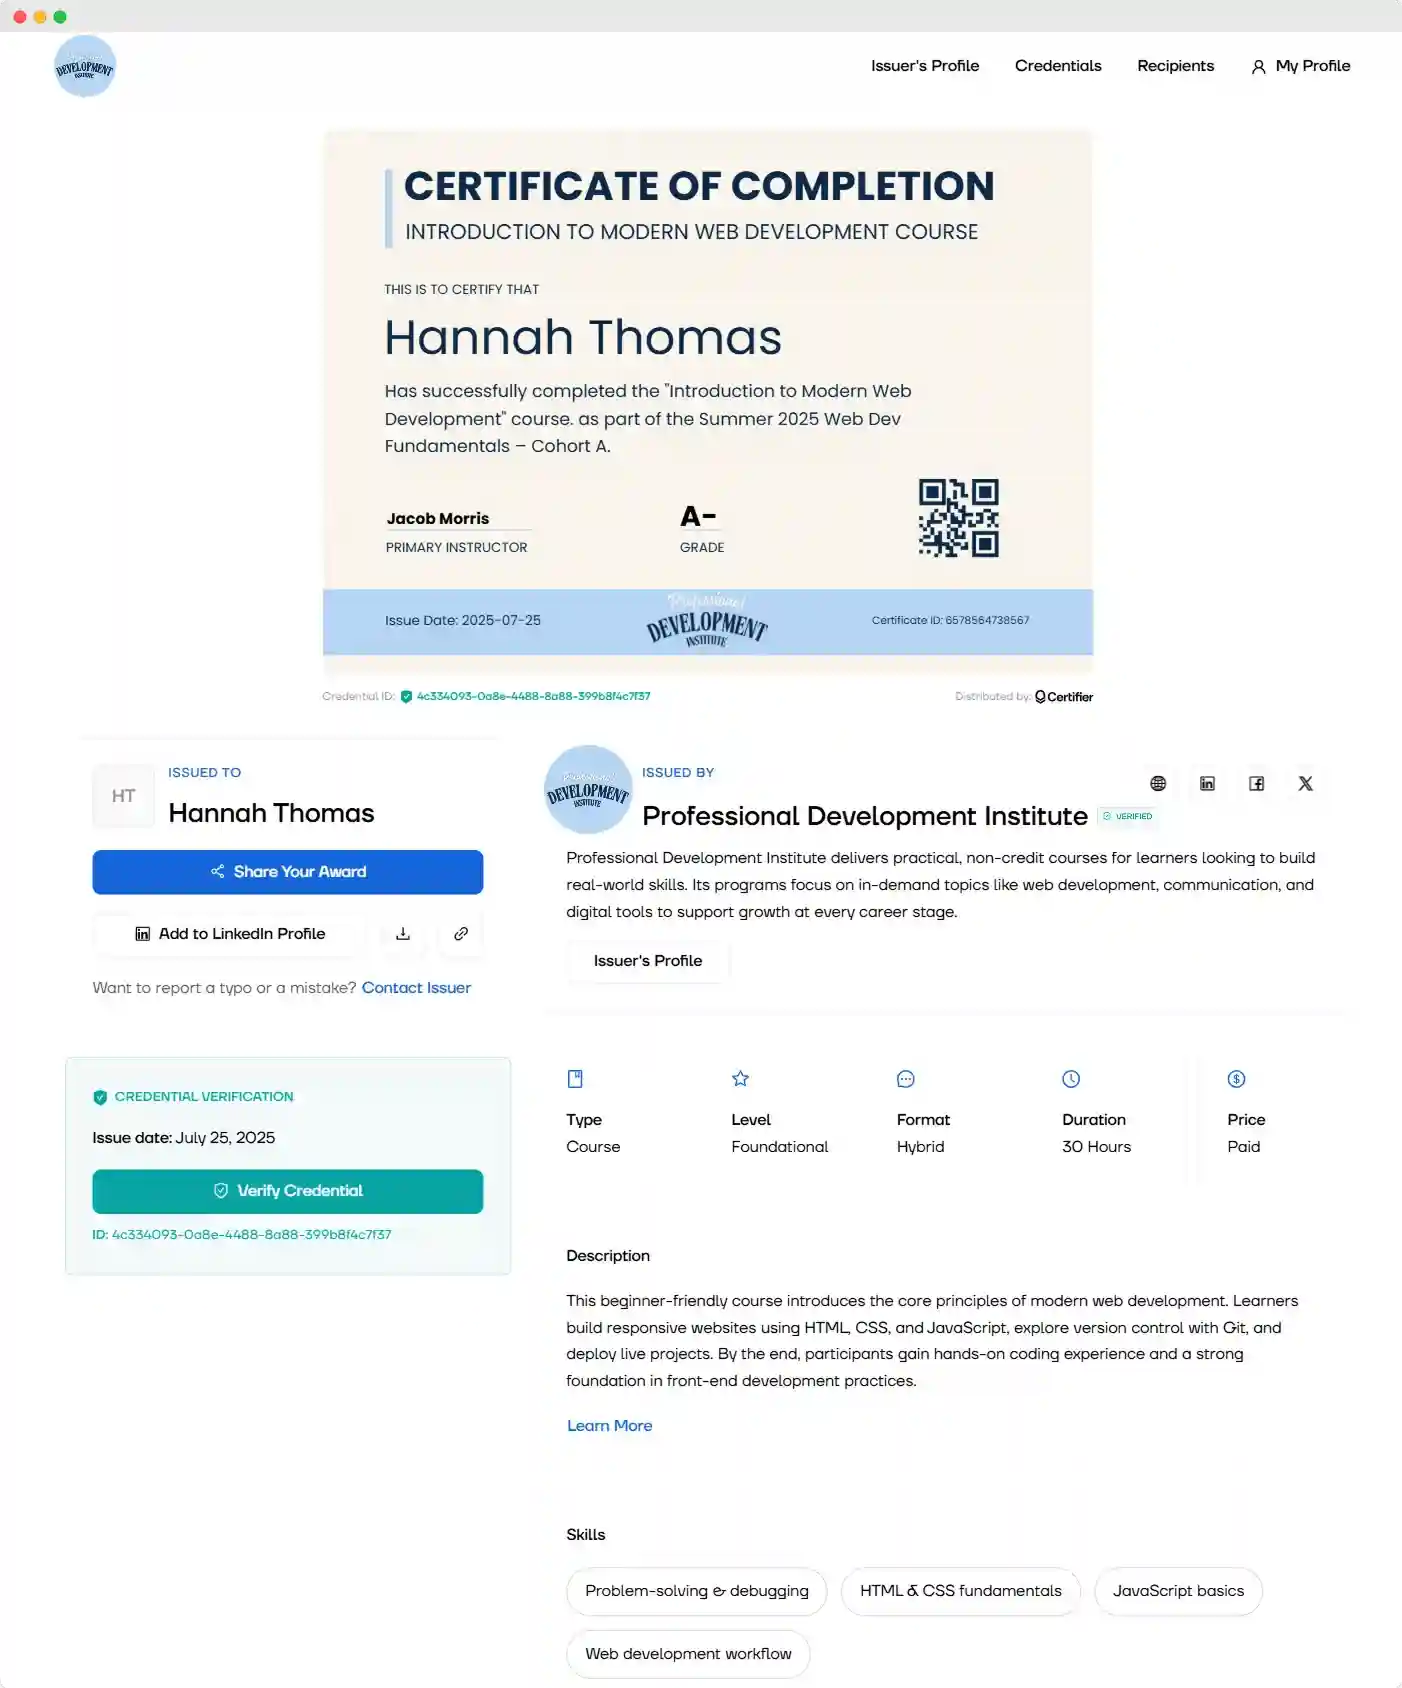
Each learner gets a personal wallet where all certificates for course completion live—fully branded, mobile-friendly and always up to date. If you spot a typo or update someone’s name, just edit the data. The change shows up automatically, no reissuing needed.
Track performance after delivery
Want to know who opened their email? Who downloaded or shared their course complete certificate? Certifier’s dashboard shows it all in real time—so you can follow up, re-send or measure reach.
For more useful tips, see how to make a certification program for your course.
Start issuing better certificates for completing a course—faster
You don’t need complex tools or hours of admin to send a professional certificate for completing a course. Certifier takes care of the design, automation and delivery—so you can focus on your learners.
Create a Certifier account to create and send your first 250 course completion certificates in minutes.
Sign up now and see how easy it gets.
FAQ certificate for course completion
Dig more into the topic by reading the answers to the most frequently asked questions on certificate of course completion.

- Content Strategy
- Content Writing
- Digital Credentialing
- Keyword Research
- Content Editing
Senior Content Specialist
Valerie leads Certifier's content strategy, creating SEO-optimized guides and resources on digital credentialing best practices for educators and training providers.

