Trusted by:
Updated: June 24, 2025
13 min read
How to Create Custom Certificates: Tips and Tricks
Creating custom certificates has never been easier. Select a template, make some tweaks, and your certificate is ready to distribute or download. Read our article for the best tips and tricks for professional-looking custom certificates (that beat Canva).
With the Certifier certificate tool, you can generate custom certificate templates quickly and easily. No need to make a certificate from scratch. You can customize a template to fit your branding and intent (course, event, training – you’ll find them all).
Here’s the only recipe you need for creating custom certificates. We show you which elements to pay attention to and how to cover all the details, such as certificate colors, wording, digital signatures, and more.
Let’s learn about custom certificate meaning and how to design certificate templates that are all yours – down to the last detail.
🌟 What is custom certificate? It’s a certificate designed to match specific branding, content, and style requirements. It allows organizations to personalize details like colors, logos, fonts, and wording for a unique and professional look.
The best trick for speeding up custom certificate creation
Even though you want to create custom certificates, you can still use tools that greatly facilitate your work – a custom certificate template. You don't have to draw particular elements yourself, but you get a starting point to build upon. You decide which element you want to remove or which one to add. You'll be less likely to forget anything vital, and your certificate will appear as if it was designed by an expert.
Want to know the custom certificate meaning in practice? It’s about creating a certificate that fits your unique needs while keeping the process simple and professional. And Certifier advanced certificate editor provides it all. Easily generate custom certificates from available templates, change the background, and customize every detail. Then? Send certificates to hundreds of certificate users in just a few seconds (you can download and print them, too).
Create and Send Digital Credentials
Here are some of the professional tips on how to make the most out of custom certificates, whether you create them from scratch or with templates.
Tip 1: Set the certificate style
Decide on the style for your custom certificate. You don't have to stick 1:1 to the chosen certificate design (you’ll customize it later on). But such a template is a good base for everything you do next to keep the design consistent throughout. It’s also part of your communication strategy. Just like brands such as Apple or Coca-Cola keep their messages unified, your custom certificate of completion should do the same.
Unsure about which style to pick? Consider the field you’re designing for. Whether it’s formal corporate training or a casual workshop, your design can range from sleek and professional to fun and vibrant. Think about the nature of the event – who will be your audience? What’s the topic? You can look for the answers there.
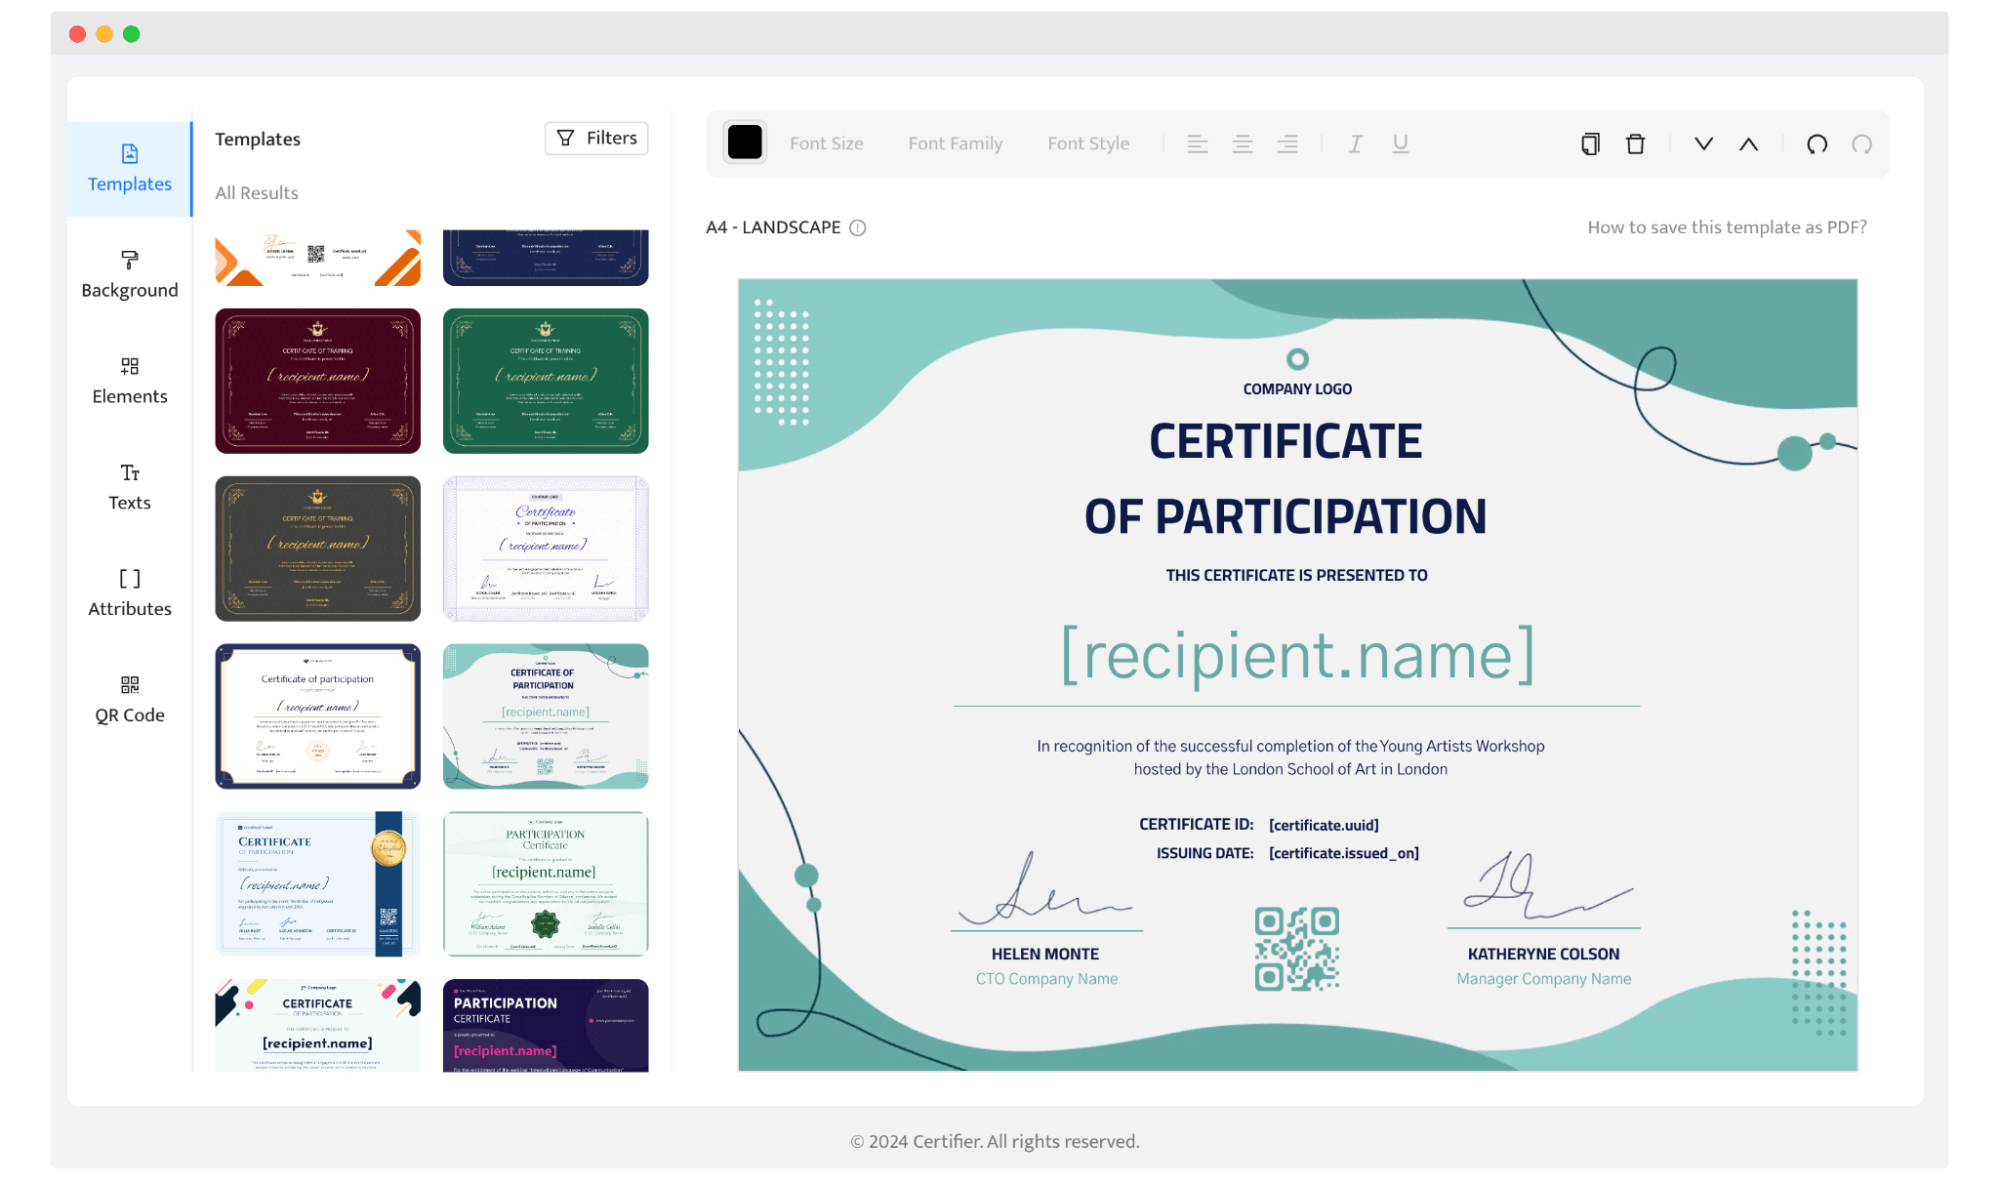
Find inspiration and explore the library of certificates (Certifier is truly the best!). Use filters, select the template, sign up to Certifier, and customize it however you want to. There are many certificate types: custom recognition certificates, custom achievement certificates, custom certificate of completion. The list is longer than you expect!
✋ Please note: Certifier’s certificate templates are print-ready, so if you choose printable custom certificates over digital ones, you don’t have to worry about content positioning and quality – it will be perfect.
Tip 2: Pick a color for the main theme
You need to pick the right colors for your custom certificates, and it's more than just picking what looks good. You should look for colors that complement each other (if you’re using more than one) and reflect the vibe of the certificate.
For a modern feel – go for brighter colors.
For something more professional – stick to toned-down shades.
Think about the main theme of your custom certificate template. If you’re not sure about the style, just decide on the primary colors. These colors can be everywhere – in the background, the fonts, or other design elements.
But here’s the thing: colors have meanings, and they can subtly influence how people feel about your certificate. For example, orange energizes, blue calms people down, and green brings a sense of balance. It might seem like a small detail, but the colors work on a subconscious level.
If you’re scratching your head about which colors to pick, Adobe Color Wheel is a lifesaver. It helps you play around with different color combos and find the one that you can easily implement together on different certificate elements. You can also upload the brand images to get the color palette perfectly made for your best custom certificates!
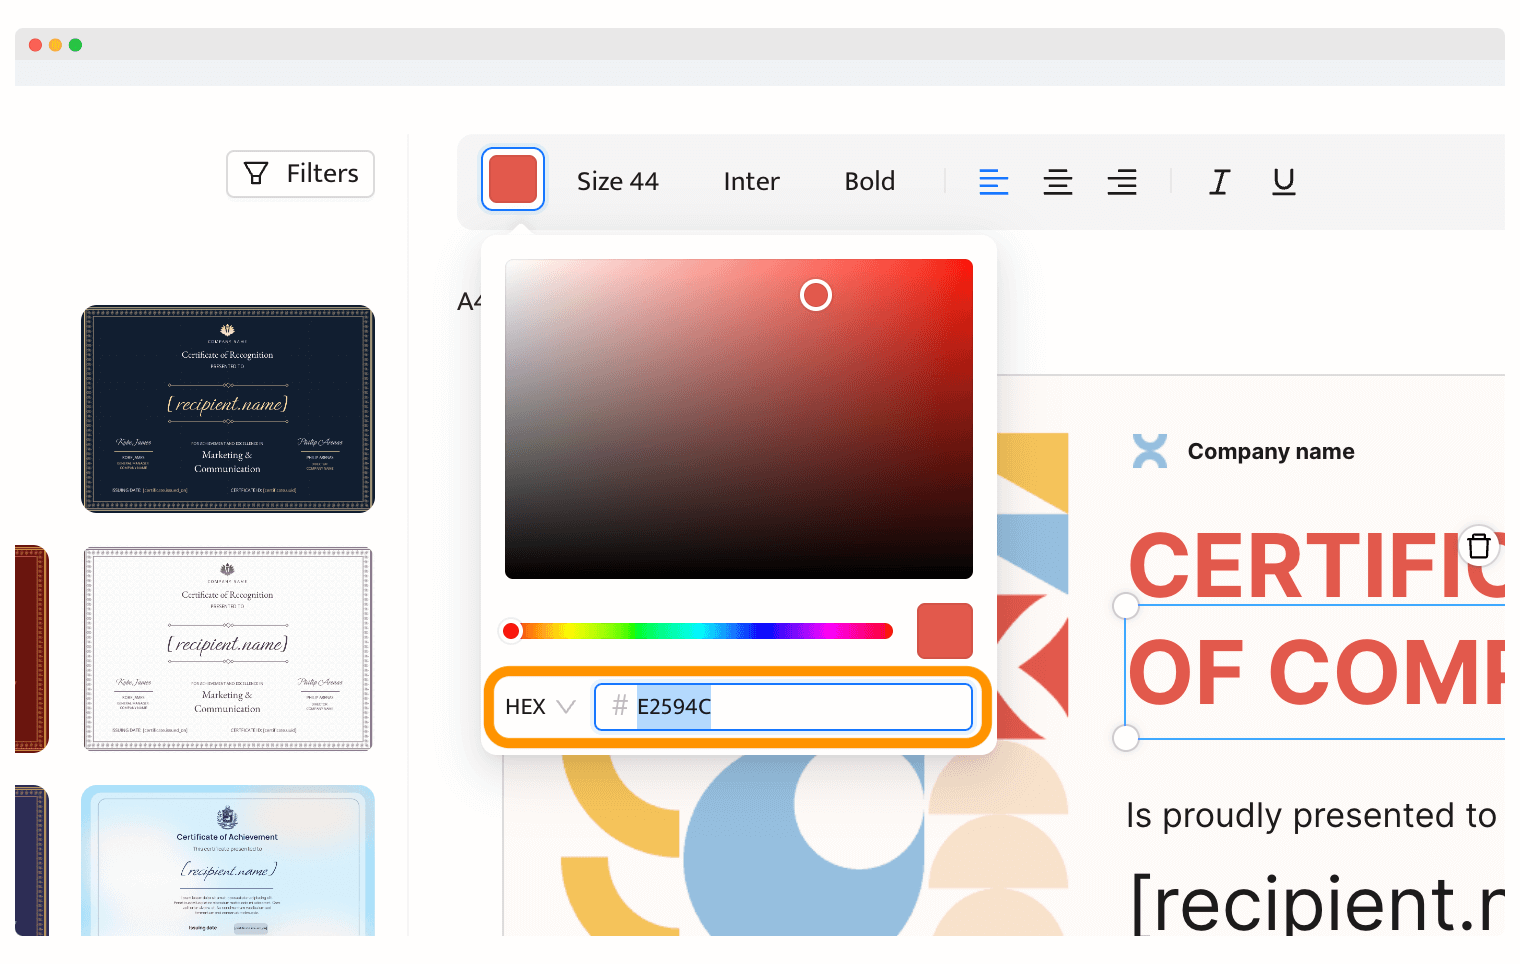
🎨 Certifier tip: If you’re creating custom certificates with Certifier, you can easily paste the hex color codes into the designer. Just copy the code you want, click the element you want to change, click on the color, and paste the code.
Tip 3: Put your logo and branding
To make your custom certificates really pop, it's key to include your branding and company logo. It makes your customized certificates look professional and leaves a lasting impression on those who receive them.
Think about which image files you're using to upload the logo.
PNGs are better than JPEGs for logos with transparent backgrounds.
SVGs give the most flexibility (best if you create badges).
Quality is also super important here. Make sure your logo and any graphics are high quality (at least 5MB), so they look sharp and professional. When it comes to placement, your logo should be visible but not overpowering. You don’t want it clashing with other elements on the certificate. And the good news is that you can create a certificate with logo in seconds with drag-and-drop interface.
Also, choose a background that complements your logo and keeps everything looking clean and balanced.
🎨 Certifier tip: Custom certificates on Certifier allow you to upload as many elements on the certificate as you wish (including custom background). Easily go to the Elements on the left-hand menu and add the image you want. See more tips on how to make a good certificate.
Good branding plays a big part in the customer experience. If your company offers exceptional courses and then gives out high-quality, branded certificates, you're likely to get positive reviews and feedback. Your participants will be more likely to share their certificates, spreading the word about your course further.
Overall, using symbols that represent your company, such as specific logos, graphics, fonts, and colors, will make your custom certificate of completion stand out. Even a customary certificate can be turned into a beautifully designed custom certificate.
Tip 4: Stick to one or two certificate fonts
When you create custom certificates, font choice is another very important factor. The most important thing is readability. Pay attention to the size, spacing between letters and words, and the overall design of the font. Avoid fonts that don’t meet these requirements because they will detract from the entire project.
Your chosen font should also support special characters from other languages. This is important for producing localized content. Even if you're writing in English, your audience might come from different parts of the world with various names, so it’s important to be able to represent them correctly.
Think about the emotion you want your font to convey. Choosing the right font helps set the tone and feel of your custom made certificates.
Serif fonts, like Times New Roman, are associated with classic style, elegance, and confidence.
Sans-serif fonts, like Arial, give off a modern and clear vibe.
When you customize certificates, remember to keep the font choices minimal yet impactful. This will make your certificates look professional and easy to read for everyone.
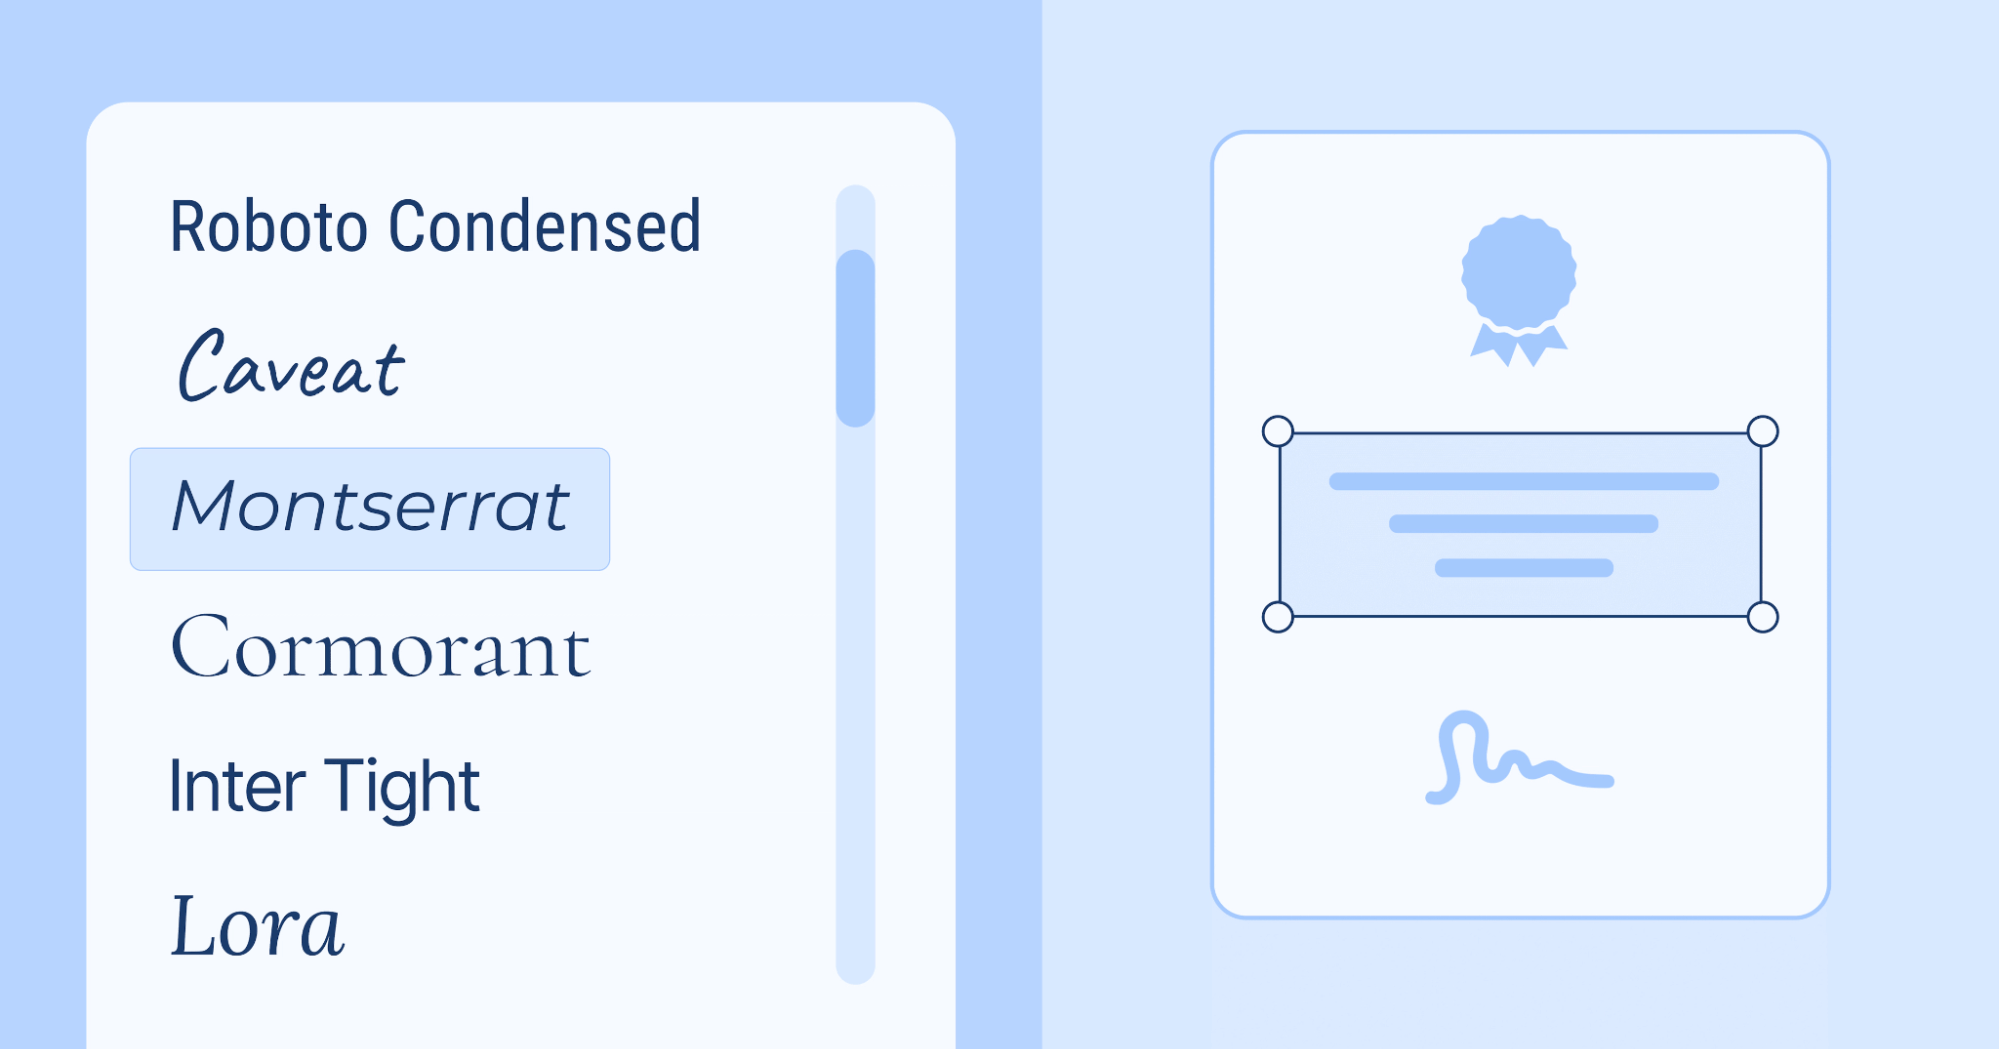
🔠 Certifier tip: Certifier provides many fonts within its designer, all suitable for certificates. Also, all the custom certificate templates contain fonts from the free Google fonts library. Learn more on how to choose certificate fonts.
Tip 5: Craft effective certificate wording
Creating effective certificate wording for custom certificate templates is more than just stringing words together. It’s about making each word count.
Your custom certificate should clearly state what it's for. The purpose should be obvious at a glance. Use straightforward language that’s easy to understand. This isn't the place for flowery language or technical jargon. Keep it professional, yet approachable.
Match the language and tone to the type of certificate. A more serious accomplishment, like an academic award, might call for a more formal tone, while a certificate for a creative contest can be a bit more light-hearted and fun.
🎨 Certifier tip: Don’t feel like you need to start from scratch. Certifier offers a range of templates with dedicated certificate wording that you can customize to suit your needs.
In the end, double-check for typos and grammatical errors. A mistake on an award certificate template can detract from its significance and might even cause embarrassment. Take an extra moment to review everything before you finalize the certificate.
Tip 6: Use dynamic attributes for extra personalization
Dynamic attributes help to create automated, personalized certificates in no time. Imagine having to create 100 or even 1,000 custom certificates by hand. No thanks, right? That’s where dynamic attributes come in. They let you personalize each certificate automatically.
So, what are dynamic attributes? They’re like magic placeholders that get filled in with specific info, like names or dates, from a data file. For example, you can have a custom certificate template with a custom field for the recipient’s name. When you use the dynamic attribute [recipient.name], the system will fill in the actual names from your spreadsheet.
At Certifier, you can use dynamic attributes for all sorts of details, e.g.:
Recipient’s name – automatically add each person’s name.
Certificate ID – each certificate gets a unique ID number.
Issue date – automatically include the date the certificate was created.
Certificate expiration date – when the certificate is valid until.
This feature is perfect for creating custom recognition certificates or any other custom certificates in bulk. It saves you time and helps you avoid mistakes.
And don’t worry if you need something special that’s not on the list. You can create custom attributes for things like grades or scores. Just go to the Attributes, click Add custom attribute, and place it on your certificate.
📚 Learn more and see the whole design process of how to make DIY certificates with dynamic attributes, step by step.
Tip 7: Take care of digital signatures
When you're figuring out how to write certificate in stylish way, don’t forget about digital signatures. They add a professional touch and are just necessary to make the certificate valid.
There are two main ways to add signatures (each has its pros and cons):
Digital scan or image of a real signature (via signature makers)
Fonts that look like signatures.
A digital scan of an actual signature (usually a PNG file) gives a personal, authentic feel. It looks like someone actually signed the certificate by hand. This method is great for custom recognition certificate templates where a personal touch is important.
On the other hand, using fonts that mimic handwriting can be quicker and easier. There are lots of fonts available that look like real signatures (Certifier provides them!). This option is perfect if you need to create certificate templates that can be used over and over again. And, it guarantees consistency across multiple certificates, which can be a big plus if you’re dealing with a large batch.
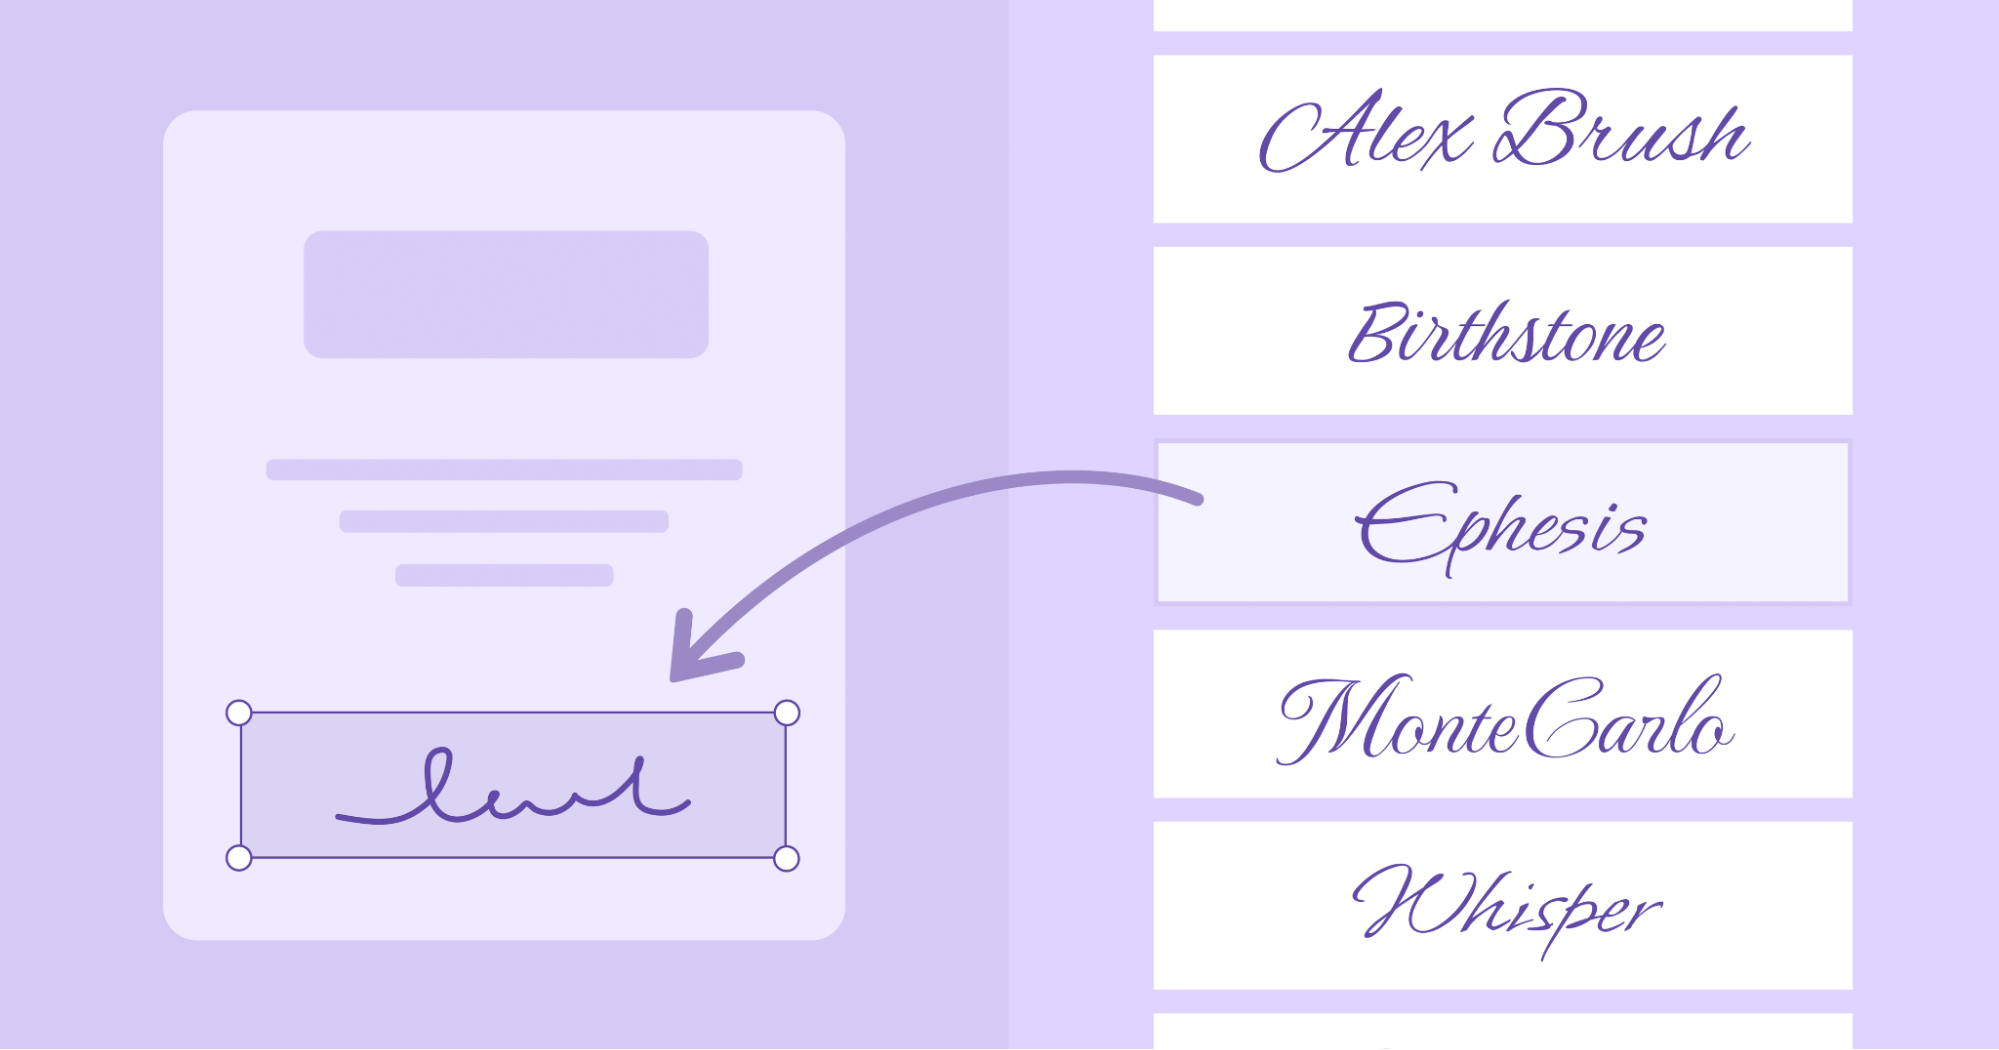
✍🏻 Certifier tip: Get to know which fonts look like signatures. You can find them all within the Certifier designer. It's the fastest way to sign your freshly made certificates. What's even better? There is no need to sign each certificate individually.
Tip 8: Keep the customized certificate details to a minimum
There's a temptation to add a lot of details to a custom certificate. While extra options can add value to a certificate, too many can make it look cluttered and unattractive. So, how do you strike the right balance?
First, remember that less is often more. Simplicity with a few subtle extras usually works best. Choose elements that align with your company’s theme and don’t disrupt the overall design. These elements should highlight, not overshadow, the main information.
For example, avoid using photos. Stick to the graphic from the templates. It’s especially important when creating custom recognition certificates or custom achievement certificate templates that emphasize success.
Also, resist the urge to fill every inch of space with text. This can make the certificate look overwhelming and discourage people from reading it. It also leaves no room for any nice graphic elements that could enhance the design.
To keep things clear and attractive, include only the essentials in your custom certificate template:
Award name
Recipient's name
The Certificate Authority (CA)
The date of issue (and possibly the expiration date)
If there’s more information you feel is necessary, try to condense it into about two sentences. This way, your custom made certificates remain clean and easy to read.
For example, a custom certificate of completion might simply state, "This certificate is awarded to [Recipient Name] for successfully completing [Course Name] on [Date]." Short, sweet, and to the point.
Tip 9: Find the right place for the QR code
QR code in your custom certificates can boost credibility and simplify verification. However, it's important to get the placement, size, and type just right.
When you add a QR code to your custom certificate template, it should be easily noticeable but not intrusive. Ideal spots are the bottom corners or side margins. This keeps the QR code accessible without disrupting the overall design. It's best if there's some space around it so it doesn't blend into other elements, making it easy to scan.
The QR code needs to be large enough to scan easily but not so big that it hides important information. A size of around 1 inch x 1 inch usually works well, but adjust according to your certificate’s design and layout.
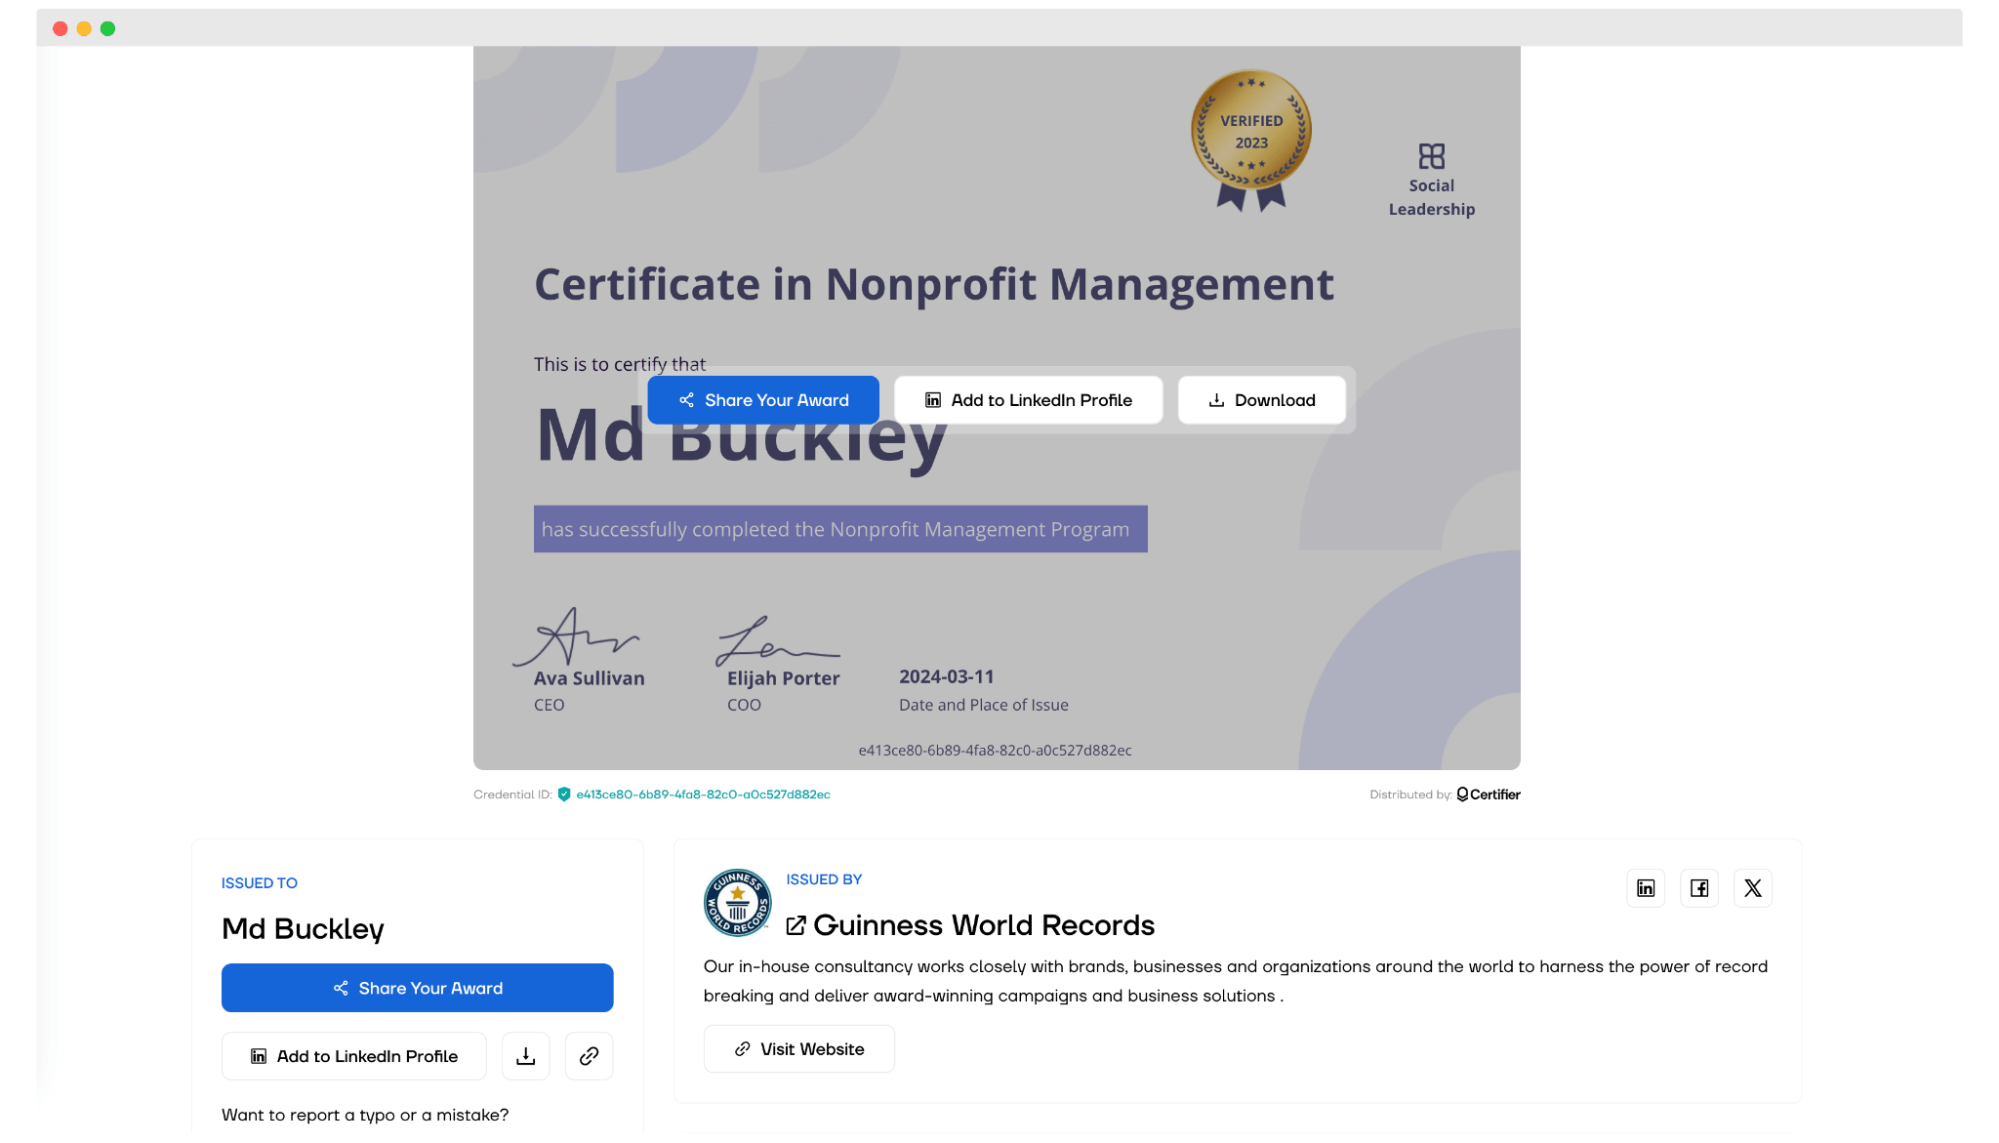
There should be a seamless match between the QR code design and the award certificate. Certifier allows you to generate custom QR codes (watch the video) – you can change their size and color. All within our intuitive online editor, without the need to use an external QR code generator.
🔎 Certifier tip: Certifier provides two options for QR codes: access to the dedicated verification page or a custom link. The first option is more effective in giving the vibe of a credible issuer. Your certificate recipients get access to the digital wallet from which they can share, verify or download the certificate.
Tip 10: Save the design as your own template
To speed up the issuance of custom certificates in the future, it will be a good idea to save your project so that you don't have to design from scratch the next time (you’ll just change the necessary data).
After all, it's still your creation, and it can be customized for different clients, industries, etc. Furthermore, by having a few saved works, you build your own base of customizable certificate templates.
If your tool offers you the ability to save the beautiful certificates you create (and Certifier does), take advantage of it. But if it doesn't have such a feature, maybe it's time to change providers and choose a different certificate maker, just saying!
How does custom certification look with Certifier?
So, what is custom certificate for Certifier users? It's a document that is professional, easy to distribute, and simple to edit and manage. No manual work, or generic designs. Just custom certification that fits your brand.
Check out how your custom certificate template can look like when issuing with Certifier:
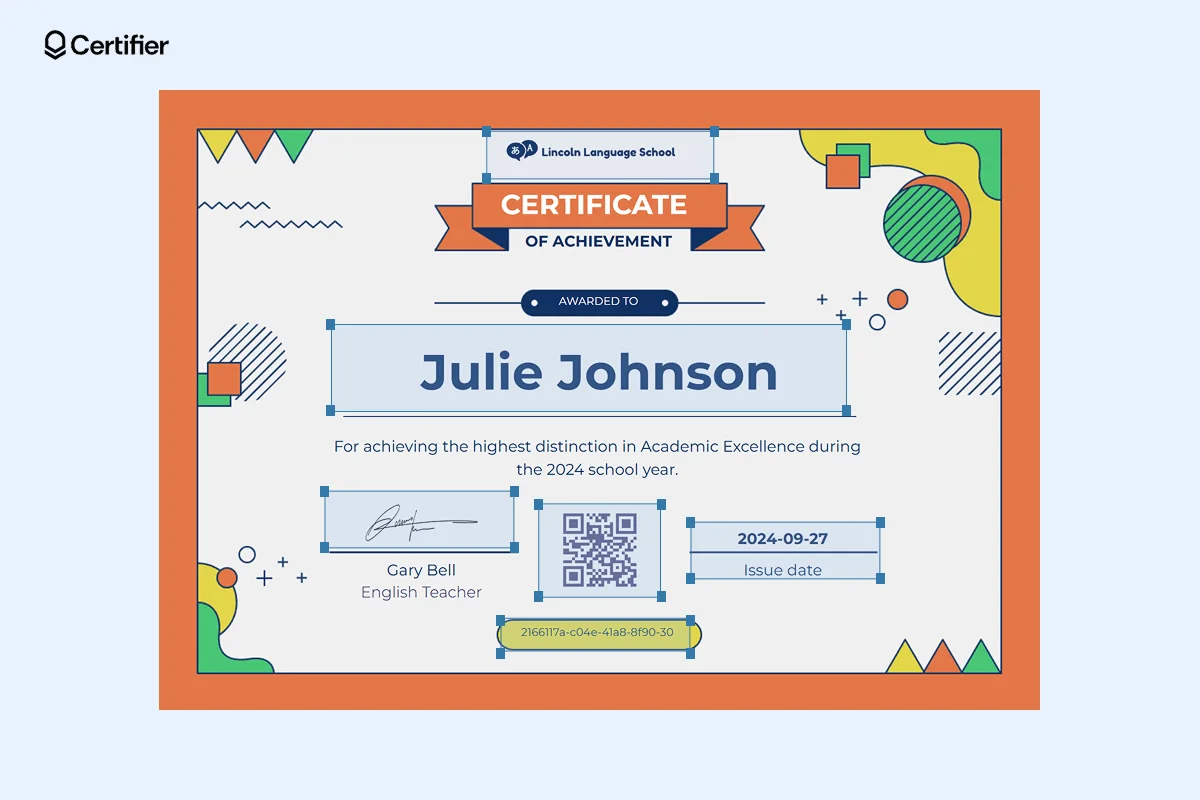
Fully branded: You can skip designing from scratch. Certifier offers custom certificate templates that are editable in minutes. Adjust colors, fonts, logos, and wording to match your style. Save your design and reuse it anytime.
Every custom certificate is sent in a branded email like this one:

Add your logo, choose a template, and send certificates instantly – no need to attach PDFs or send emails manually.
Professional and accessible: Recipients get a custom certificate stored in a secure digital wallet.
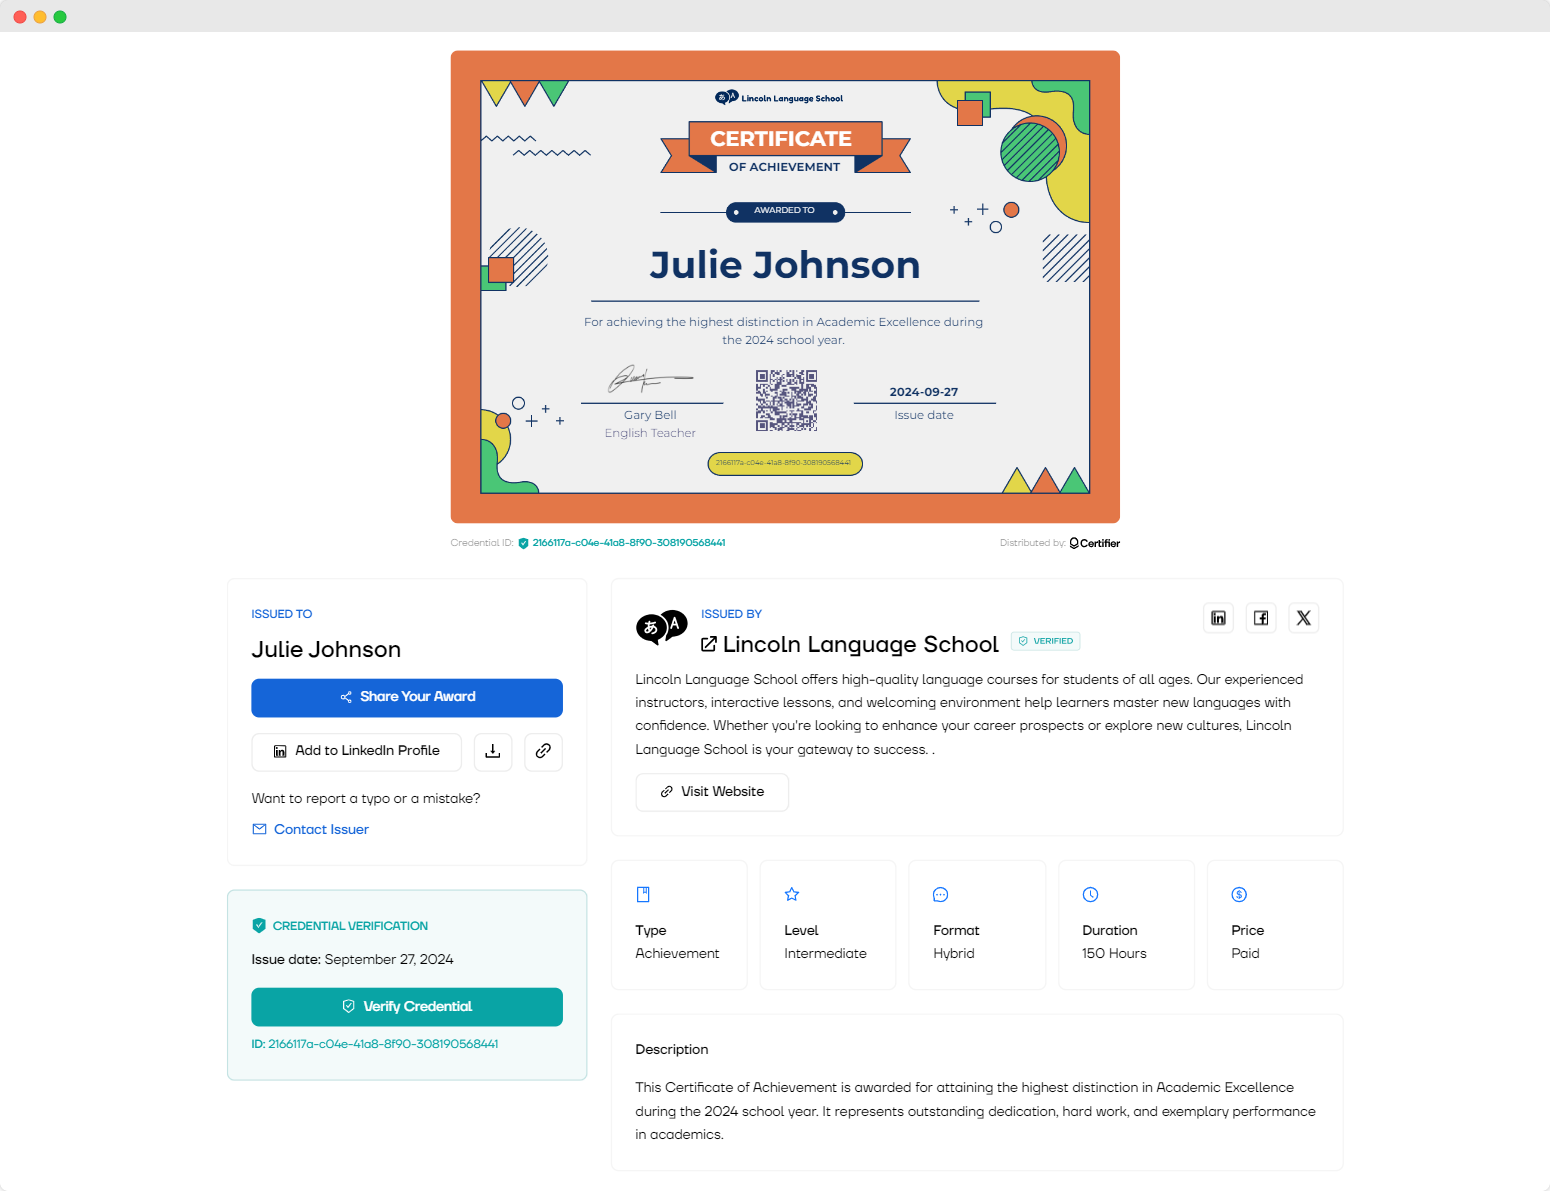
They can share it on LinkedIn, download it as a PDF, or verify it anytime. No lost certificates, and no printing hassles.
Credible and verifiable: Certifier’s issuer portal ensures that every custom certificate is authenticated and easy to verify. Issuers have full control over their credentials, with a structured credentials directory, branded issuer profiles, and instant verification options that guarantee credibility.
Custom certificate templates ready in minutes
Custom certificates can set you apart in this competitive market and don’t have to take hours to be attractive and tailored to the industry (if done right). As you can see, you don't have to use generic certificates to create amazing certificates in minutes.
We hope the above tips will help you improve custom documents and make your customers love them. So take advantage of Certifier certificate maker and let your creativity run wild.
FAQ about custom certificates
Here, you have the most common questions related to creating custom certificates, such as what is custom certificate, custom certificate meaning, how to create them, and more.


